



3-Way Switch Wiring: A How to Comprehensive Guide
Here at the off grid cabin we’ve done our fair share of electrical work including 3-way switch wiring. We’ve done all the internal and external electrical wiring for the off grid cabin ourselves, including lights and switches, outlets, electrical panel, the solar system, connecting it to our electrical panel, as well as to the back-up generator.

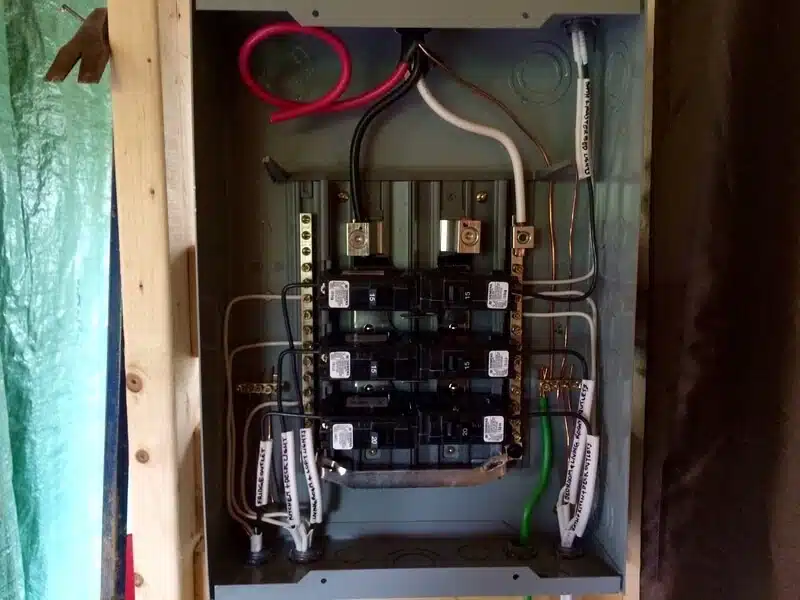
First and foremost, we’re no electrical experts. My background in electrical work comes from serving as a Naval Weapons Technician for ten years and being schooled at the Canadian Forces Naval Engineering School (electronics, hydraulics, mechanical and pneumatic systems) before becoming an Air Force Pilot. I feel know my way around electrical systems well enough to tackle wiring here at our off grid home.
That being said, you can NEVER be too safe while working with electricity. If you aren’t comfortable call a qualified electrician. Electricity is invisible and unforgiving. Always follow proper safety protocols and check twice with a voltmeter or probe BEFORE touching anything.

Table of Contents
- Introduction
- Understanding the Basics
- Off-Grid & Solar-Specific Applications
- Tools You'll Need
- Cost Breakdown
- Step-by-Step 3-Way Switch Wiring Guide
- 3-Way Switch Wiring Diagram: Power to Light Switch
- 3-Way Switch Wiring Diagram: Power to Light Fixture
- 3-Way Switch Wiring Diagram: Power to Light Switch with Fixture Between Switches
- Troubleshooting Common Problems
- Advanced Variations
- Advantages of Three-Way Switches
- Off-Grid Safety Notes
- Conclusion
- FAQs
Introduction
Wiring a three-way switch may seem like a daunting task for some DIY enthusiasts, but fear not! In this guide, we’ll walk you through the process in a step-by-step manner with detailed diagrams to clarify depending on your existing wiring setup.

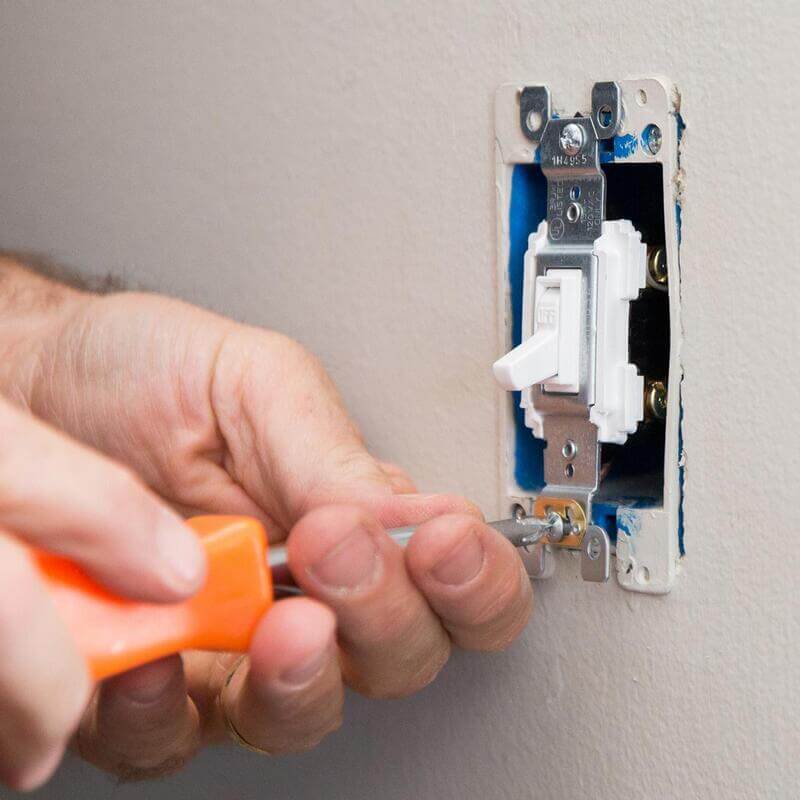
From understanding the basics of a three-way switch, to connecting the wiring, to ensuring it works properly. We’ll also recommend a couple YouTube videos that might simplify how these switches function.
Understanding the Basics
What is a Three-Way Switch?
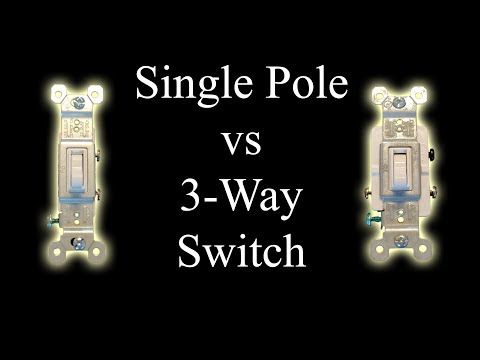
A single pole switch controls a light from one location only. A three-way switch controls a light fixture from two different locations.

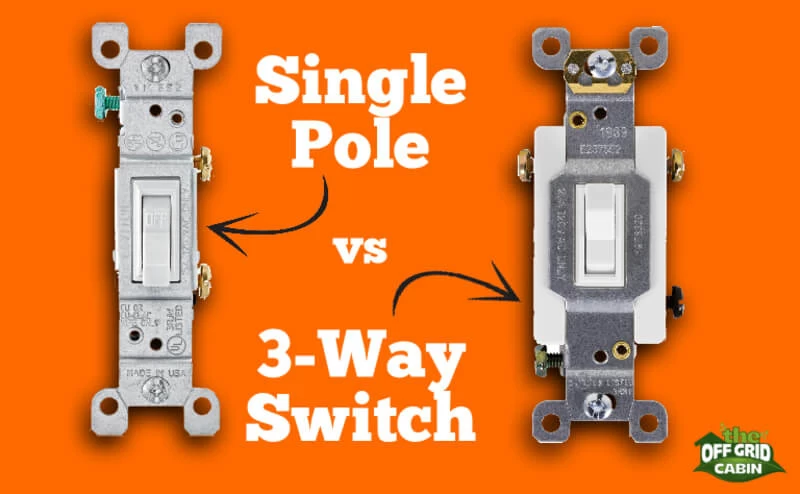
In the image above you can see a single pole switch has three screws while the 3-way switch has four screws. That’s for a “traveler wire” which is used in wiring 3-way switches. Another interesting note is that 3-way switches aren’t labeled “ON/OFF” like single pole switches.
It provides flexibility, convenience, and safety. We use a three-way switch to control the ceiling lights in the cabin loft. We can turn on the loft lights from a switch on the main floor, go up the ladder to the loft and then turn them off from a second switch upstairs. EngineeringEscape did a great job of explaining how a 3-way switch works.
Here’s a short animation of how a 3-way switch works by Terry Peterman.

Off-Grid & Solar-Specific Applications
This is the part most wiring guides skip, and it’s exactly what off-grid folks searching for this topic actually need to know.
AC vs. DC 3-way switching. Everything above assumes a standard 120V AC circuit, which is what most cabins run for lighting even when the power originates from an off-grid solar/battery system through an inverter. If your inverter is feeding a standard AC panel, the wiring above applies exactly as written — the switch doesn’t know or care that the power came from a battery bank ten minutes ago instead of the grid.
Where it changes is if you’re running low-voltage DC lighting directly off the battery bank (common in bunkies, sheds, or a cabin loft before you’ve got a full AC subpanel run). A 3-way switch will still work on 12V or 24V DC, but there are two things to watch:
- Wire gauge matters more. DC circuits carry more amps for the same wattage than AC does, so voltage drop over distance is a real problem. For anything beyond a short run (say, past 25-30 feet), size up at least one gauge from what you’d use on AC, or you’ll get dim, sluggish lights at the far switch.
- Switch rating. Not every switch rated for 15A at 120V AC is rated the same for DC — check the switch’s DC amperage rating specifically before wiring it into a battery-fed circuit. Standard household 3-way switches are usually fine at low DC voltages, but confirm on the switch’s spec sheet.
We wired our loft lights this way before our solar system was fully built out — running 12V straight from an AGM battery through a 3-way pair to a couple of LED puck lights, no inverter involved. It’s a great way to get lighting into an outbuilding fast without waiting on a full electrical buildout.
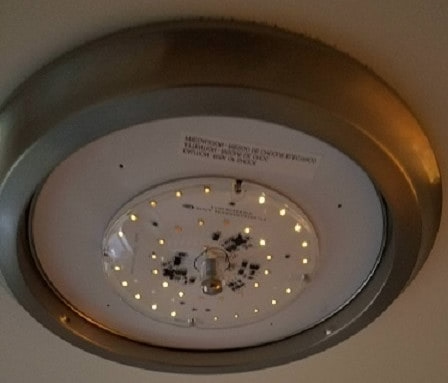
LED compatibility. If you’re retrofitting an existing 3-way circuit with LED bulbs or fixtures, watch for a faint glow when the switch is “off.” This is usually a small current leaking through the traveler wires via the LED driver, and it’s more common on off-grid setups where circuits may not be perfectly balanced. Swapping to LED-rated 3-way switches or adding a small bypass capacitor at the fixture usually clears it up.
In the image below you can see the faint glow of the LEDs even though the wall switch is off.

Tools You’ll Need
Before diving into the wiring process, gather the necessary tools:
- Three-way switch
- 14-3 or 12-3 cable (14-4 if required)
- Screwdriver (flathead and Philips)
- Wire stripper
- Voltage probe or Voltmeter
- Needle-nose pliers
- Wire nuts
- Electrical tape


We also have a complete list of the tools we use here at the off grid cabin.
Cost Breakdown
Here’s roughly what one 3-way switch pair costs to wire, based on what we’ve paid for materials. Prices will vary by region and retailer, so treat this as a ballpark for budgeting, not a quote.
| Item | Approx. Cost |
|---|---|
| 3-way switch (x2) | $6 – $15 each |
| 14-3 NM cable (per 25 ft, standard run) | $20 – $35 |
| 14-4 NM cable (if power-to-fixture setup) | $30 – $45 per 25 ft |
| Wire nuts (pack) | $5 – $8 |
| Electrical tape | $5 – $10 |
| Voltage tester/probe (one-time tool) | $15 – $25 |
| Wire stripper (one-time tool) | $15 – $30 |
Step-by-Step 3-Way Switch Wiring Guide
Now, let’s dive into the actual process of wiring a three-way switch. Depending on which one gets the power first, the light switch (which is more usual) or the light fixture, you’ll follow one of the following diagrams for 3-way switch wiring.
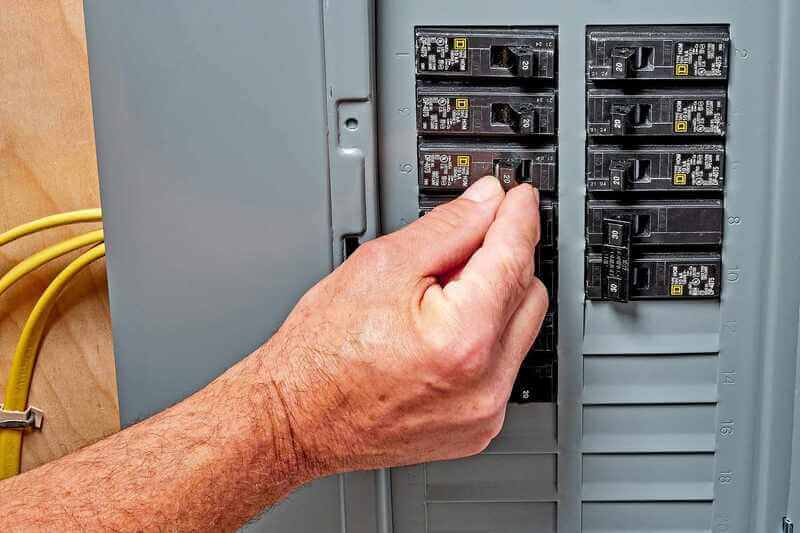
Turn Off the Power
Safety first! Ensure the power is turned off at the breaker before you start working on the wiring.
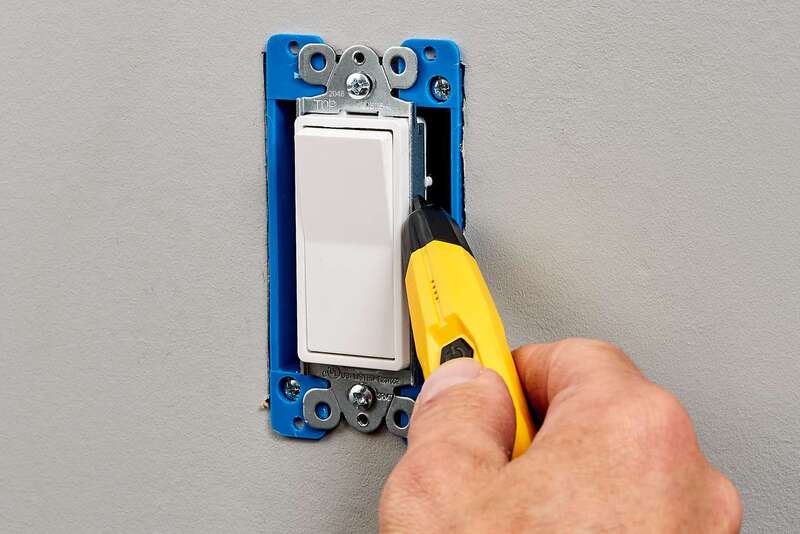
Always use a voltage tester to double-check and make certain the light switch has no power going to it.

Identify the Wires
Differentiate the different wires in the 14-3 NM cable to avoid confusion. Typically, you’ll encounter three insulated wires (Black, Red, White) and a bare Copper ground wire.
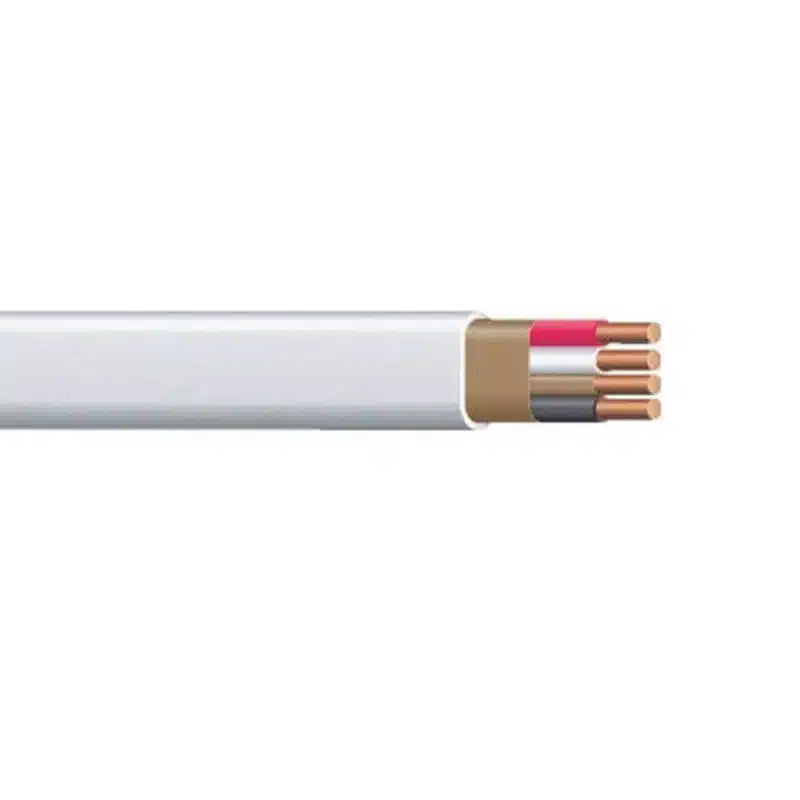
This is the wiring you will need when connecting from the power source to a three-way switch, to a second three-way switch and finally to the light.
3-Way Switch Wiring Diagram: Power to Light Switch
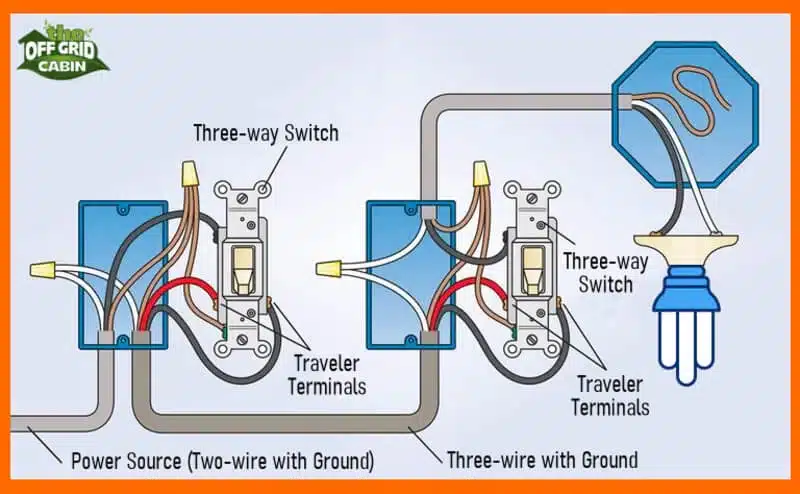
In our first diagram the power source is coming to the light switch.
- In this diagram, the incoming hot wire is attached to the first switch’s common dark-colored terminal.
- The two hot wires of the three-wire cable connect to a pair of brass-colored traveler terminals on each switch.
- The fixture’s hot wire connects to the second switch’s common terminal.
3-Way Switch Wiring Diagram: Power to Light Fixture
In our next two scenarios you’ll need 14-4 wire. This wire includes an extra wire (blue) to act as a second traveler.

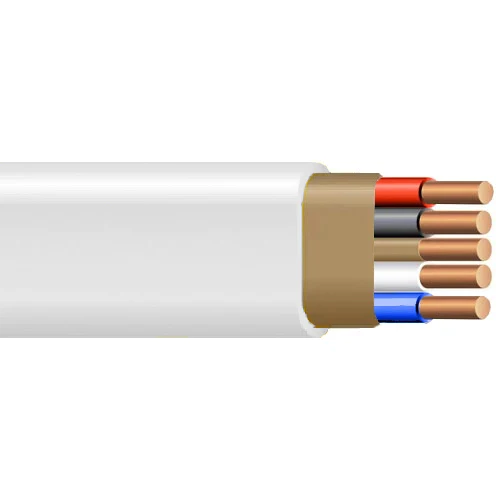
This 3-way light switch wiring diagram shows how to wire the switch and the light when power is coming to the light fixture. Here, the power source is first connected to the light fixture and then to the three-way switches.
- The black hot wire connects to the far right switch’s common terminal.
- Red and blue wires link the traveler terminals of both switches.
- The red wire, which is connected to the first switch’s common terminal, leads back to the fixture.
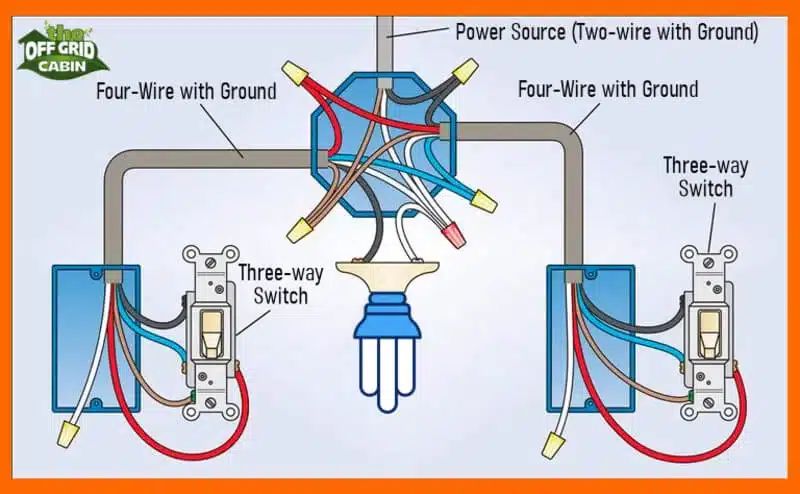
3-Way Switch Wiring Diagram: Power to Light Switch with Fixture Between Switches
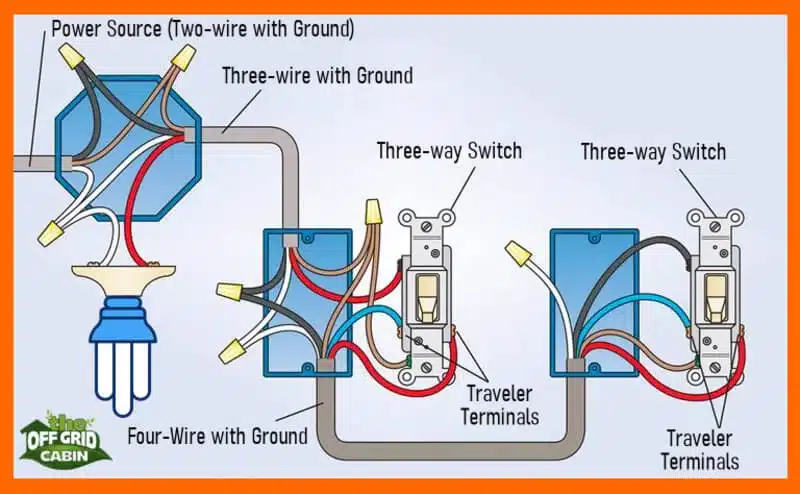
Here the light fixture is in between the three-way switches and again requires 14-4 wire that has the second traveler wire.
- The incoming black hot wire is connected to the right switch’s common terminal.
- Two lengths of four-wire with ground cable, joined at the fixture box, link the right and left switch traveler terminals to each other and to the fixture.
Mount the Switch
Carefully mount the switch back into the electrical box, ensuring a secure fit.

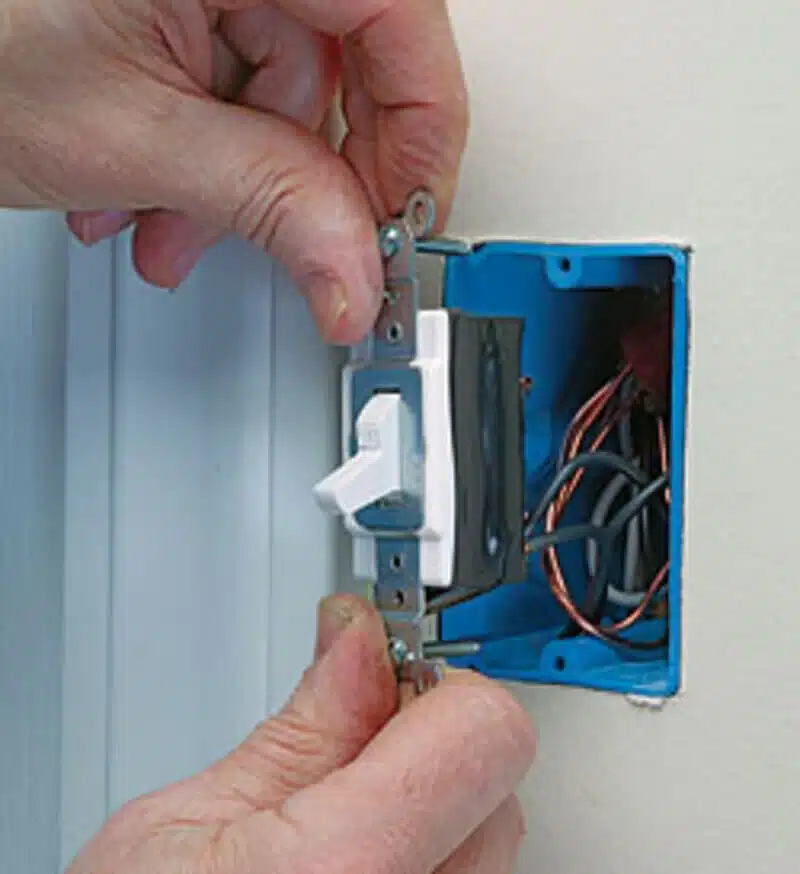
There are opposing thoughts about wrapping the switch with electrical tape before placing the switch back into the electrical box. Personally I do wrap my switches and outlets with electrical tape. I’ll leave that up to you to decide whether or not you want to do it. For reference I use 3M vinyl electrical tape that won’t dry out and/or peel off when used properly.

To wrap the switch/outlet I apply one full wrap without stretching the tape and a second wrap slightly pulling/stretching the tape. Then, finally make sure to cut the tape and not pull it. The local box stores actually sell a product called ArmourBand Insulating Straps for this exact purpose.

Test the Wiring
Lastly, turn the power back on and test your newly wired three-way switch to ensure it operates correctly.
Troubleshooting Common Problems
Even a careful wiring job can go sideways the first time. Here’s what to check before you assume you need to start over.
Light doesn’t turn on at all. Most likely a loose connection at a wire nut, or the hot wire landed on a traveler terminal instead of the common terminal. Kill the power, pull both switches, and re-check which terminal is common (it’s usually the darker, single screw — travelers are the brass pair).
Light only works from one switch, not the other. This almost always means the traveler wires are crossed or swapped between the two switches. Traveler wires need to land on matching traveler terminals at both ends — if they’re reversed at one switch, one location will control the light and the other will do nothing.
Switch buzzes or feels warm. Turn the power off immediately. This points to a loose connection creating resistance and heat at the terminal — re-strip the wire and make sure it’s fully seated under the screw, not just pinched at the edge.
Light flickers. On an AC circuit this is usually a loose neutral or ground, or (per the note above) an LED bulb interacting with the traveler wiring. On a DC off-grid circuit, flickering is more often a voltage drop issue from undersized wire over a long run.
Breaker trips as soon as you flip the switch. This is a short — almost always a hot wire touching the ground or neutral, often from a nicked wire insulation inside the box. Pull the switch, inspect every stripped wire end for damage, and re-check nothing bare is touching the metal box.
Advanced Variations
Adding a third or fourth control point. If you want to control one light from three or more locations — say, a cabin with entrances on two ends plus a loft — you don’t add another 3-way switch. You add a 4-way switch in the middle of the run, between your two 3-way switches. The two traveler wires pass through the 4-way switch, which internally swaps them when flipped. Any number of 4-way switches can sit between your two end 3-way switches.
Retrofitting with smart/wireless switches. A lot of off-grid cabins have finished walls with no easy way to fish new cable, which makes a traditional 3-way retrofit painful. Smart switches designed for 3-way circuits (that use the existing traveler wiring) or fully wireless battery-powered switches paired with a smart relay at the fixture can solve this without opening a single wall. We’ve used a couple of wireless smart switches here for exactly this reason — good for retrofits, though they add a small ongoing dependency on batteries and, in some cases, a hub.
Advantages of Three-Way Switches
Increased Convenience
- They offer convenience and safety, as you can turn on or off the light without having to walk across a dark or long space.
Save Energy
- They can save energy and money, as you can avoid leaving the light on unnecessarily when you leave a room.
Smart Devices
- They can work with smart devices and voice assistants, giving you more options to control your lighting remotely or with voice commands.
Security
- They can integrate with security systems and motion sensors, enhancing the protection of your home and automatically turning on or off the light when needed.
Off-Grid Safety Notes
A city electrician’s mistake usually gets caught at inspection. Out here, there’s no inspector coming — you’re the first and last line of quality control on your own wiring, which means the standard has to be higher, not lower.
A few habits worth adopting:
- Label your panel as you go. On a build where you’re wiring room by room over weeks or months, it’s easy to forget which breaker feeds which run. Label it the day you wire it, not “eventually.”
- Photograph your wiring before closing walls. We photograph every box before drywall or paneling goes up. If something misbehaves two years later, you’ve got a record of exactly what’s behind the wall instead of guessing.
- Don’t skip the ground just because it’s a small job. It’s tempting to cut corners on a “simple” light switch. Treat every circuit like it’ll outlive you in that wall — because it probably will.
- If you’re mixing solar/battery and grid-tied AC in the same building, clearly separate and label which circuits are which. Confusing a battery-fed circuit for a dead grid circuit is a good way to get a nasty surprise from a voltage tester that didn’t fire the way you expected.
Conclusion
Wiring a three-way switch might seem complex initially, but with our comprehensive guide, you can tackle it with confidence. Remember, safety is paramount, so always double check wires before you touch anything with a functioning voltmeter or voltage tester. If in doubt, call a professional. We have a complete section dedicated to the design and construction of our cabin here. You can go all the way back to when we first built the foundation, framed the walls, and constructed the roof right up to installing our composting toilet and hot water heater.Let us know in the comments below if you’ll be tackling any electrical work yourself and if you have experience, feel free to share any additional safety tips with our readers.
FAQs
Can I use any color for traveler wires?
- While the industry standard is red and black for traveler wires, the color might vary. Always identify wires properly before proceeding.
Is it possible to add more than two switches to control a single light?
- Yes, it is. You can use additional four-way switches in conjunction with three-way switches for more control points. (See the Advanced Variations section above for the full walkthrough.)
Are there wireless alternatives to three-way switches?
- Certainly! Smart home technology offers wireless solutions for remote control of lights without additional wiring. We use several smart light switches and smart bulbs here at the off grid cabin.
What if I have multiple lights controlled by a three-way switch?
- You will need to extend the wiring to additional light fixtures while maintaining the three-way switch configuration in the wiring diagram(s) above.
Can I wire a three-way switch without a ground wire?
- While it’s not advisable, it’s possible in some cases. However, for safety reasons, a ground wire is always recommended.
Does 3-way switch wiring work the same on an off-grid solar system?
- Yes, if your lights run on standard 120V AC through your inverter — wire it exactly as shown above. If you’re running low-voltage DC lighting straight off the battery bank, the switch wiring logic is identical, but pay attention to wire gauge over distance and confirm your switch is rated for DC. See the Off-Grid & Solar-Specific Applications section above.


