


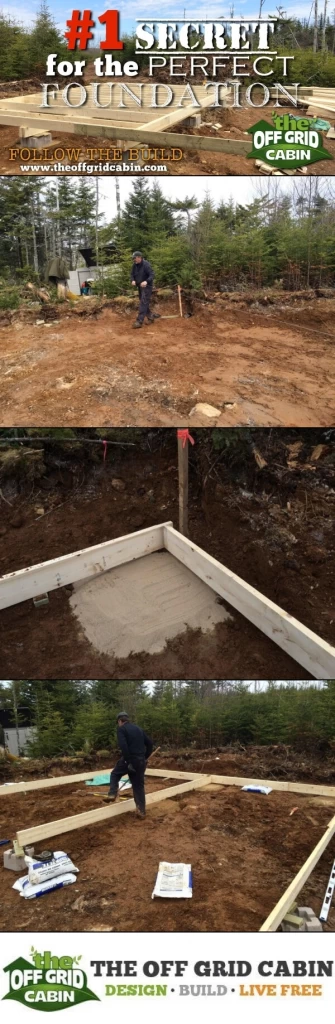
Hidden Secrets To A Perfect Cabin Foundation Every Time!
The Secret To A Perfect Cabin Foundation
The SECRET to building the PERFECTLY LEVEL foundation for a cabin or house is…
Actually there are several things you must do in order to give yourself the best chance at constructing a perfectly level and square cabin. And it all starts with the foundation.
BUILDERS-TIP: We cannot emphasize how critical the foundation is. Taking the time here will save you heartache days, months and years down the road.
#1 Make sure it’s level and square all the way around BEFORE you do ANY framing!

Do it right the first time. – Mike Holmes
The fact is… if the foundation of your cabin/home is out as much as 1/8th of an inch at the bottom, by the time you get to the top of a framed wall that slight error will compound ten fold. The end result may be that the top of your framed walls may never line up. No matter how hard you pound on them with a sledge hammer, tug on them with ratchet straps or pry on them with a crowbar. I’ve seen it all.
Why is the alignment of these walls (which stem from your foundation) so critical?
Depending on the truss construction you may very well be exurting tens of thousands of pounds of pressure OUTWARD on those walls and if that load bearing wall is anything other than plumb you risk a catastrophic failure of your entire build. usually AFTER you’ve finished building it as that’s when the most weight, stress and weather affects your build.
Also, skewed construction means windows, doors, flooring, cabinets, and drywall almost never line up properly. We’ll teach you every trick we know as we build our cabin to help you prevent this from happening.
Everything must begin with a perfectly square and level foundation and stay that way until the last nail/screw is driven into the roof.
Want a complete cost breakdown of our off grid home including the building materials list?
SHOW ME THE COMPLETE PACKAGE!5 Steps: Starting A Foundation Right
1. The first secret in building a proper foundation is choose the right ground. Make sure your building on undisturbed soil (earth). Know ahead of time what type of ground your working with (i.e. clay, sand, gravel, rocks, boulders, soil etc.) Also know if there is the potential for any standing water/freezing. Ensure you also have clearance around the building to work is your in a forested area like us. Remember, putting an exterior finish on your cabin requires more elbow room that the foot print your foundation will take.
2. Never rush this phase of the build. Take twice as much time as you think you need.
When building the foundation remember that this is NOT where to cut corners. The more time you take to ensure your foundation is rock solid, plumb and level the less time the rest of the build will take.
Taking your time now will speed up the rest of the build and that means you enjoying your cabin sooner rather than later.
3. Measure everything 3Xs at several stages of this phase. Even after you’ve got every pad, block, post, beam, or joist in place… check it all again. For plumb, square and level. I know your excited to see those walls go up. And I know the foundation isn’t where you see the biggest results for a hard days work but it is where you’ll get the best return for time well spent.
4. Use the right tools for the job (we share them below) and know how to use them properly to save time, money and frustration.
5. Lastly, don’t be afraid to adapt to the situation. Planning is essential but sticking to the plan isn’t always an option. Sometimes the type of foundation you initially settle on may not be feasible for your type of ground. Adapt and over come but remember to take you time.
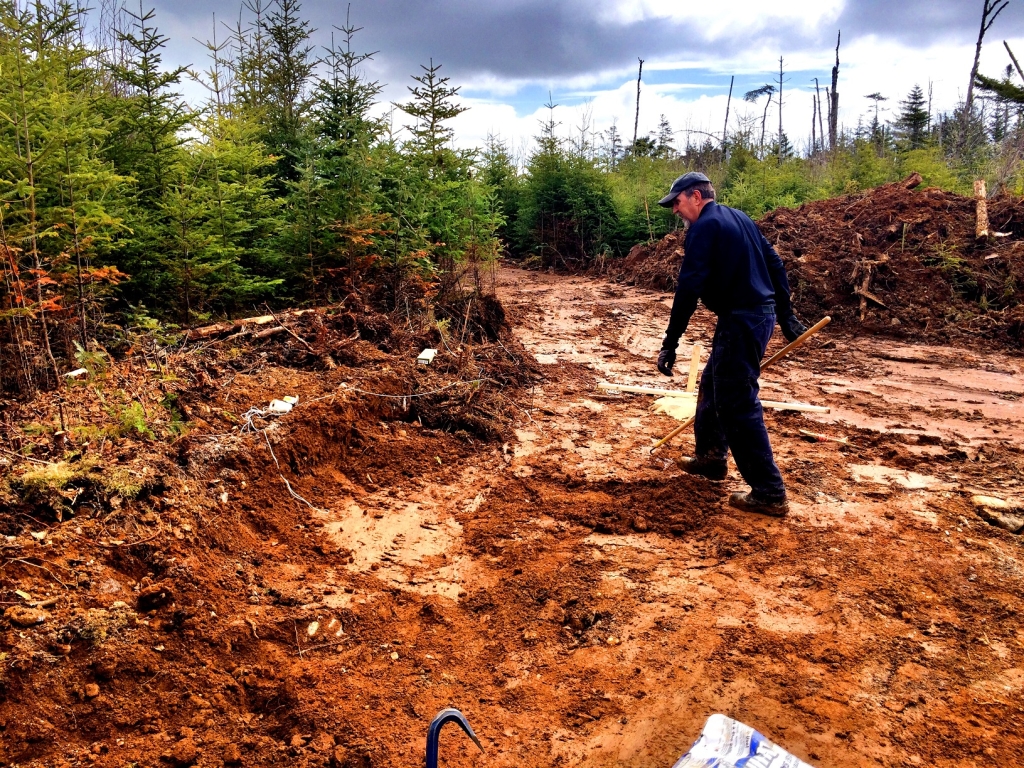
Clearing The Land
Below you can see the excavator clearing the overburden in our build site.
We had already cut down most of the brush by hand inside this 60ft X 40ft area when we were trail blazing.
Below is the cleared area where we’ll cabin will be built.
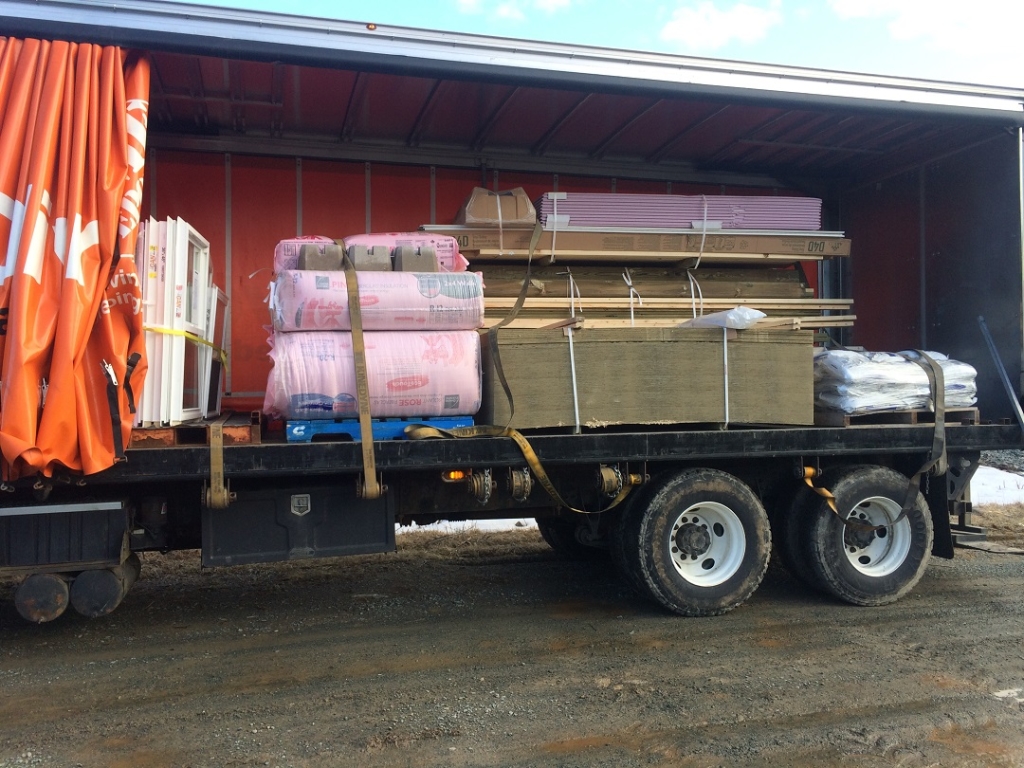
The Building Materials Are Delivered
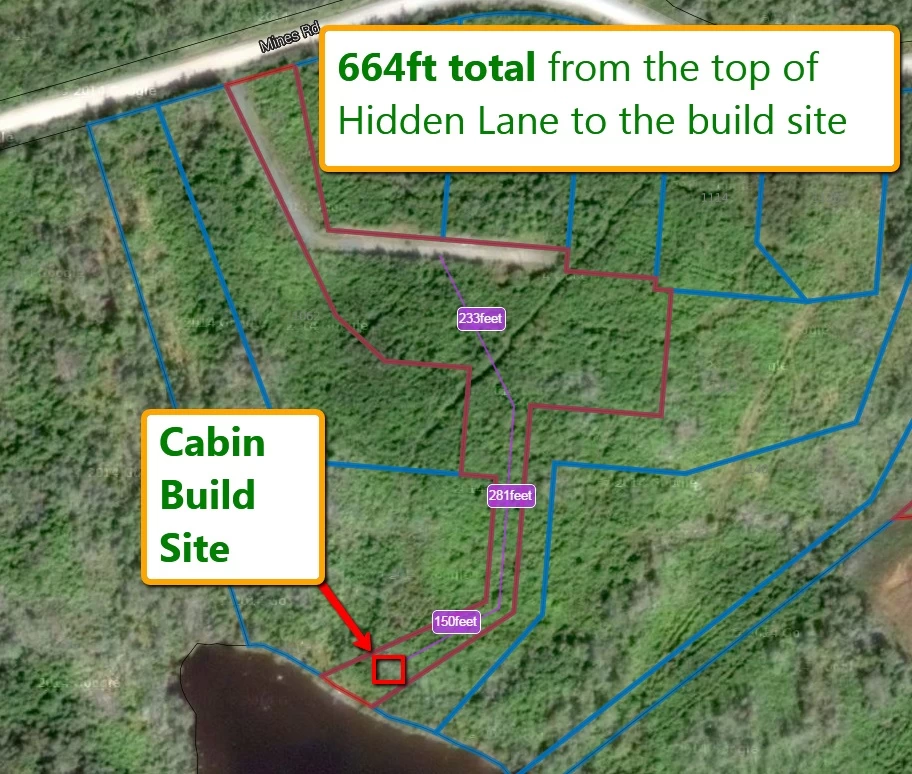
Yesterday all the building materials for the cabin (from Home Depot) arrived and were dropped off at the top of the hill.
We had already brought most of the smaller building materials down using our ATV and a small utility trailer so that we could get a head start.

Thankfully the excavator operator who was concurrently building our access road was able to sling down some of the heavier materials for us.
We slung the 3 concrete footings, 36 bags of crusher dust (2,376lbs in total) as a large portion of the lumber.
Home Depot did however slightly dropped the ball.
They forgot to load our steel roof onto the delivery truck which had been stored for us on one of the top shelves inside Home Depot.
The roof was ordered through Home Depot and came shipped from the roofing company in Ontario earlier than expected. Hence why it was waiting at the store for a few days.
They also forgot 36 additional 8″ cinder blocks and the 12 24″ x 24″ concrete pads.
However… they did deliver us 10 1/2″ 4ft X 8ft OSB instead of 10 3/4″ T&G OSB and a good portion of the dimensional lumber is actually longer than we had ordered.
Finally they delivered us 3 extra 10ft 6″ X 6″ pressure treated posts. SCORE!
BUILDERS-TIP: Often times if the length of lumber you ordered isn’t available the store may provide you with longer (never shorter) lumber for for the same price as your quote. They want your business and will often take a hit on the cost of lumber in order to keep you happy and keep your business.
Want A Complete List Of The Building Materials?
SEND ME THE MATERIALS LIST!The Concrete Pads and Layout
Getting this part right is paramount. We discovered after peeling back the top layer of organic material that the underlying material was stone, very compact dirt and solid grey clay. Probably the best case scenario for the type of area we’re in (close to the water). The excavator was able to level the ground out incredibly well for us and that meant minimal manual leveling for us.
Deciding where to build. This was all about the orientation of the cabin to the lake and sun. Luckily both are perfectly in-line and it was only a matter of rotating the layout to suit our view.
BUILDERS-TIP: If you plan on ever installing roof top solar panels then NOW is the time to advantageously plan the orientation of your cabin. This includes not only the surrounding trees (shading) and the orientation of the cabin to the sun but the actual pitch of your roof as well. A quick tip for the pitch of your solar panels… match your latitude (found using Google Earth) to the pitch of your panels (this is for fixed pitch solar panels like ours, meaning we don’t plan on moving them as the seasons change). For more info check out www.solarpaneltilt.com
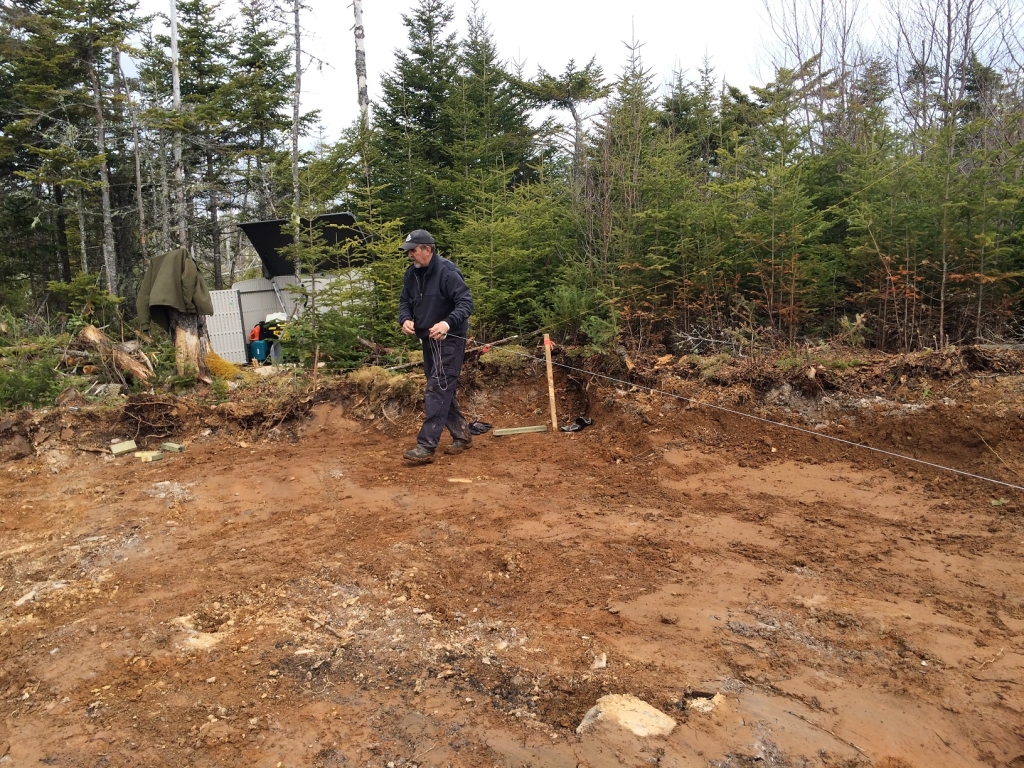
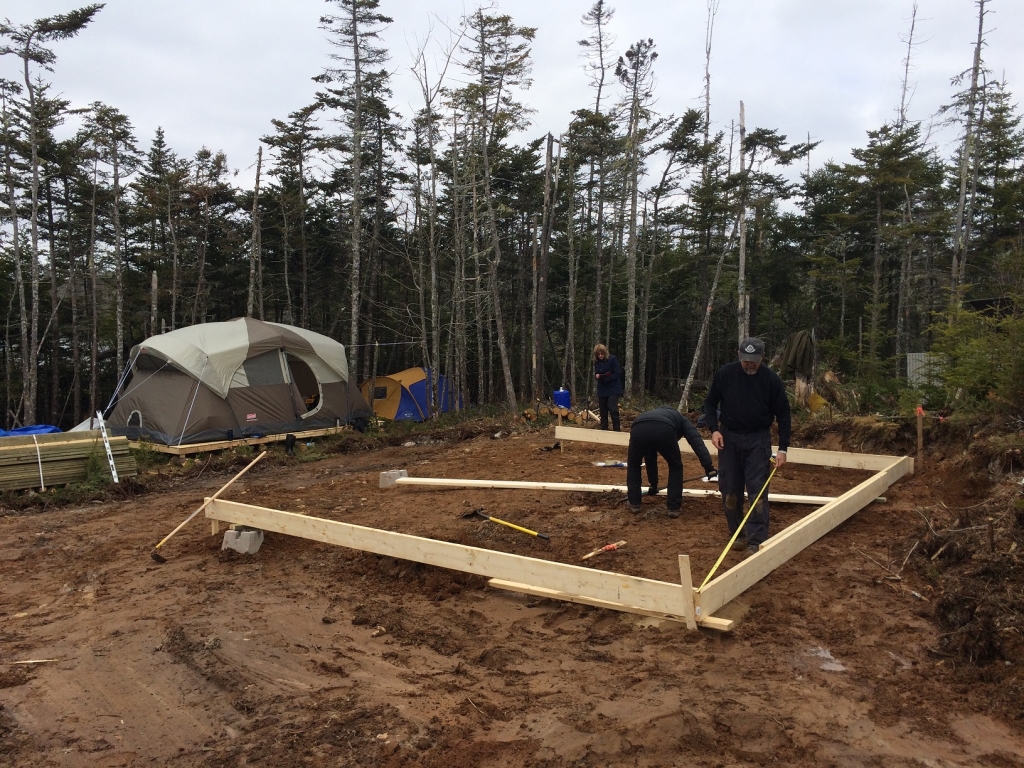
The Cabin will be 16ft deep (front to back) and 20ft wide with an additional 8ft deep deck (front to back) and 20ft wide.
We put in simple wooden stakes to mark out the orientation of the cabin and then leveled out the ground with a shovel.
We’ll be using 6 concrete pads with cinder blocks on top as the footing for the foundation beam to rest on.
Aluminum Line Level
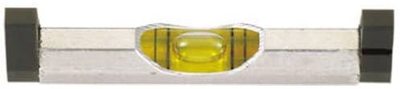
An invaluable tool we used to help us get the foundation perfectly level quickly was this super cheap string level. I highly recommend you pick one up!
BUILDERS-TIP: When I share the tools we used I will always look online and find you not only the BEST price for the tool but also a HIGH QUALITY and AMAZON RECOMMENDED tool. I’m all about sharing the best of the best with you and even though this line level is LESS than $3… it’s Amazon’s top choice for line levels and ours as well!
Laser Level

Another tool that sped up the building process ten fold every day was this small but mighty laser level. This is Amazon’s top choice for laser level and ours as well. We’ve used different laser levels during the build and this reigns king! This easily reaches from one end of the cabin build to the other even on the brightest days outside.
That level survived being dropped from 30ft, being stepped on and dug out of the mud. It never failed. The battery never died. It’s just plain indestructible.
For a complete list of all the tools we used in the build process you can see our 63 must have off grid tools post.
We used these pieces of lumber and the level to “grade” the ground and finally level it all off with bags of crusher dust.
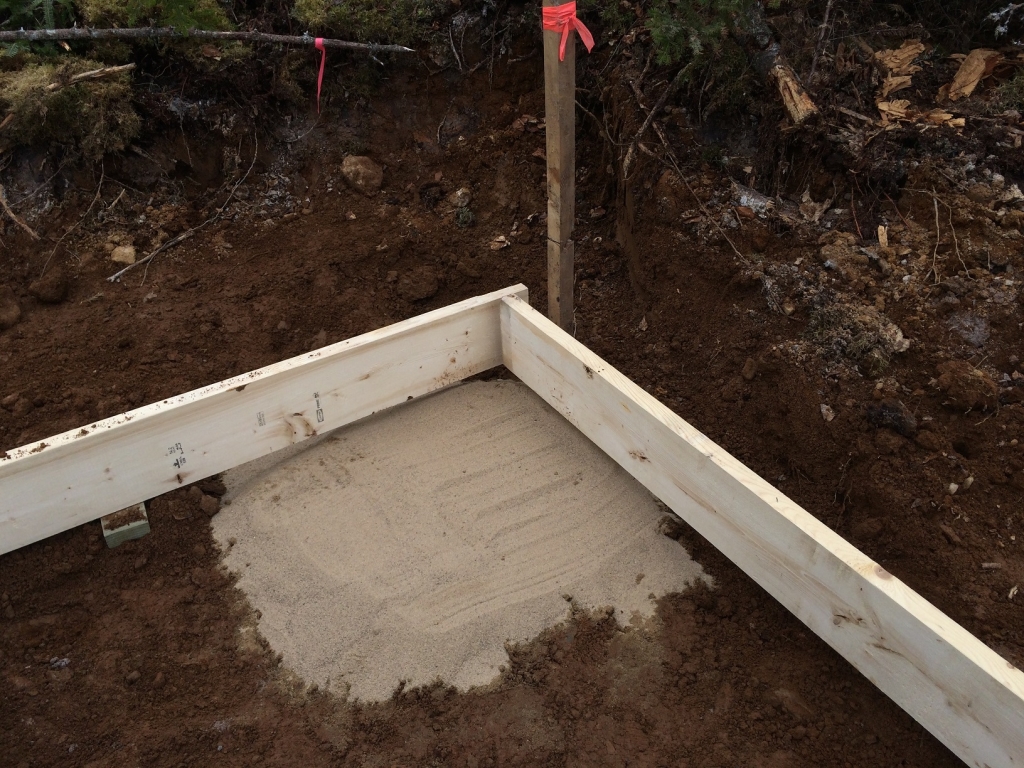
We will be placing 24″ X 24″ concrete patio slab paver stones on Quikrete All-Purpose-Sand sand and then stacking the cinder blocks on top of that.
Some folks have asked what patio slab stone exactly we used.We used the Shaw Brick 24″ x 24″ Patio Slab Paver you see here.
Our Indestructible Tape Measure
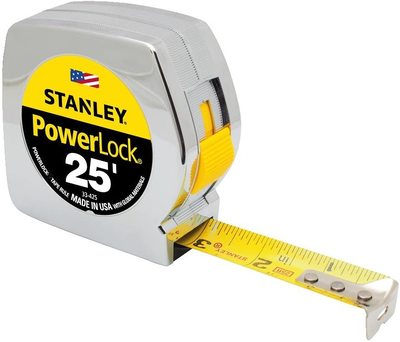
It might be less than $10 but this Stanley Powerlock 25ft Tape Rule (measuring tape) survived everything we threw at it. We ran it over with the excavator, dropped it from roof top onto the rocks, left it outside in the rain and even dug one out of the ground a year after we “thought” we’d lost it and I still use it today!
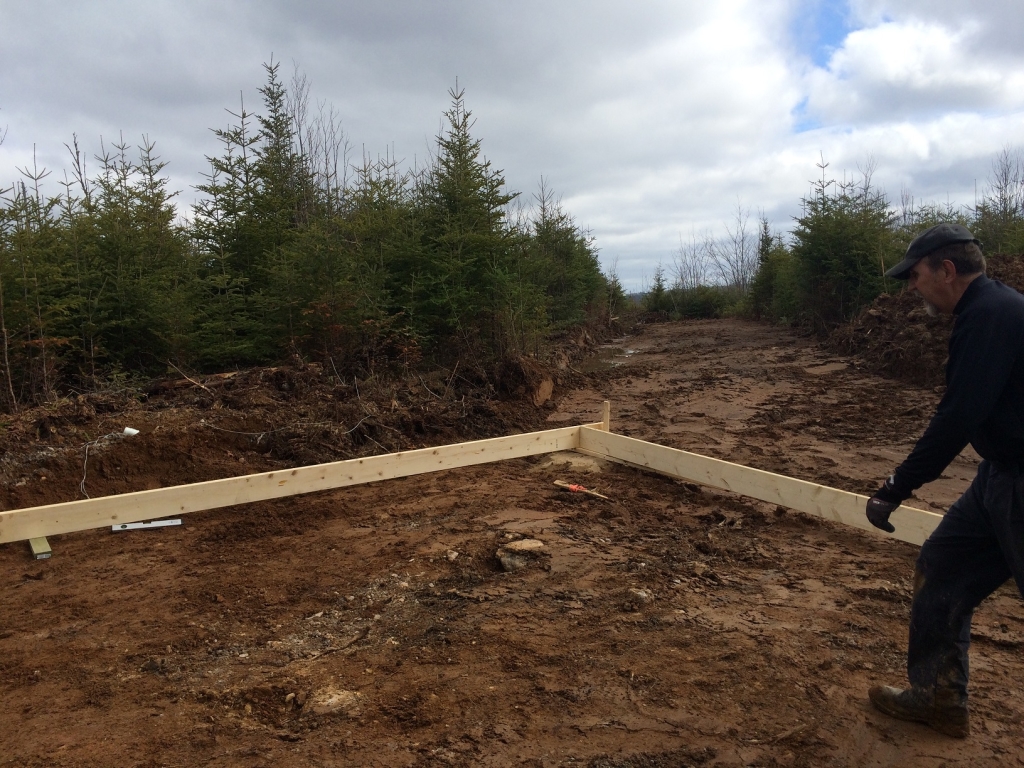
Three 10ft 6″ X 6″ pressure treated posts will be supporting the roof over the front deck and that is why we have the three concrete post footings there.
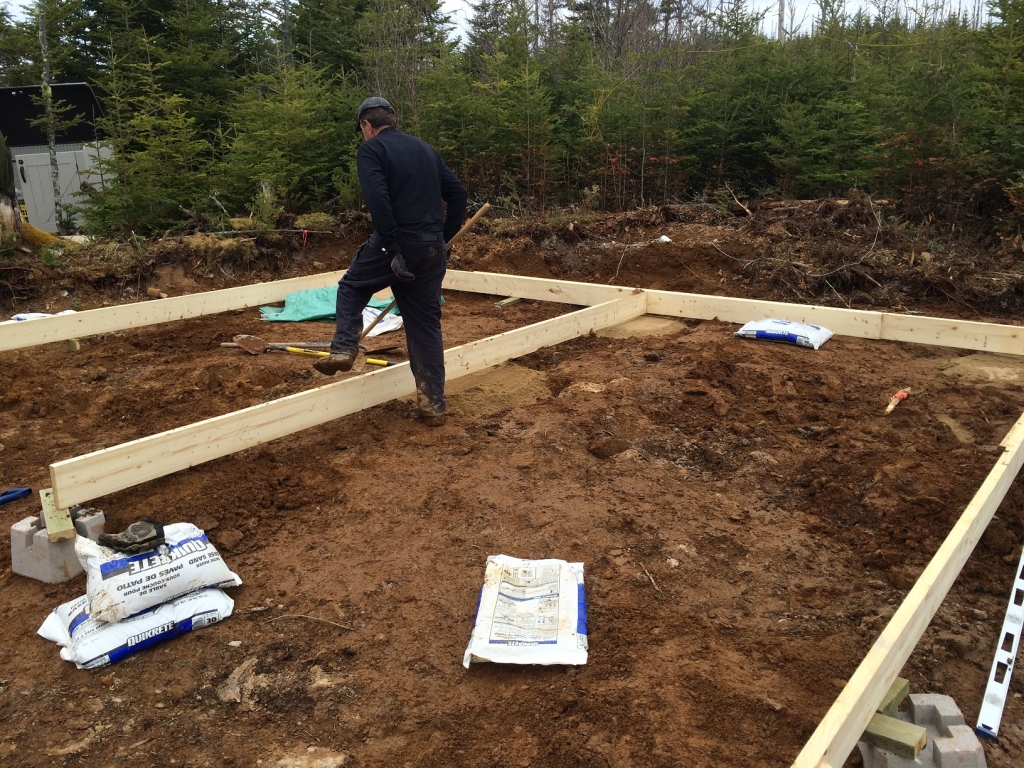
It took a good amount of time to get the foundation perfectly leveled and square but it’s critical to get this part right.
Next time, we’ll will finish up the foundation footings, build the support beams for the floor joists and start the floor joist.
Ready To Check Out The Next Step Of The Build?
Be sure and share our progress if you feel it worthy of your time.
Here’s a special pin for our Pinterest fans.
See you at the top!


how to clean solar panels
How to Clean Solar Panels: A Step-by-Step DIY Guide As you already know, residential and off-grid solar systems are amazing sources of renewable energy that are quickly growing in popularity. The large flat [...]
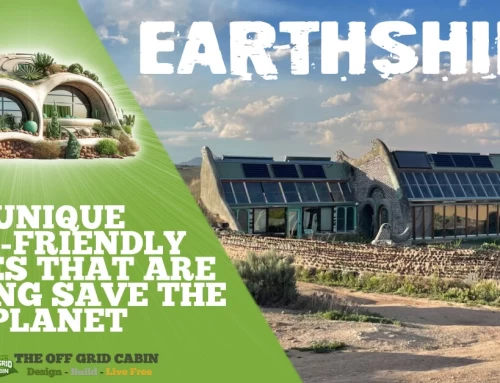
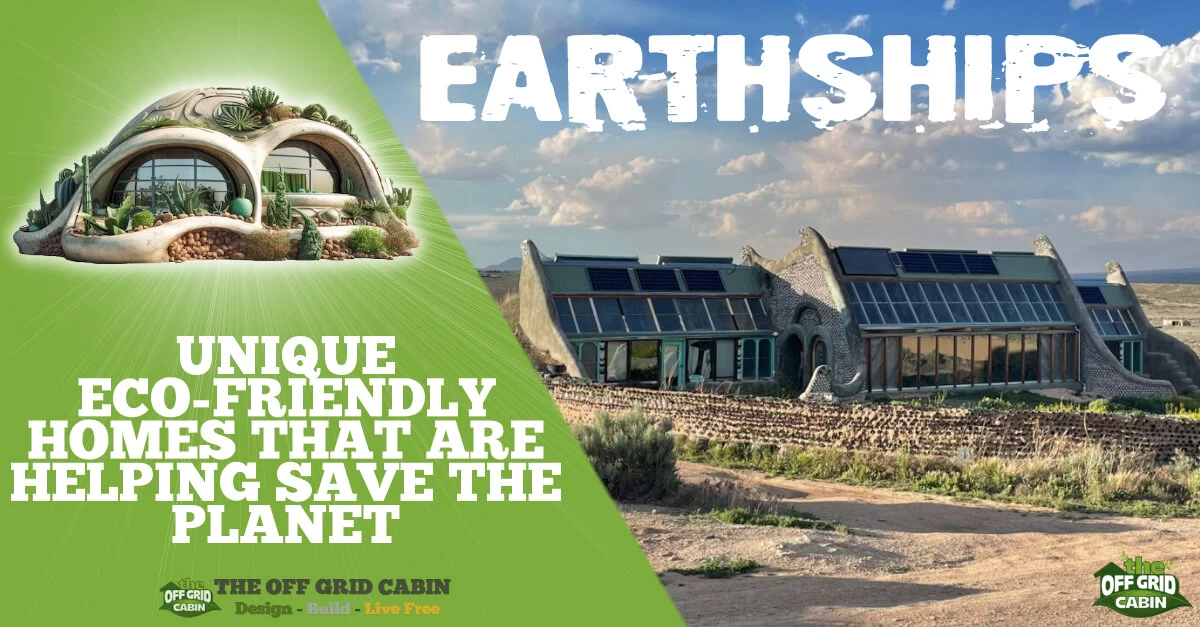
earthship
What Is an Earthship and How It Can Help Save the Planet Imagine living in a home that is completely self-sufficient, eco-friendly, and comfortable. A home that grows its own food, collects its [...]

3-way-switch-wiring
3-Way Switch Wiring: A How to Comprehensive Guide Here at the off grid cabin we’ve done our fair share of electrical work including 3-way switch wiring. We’ve done all the internal and external [...]
solar generator
How To Find The Best Solar Generator When we first cleared the land to build our off grid home back in 2016, we started with one of those small 700 watt Moto Master [...]

Off Grid Heating
The Best Off Grid Heating Methods Introduction To Off Grid Heating If you're Living off the grid already or planning to in the future, you already know how important it is to have [...]

off grid appliances
The Best Off Grid Appliances for Off Grid Living Introduction To Off Grid Appliances Living off the grid can be a rewarding and fulfilling experience, but it also comes with some challenges. One [...]


Thank you for telling me about matching the latitude for the solar panels. I was just thinking of going out and looking at the sun. This will help a lot to have it panned ahead of time. Luckily for us, there are NO trees at all where we are building just lots of sage brush.
Glad I have found you I’m getting ready to build our family cabin this I know will be a help
Was the excavator able to get to the build site using your hand blazed trail?
Yes! In fact… it took only 3 days for the excavator to clear the trees/shrubs the entire length of the road, remove all the overburden, properly grade the roadway, install a culvert under the road at the bottom where the water runs off, and tamp/level the SEVERAL loads of hard pan and gravel brought in by large dump trucks.
Home Depot delivered 10 sheets of 1/2 inch osb instead of 10 sheets of 3/4 T and G osb? I guess the T and G came on the next delivery? Did you keep the 1/2 inch to use somewhere else in the build?
Exactly. It was a blessing in disguise they had to return anyway because they FORGOT to load our steel roof package that was being stored inside the Home Depot that arived a few weeks earlier. They aimed to deliver everything in one load but because of the slip up (scrambling the lumber order slightly, and forgetting the roof) they had to return anyway. We also used that second load to bring in some additional materials since we didn’t have to pay for the delivery anyway.
We cleared two heavily forested acres by hand two years ago on our five-acre parcel here in NE Minnesota. Next up in the spring is building our driveway – ourselves. Thing is, 20 or 30 years ago, you’d have to hire it all out or wait for someone to teach you. Now that we have blogs like yours, YouTube, and the internet, everything can be done yourself if you’re willing to put in the sweat equity. We’ll be doing our build entirely ourselves.
I would love to know the approximate cost for excavating… I am just starting my process finding my land, researching the costs, and deciding what plot to buy. Any other ideas you may want to share would be fantastic. Thanks!
Hey there Joe!
Well, we initially asked our road builder to put in our road from the top of the existing gravel road down to our cabin build site. We were given a quote of $10K and that was it. When we were trying to carry the building materials down to the build site the excavator operator could see we were really struggling to get through the brush and muck so he kindly slung two loads from the top of the hill down to the build site.
All told the operator cleared the way down to the site, put in the road, cleared the overburden off our build site, and carried two loads of material. That was it. He didn’t actually excavate down at all at the build site other. He just scraped off the moss and moved the stumps.
Best of luck with your build Joe and definitely share with us how it turns out!
Steve
Was worried Steve you were no longer posting. I’m just starting all the planning stages and have watched all the blogs to the 15th day but can’t find the rest how you installed toilet, solar panels etc
Hey there Garren.
I have yet to post about so much more of the build. Believe me I really want to . I’m asked on the daily about posting more. I have all the photos necessary at the ready to write up about the steel roof, siding, electrical, solar, plumbing, water-less toilet, propane water heater, hearth, kitchen, bathroom, direct-vent wall heater… you name it. Alas… I’m just one guy, at home, still in the fight with cancer. I know the blog looks incredibly simple but I can’t tell you how many hours and hours a day I sit here every week for weeks on end just to write up one simple post. I have good days and bad days and lately I’ve just had a long string of really hard days. I’m doing my best and I will really try and get more our soon.
Cheers!
Hi, Steve! Greetings from Quarantania! Getting ready to start building our little getaway cabin – maintaining safe distances, of course. I like the look of the process you used with your cabin. Any issues with your foundation? Or, anything you’d go differently? Hope all is well!
Shelly
Hi Shelly!
Yeah, happy quarantine! Well I have to say that being at the cabin is the PERFECT way to “social distance” and still enjoy our lifestyle here at he cabin. Really… nothings changed much for us :)
The foundation is perfect. We’ve never had a prob;em and it’s a solid, level and [plumb as the day we built it.
Cheers!
Steve
I’m about to build a 16×12 cabin with a 8 ft deck extending the 12 to 18 feet.
It will be in the forest. The ground is soft. What should I do? Dig where my 24×24 cement pad will go and add and compact rock dust? How much do I dig? There won’t be any compacted clay like your area. I might get into big rocks. This is in Perth, Ontaio.
What do you mean by undisturbed soil? You excavated your foundation area. Is that considered undisturbed? Should I get my area excavated? There is a bit of a slant too.
Thank you so much for your time and energy you put into your blog and helping others build! I’m very grateful to have found you!
Hello Lisa!
I consider “undisturbed soil” as soil that has never been turned over, tilled, graded, hoed, or anything of that nature, by man or machine. Undisturbed soil is significantly stronger than soil that has been disturbed. In typical building for example, underground footings should extend to a minimum depth of 12 inches below previously undisturbed soil. Here’s a detailed article from The Spruce going into depth about it.
We used crusher dust to help “level” the cement pads for the cabin but NOT to support it. Some folks thought we were using the sand as the supporting agent. This is not the case. The ground/soil is supporting the cabin. Because our ground was dry/compact that has served and the supporting medium for our cabin.
With different soil types come different foundation designs. Every build is different but as an example… we originally tested several areas on our property for compactness of ground. Some were far too soft for our liking and ultimately drove us to build in the location we did. Just to the left of our property is where the lake runs off and into a stream. The land over that way is far too moist and soft to support a cabin unless you went with a complete excavation and poured foundation.
Lastly, some of the driving factors that drove us our design was no road access to the property, everything we had to hand carry to the build site, what two guys could build in a short period of time and of course overall cost.
Hope that helps answer some of your questions Lisa.
Hi, what kind of foundation did you use, pier, crawl space? what roof pitch did you use to get head room in the loft? I am trying to design a 16 x 30 foot…with a loft over the kitchen end….how tall are your walls on bottom 8ft or 9ft
Thank you,
for posting your journey.
anita
Hey Anita! Well, every one of your questions is actually detailed out in the next few blog posts. We go into great depth about our footing with pier and beam design, our one of a kind roof design, and all the framing dimensions are here.
Enjoy!
Hey Steve! I’m writing again to let you know WE STARTED! We really owe so much to you and this blog. Our ground is not level, so we’re building and leveling individual piers…well and truly a pain in the butt, but necessary! We have just 1.5 more to build, and then it’s on to the beams, which we’ve just placed the order for at our local lumber yard. Take a look at our progress so far: https://www.facebook.com/gracebeneaththepines1/photos/a.1123310058022619/1150495691970722/?type=3&theater
I have a question – how much adhesive did you use for each beam? We have no idea how much of that to order.
Congrats on your build Lisa!
Our whole family will be following along with the build on your Facebook page!
So for adhesive we used the DAP Subfloor Construction Adhesive. The main reason is that 1 can of this expanding foam adhesive is the equivalent of 8 tubes of the regular construction adhesive. I’ve just checked the build list and can see that we used 5 cans of this adhesive for our build. I wish I could tell you exactly how much we used on each beam but all I know is that we used a total of 5 cans for the entire cabin build. Here’s a link to the product we used and I see now that they also sell a 6-pack!
Good luck on your build and do keep us updated ok.
Cheers!
Steve
This is an excellent foundation for many situations. Some call it a “floating” foundation because it sits on the surface, supported by the bearing area of the concrete pads under each pier. In soils with poor weight-bearing characteristics, one simply increase the size of the pad. I’ve seen professionally engineered building s on peat bogs that use bolted-through pressure-treated timbers for each pad. One word of caution: this is not be a good foundation in areas prone to earthquakes, hurricanes or high winds because it depends solely on the weight of the house to keep it in place. There is nothing to resist an uplifting or shearing force on the foundation. Fortunately, those risks are quite low in most places.
This article provides valuable insights into building a level foundation, crucial for any construction project, especially for off-grid cabins. As a company Clearwater Concrete specializing in home improvement and construction, your expertise could be invaluable in assisting readers with their foundation projects, ensuring they’re well-equipped to tackle their builds successfully.