


Framing Our Off Grid Cabin Walls In Just 3 Days!
Today is the first of three days that it took us to frame the off grid cabin walls.
It took two of us just three days to frame all the walls, doors, windows and even start to Tyvek the cabin.
In fact, we built our entire off grid cabin in just 15 days.
Click the calendar below to see the exact build schedule.


That’s from the start of clearing/leveling the land on May 1st to making the cabin weather tight on May 15th.
Our Cabin's Framing Design
Our cabin is built using regular dimensional lumber and we made every effort to build it according to our residential building codes.
Meaning, it’s built just like a regular home on the grid but with a few special changes that allow for solar, water harvesting, and propane heating.
All our 2′ x 4′ (interior and exterior) walls were constructed 16″ on center however, we really beefed up some the end wall of our main living area.
We used 2′ x 6’s instead of 2′ x 4’s and we’ll detail exactly why further down and in some upcoming posts.
You’ll also discover that our unique truss design is one that most builders have never seen before.
It’s a rare technique that I’m extremely happy my dad decided to incorporate and one we’ve seen several folks use after we’ve shared it here.
Stay tuned for more about that roof design coming up in our Ultimate Roof & Rafter Guide.
Want To See The Complete Step-By-Step Build Process & Build Cost To Our Cabin?
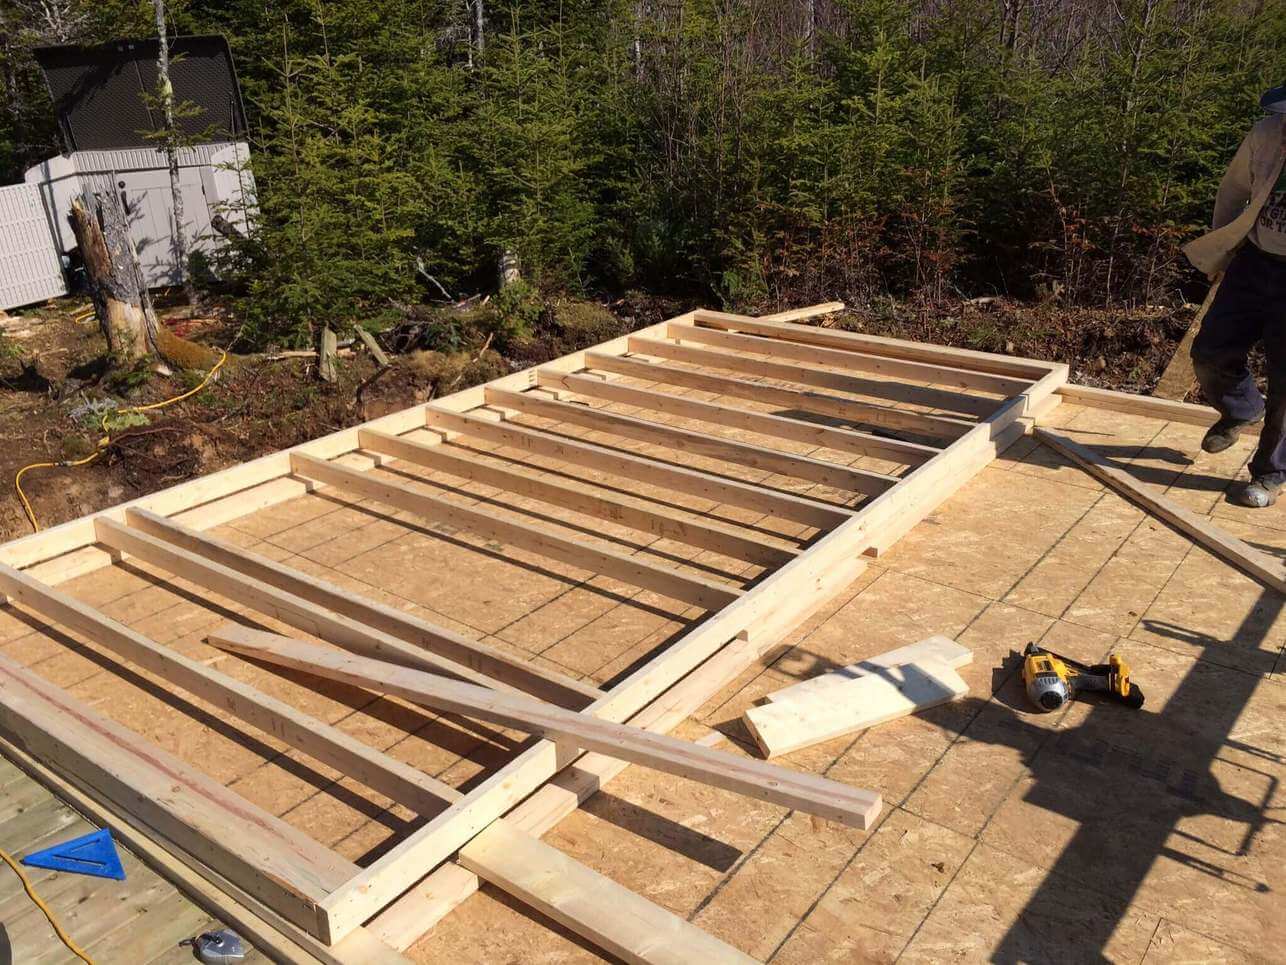
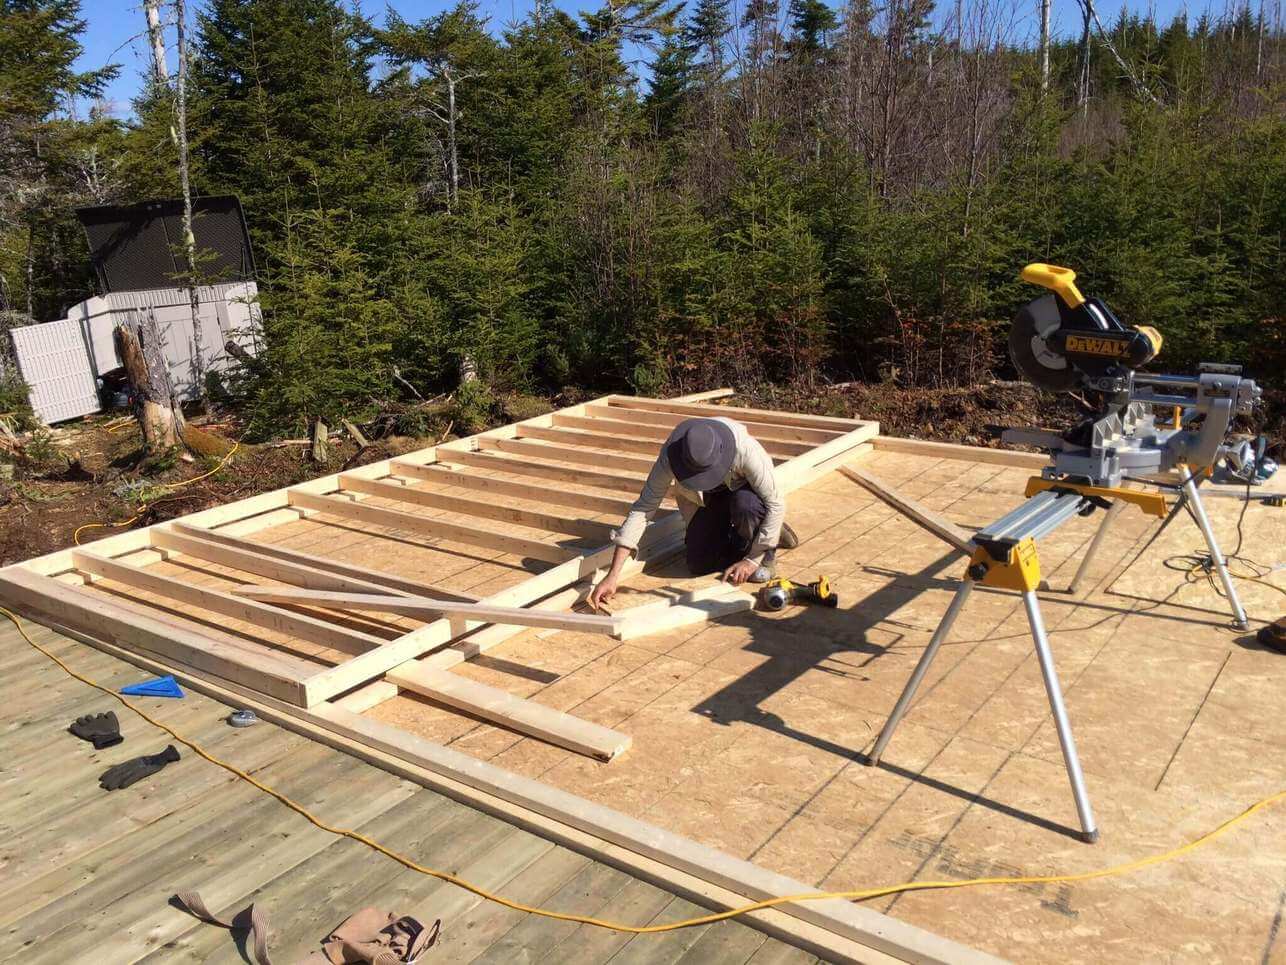
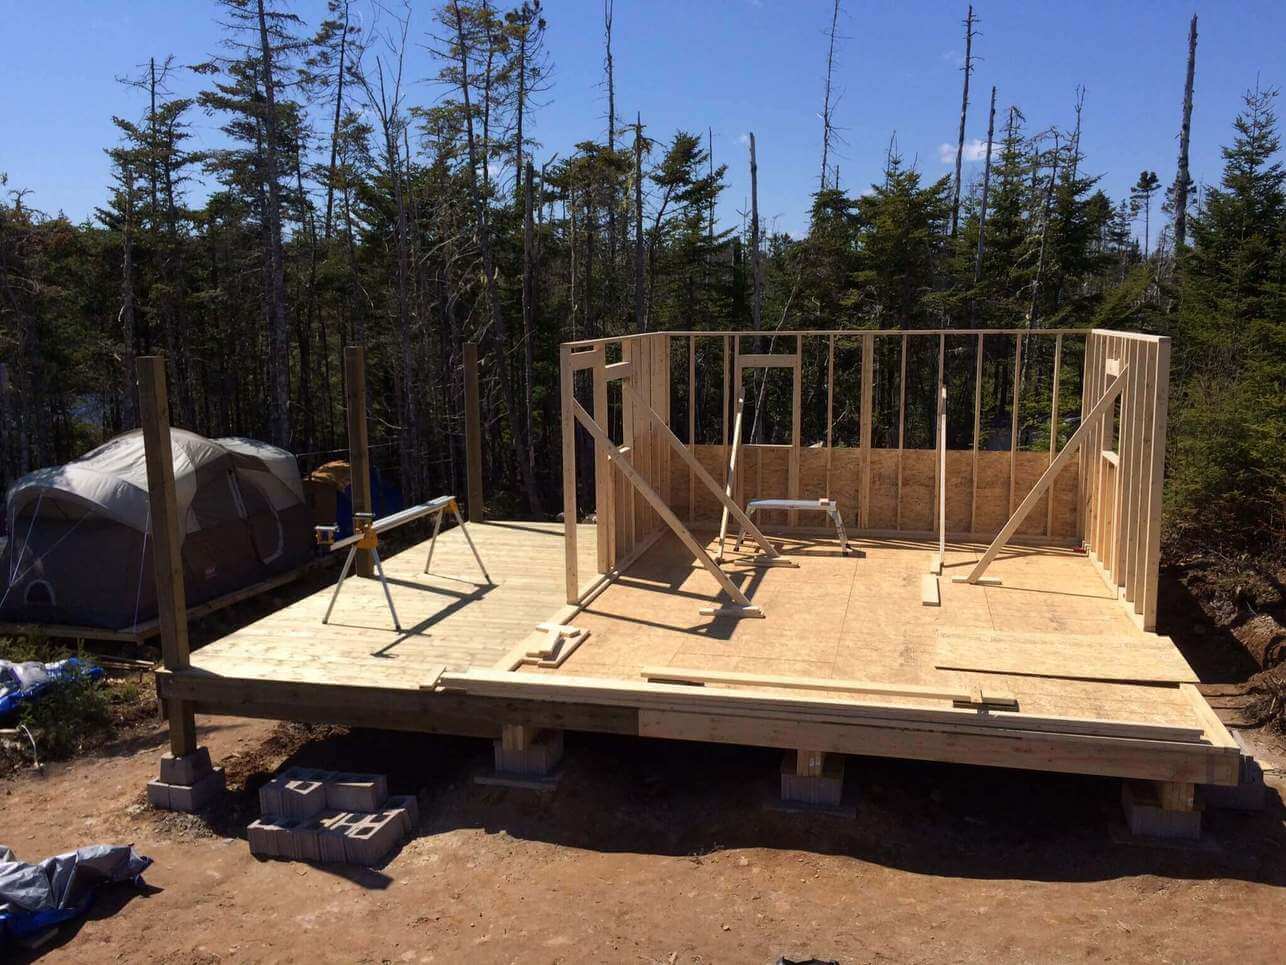
SHOW ME FROM START TO FINISH!In our last post we had just completed the floor joists, putting down the sub floor and building the front deck.
Today let’s get started with the framing!
Framing 101: An Intro To Framing
Our cabin is built using regular dimensional lumber and we made every effort to build it according to our residential building codes.
All our 2′ x 4′ (interior and exterior) walls were constructed 16″ on center however, we really beefed up some the end wall of our main living area.
We used 2′ x 6’s instead of 2′ x 4’s and we’ll detail exactly why further down and in some upcoming posts.
You’ll also discover that our unique truss design is one that most builders have never seen before.
It’s a rare technique that I’m extremely happy my dad decided to incorporate and one we’ve seen several folks use after we’ve shared it here.
Stay tuned for more about that roof design coming up in our Ultimate Roof & Rafter Guide.
Here’s a quick run down of the basics of framing to get you oriented if it’s a first time for you.
None of this is difficult and it was my first time building anything.
Headers run horizontally across the top of door and window rough openings. These support the weight of floor joists, ceiling joists, and rafters. Each header has a king stud nailed to either end with a cripple nailed under each end. If the header is longer than 5 feet then the cripple must be doubled up. Standard height of door and window headers is 6′ 10 7/8″. Of course this can vary depending on your design.
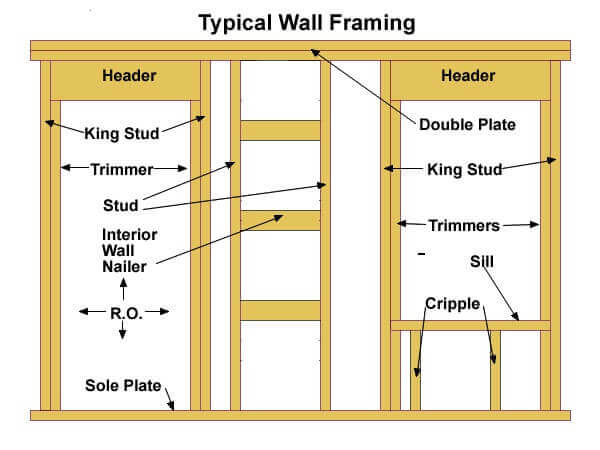
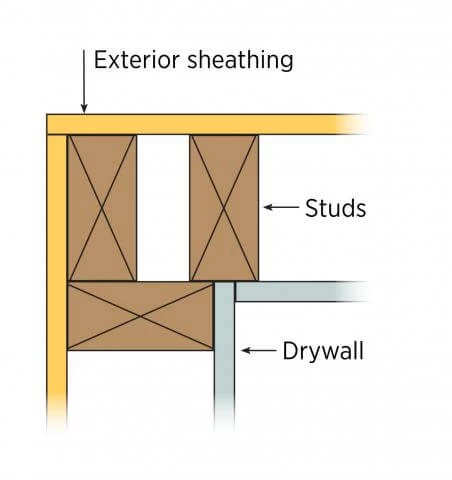
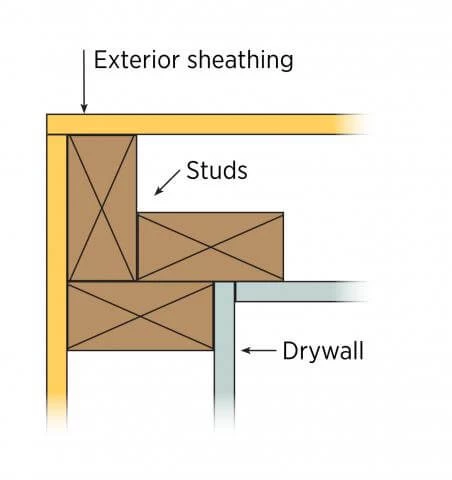
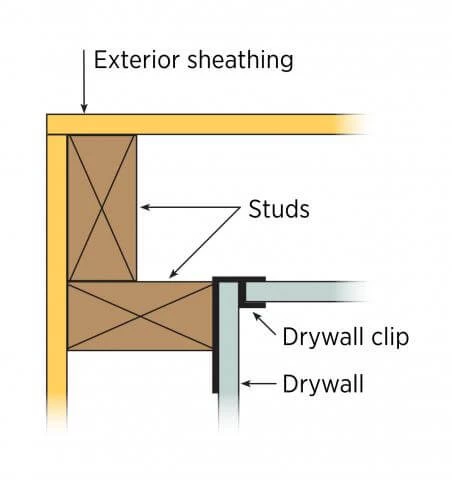
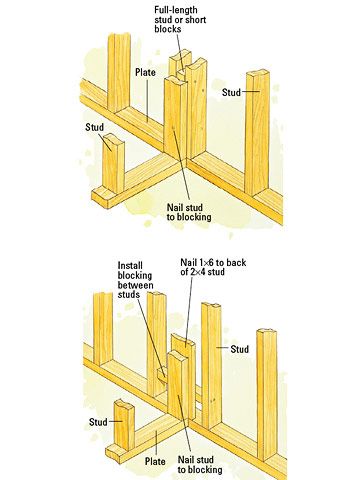
Framing Corners
Remember when framing corners to allow for a nailing surface on both side of the corner for your drywall. Here are a few different methods for framing in that nailing surface.
Framing Intersecting Interior Walls
Like the corner, when you frame an intersecting wall remember to allow for a nailing surface on both side of your corner.
Here is one of our favorite YouTube builders Shannon from HouseImprovments giving a complete run down on framing.
Our Cabin Floor Plan
You can see the complete floor plan design in this post but below is a quick reminder if you haven’t seen it.
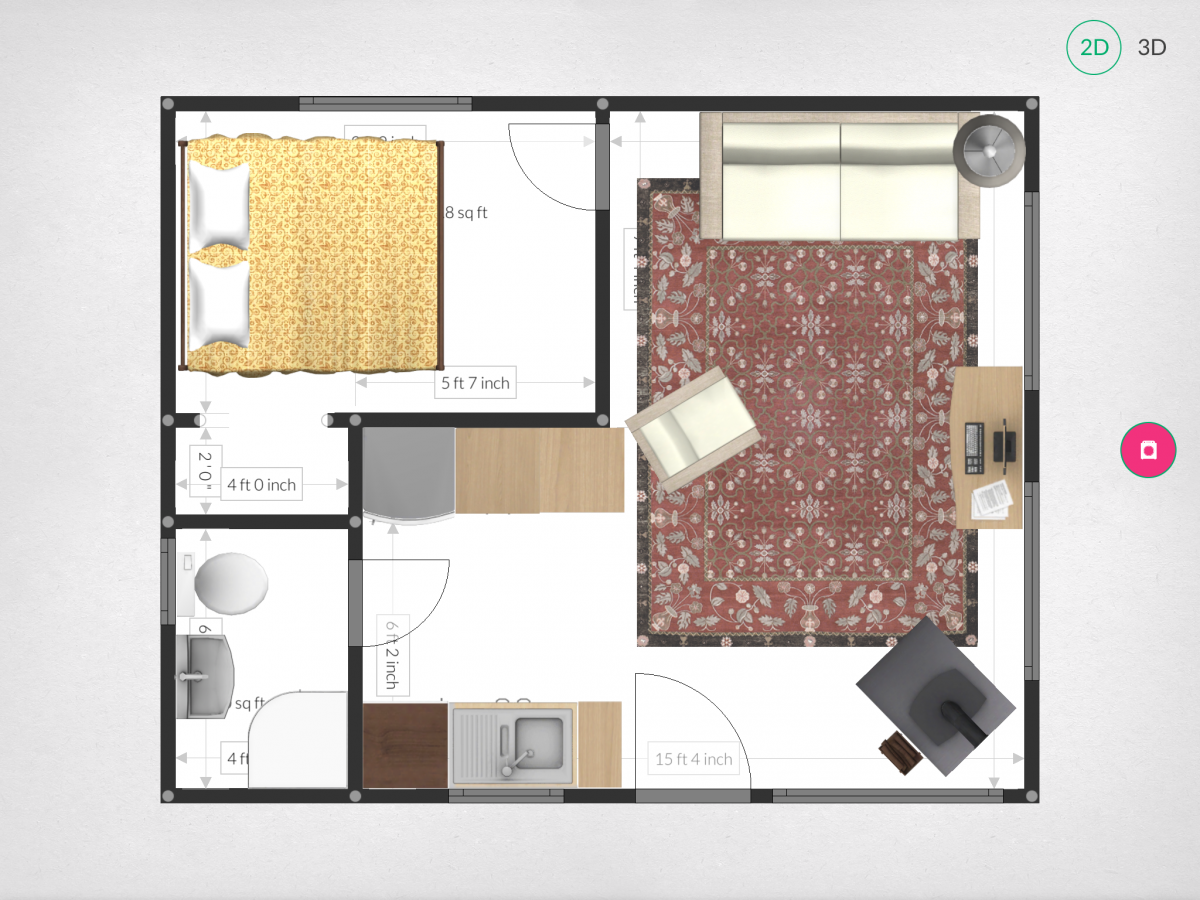
TIP: We used a free app on the iPad called Roomle to draw up a 2D and a 3D rendering of the cabin.
You can see our complete floor plan post here.
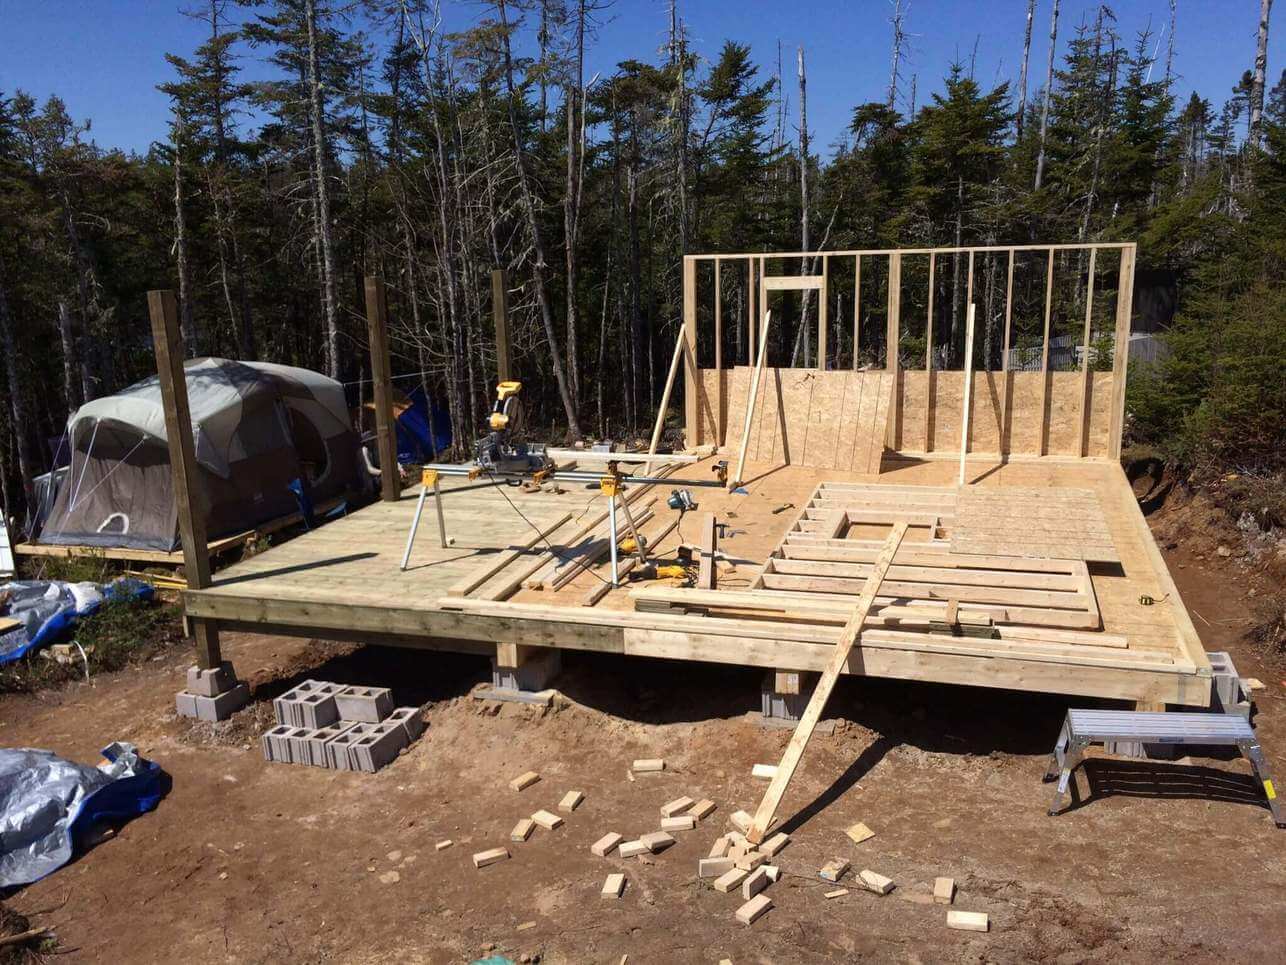
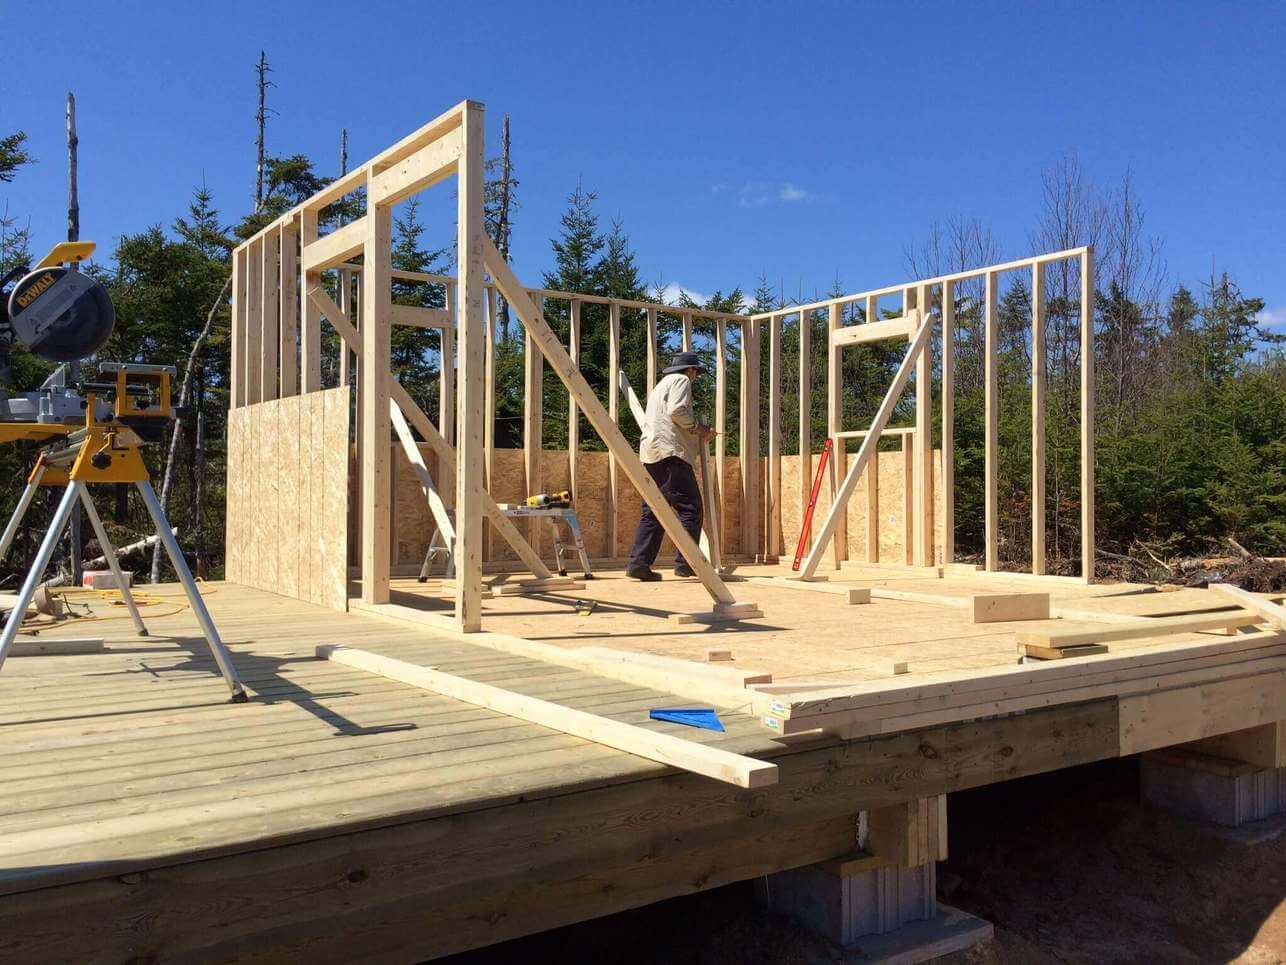
Framing The Cabin Walls
You can see the complete floor plan design in this post but below is a quick reminder if you haven’t seen it.
TIP: We used a free app on the iPad called Roomle to draw up a 2D and a 3D rendering of the cabin.
Our first end wall is 16’ long and has one window for the bathroom. This exterior end wall is build with 2’X4′ 16″o.c.
However, the opposing end wall will be constructed with 16″ o.c. 2′ x 6″ instead of the standard 16″ o.c. 2′ x 4’s as the living room will have a cathedral ceiling. This outside end wall will need to support the full weight of two floors as well as the roof and it’s winter load.
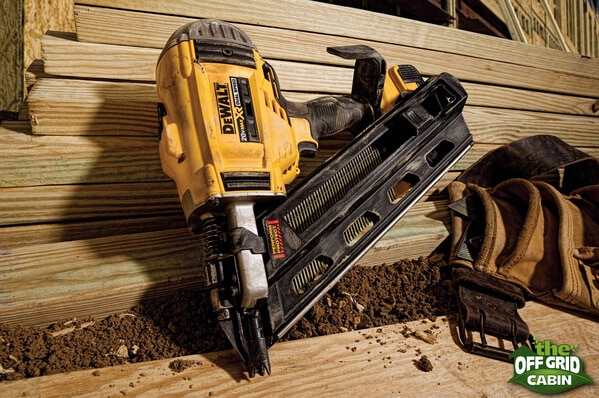
That DeWalt cordless nail-gun was by far the BEST tool on the site!
TIP: The ONLY way we were able to frame this cabin in 3 days and build it completely in 15 days came down to…
- We had a clear plan from the start.
- The Dewalt cordless nail gun
This easily shaved of an entire week off the build which would have been spent hammering and recuperating from sore forearms.
If I could recommend one tool to make your life a lot easier this would be it hands down!
![]()

In the background is our Lifetime Plastic tool storage box. We use it today to store our firewood!
Wall bracing is required while we frame to not only keep the wall up and steady with just two people but it allows us to finely plumb and square the wall before nailing it down.
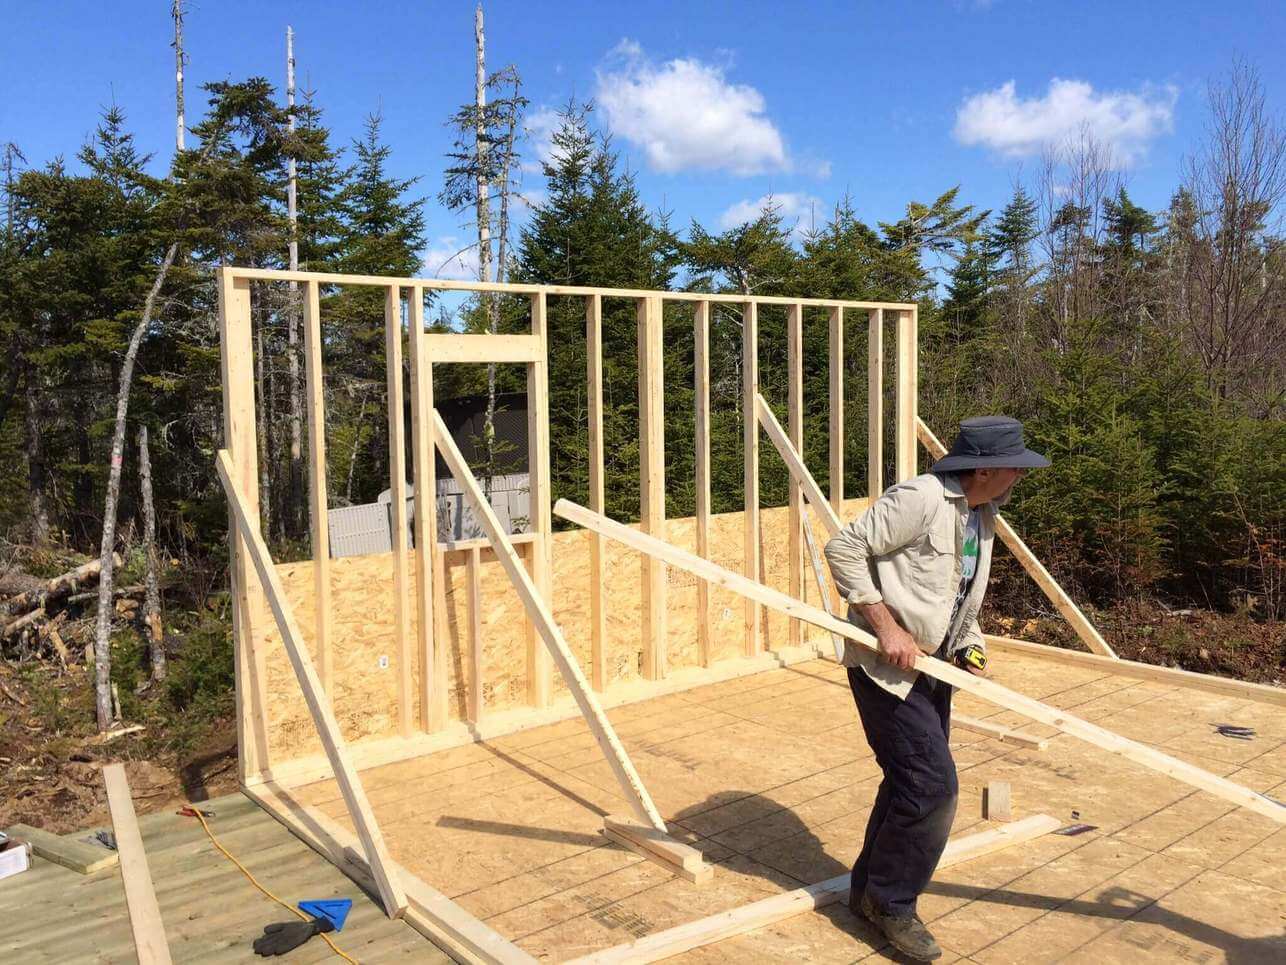
Putting up temporary wall bracing.
Wall bracing is required to not only keep the wall up while framing the second wall but it allows you to finely plumb and square the wall before nailing it down.


Another must have in order to build this cabin in such short order was this DeWalt double bevel sliding compound miter saw.
![]()

It was fast to cut through even the largest of our lumber, was quiet, ran off our Champion 3250 Watt generator and ensured every cut was perfectly square.
UPDATE: We’ve since updated our generator to the Generac GP3000i and it is a massive improvement! You can read the reviews on the GP3000i here and see the latest prices as well.
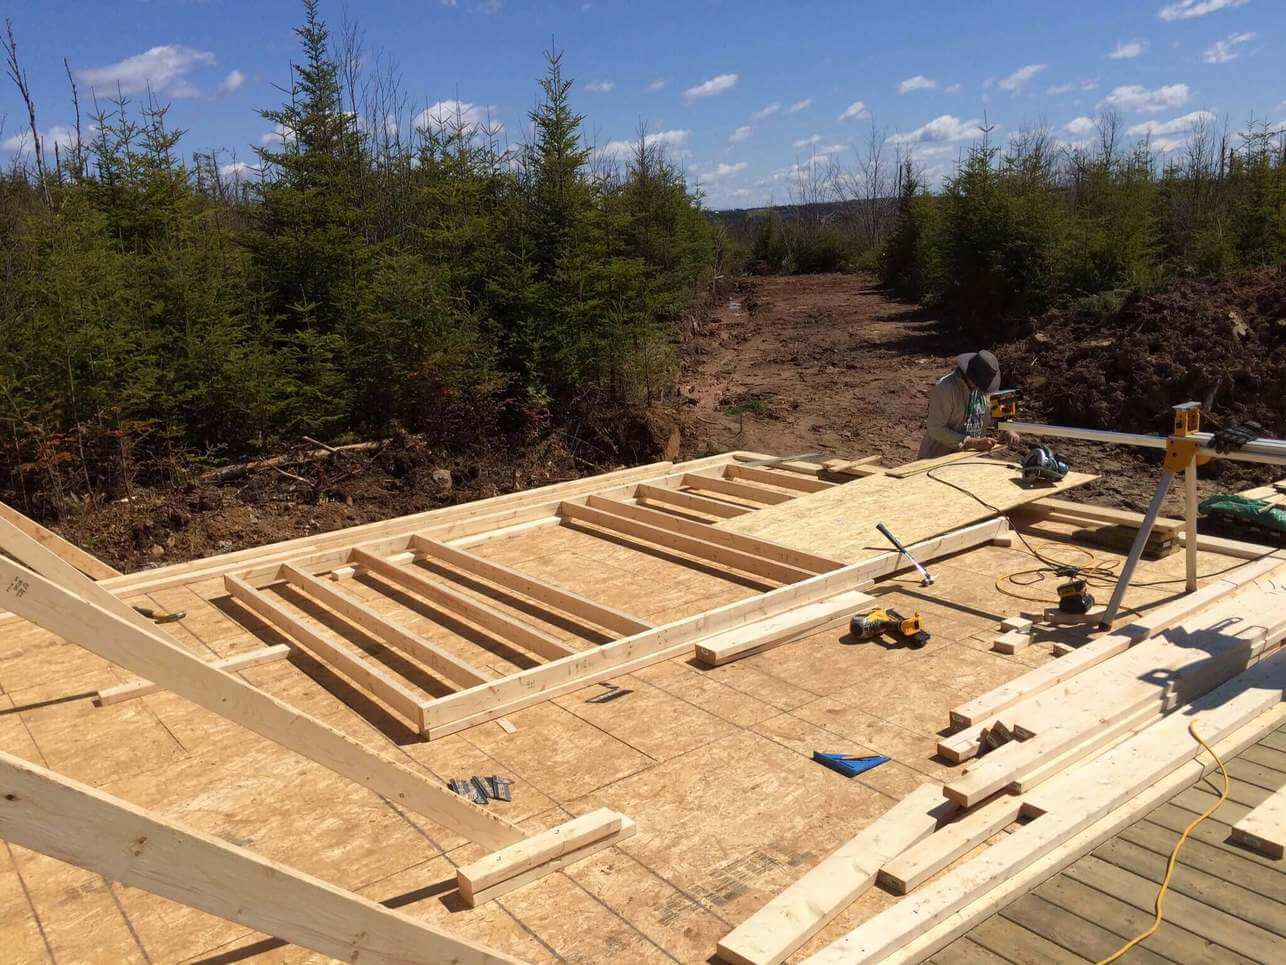
Framing half of the rear wall. You can see our access road in the background.
TIP: Always ensure that the wall are both square and plum using a large framing square in the corners as well as a long (preferably 4′) level.
The back wall will be 20’ long in total but we built in two sections for ease of lifting.
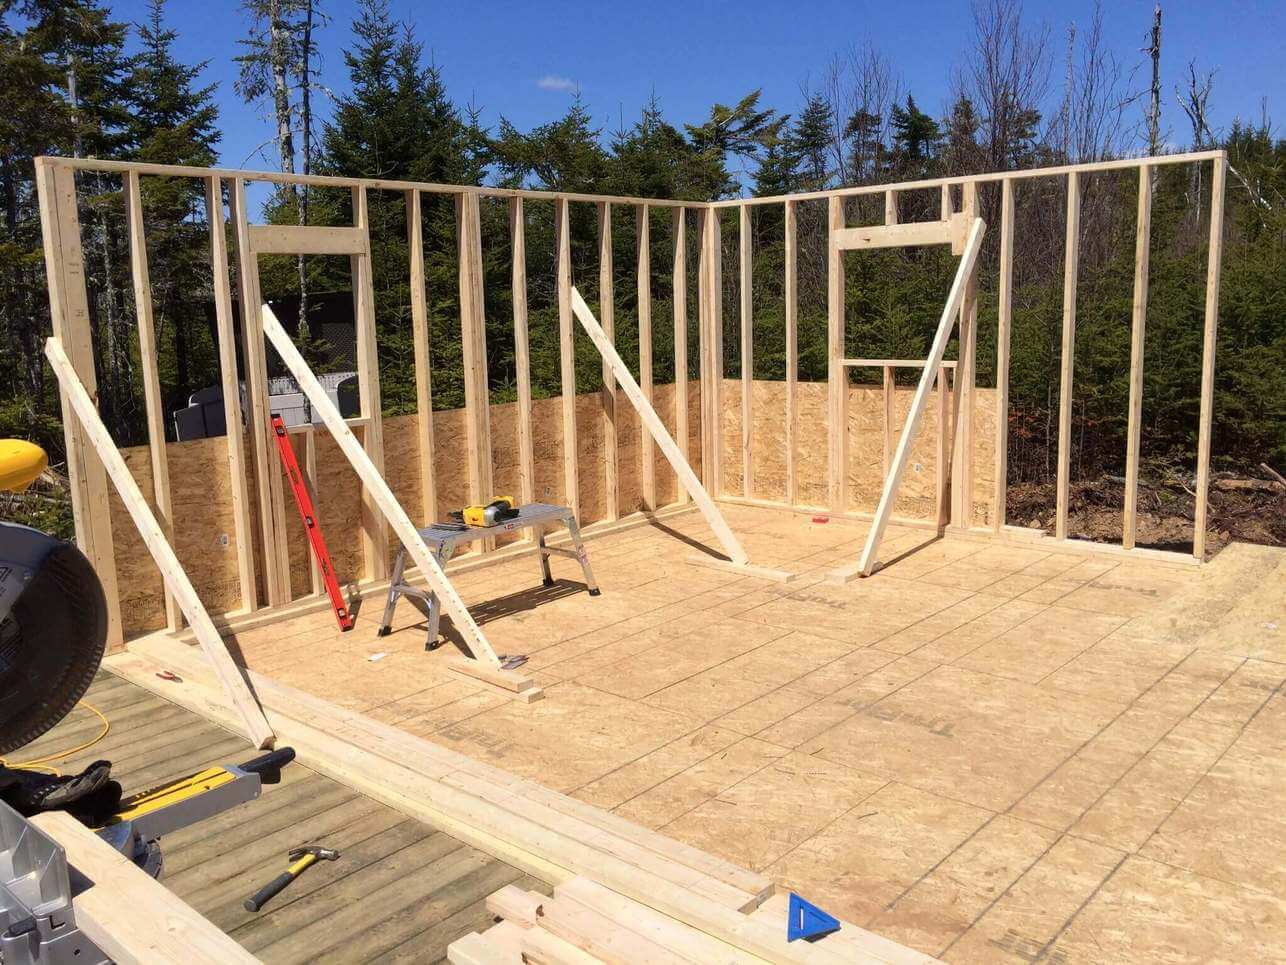
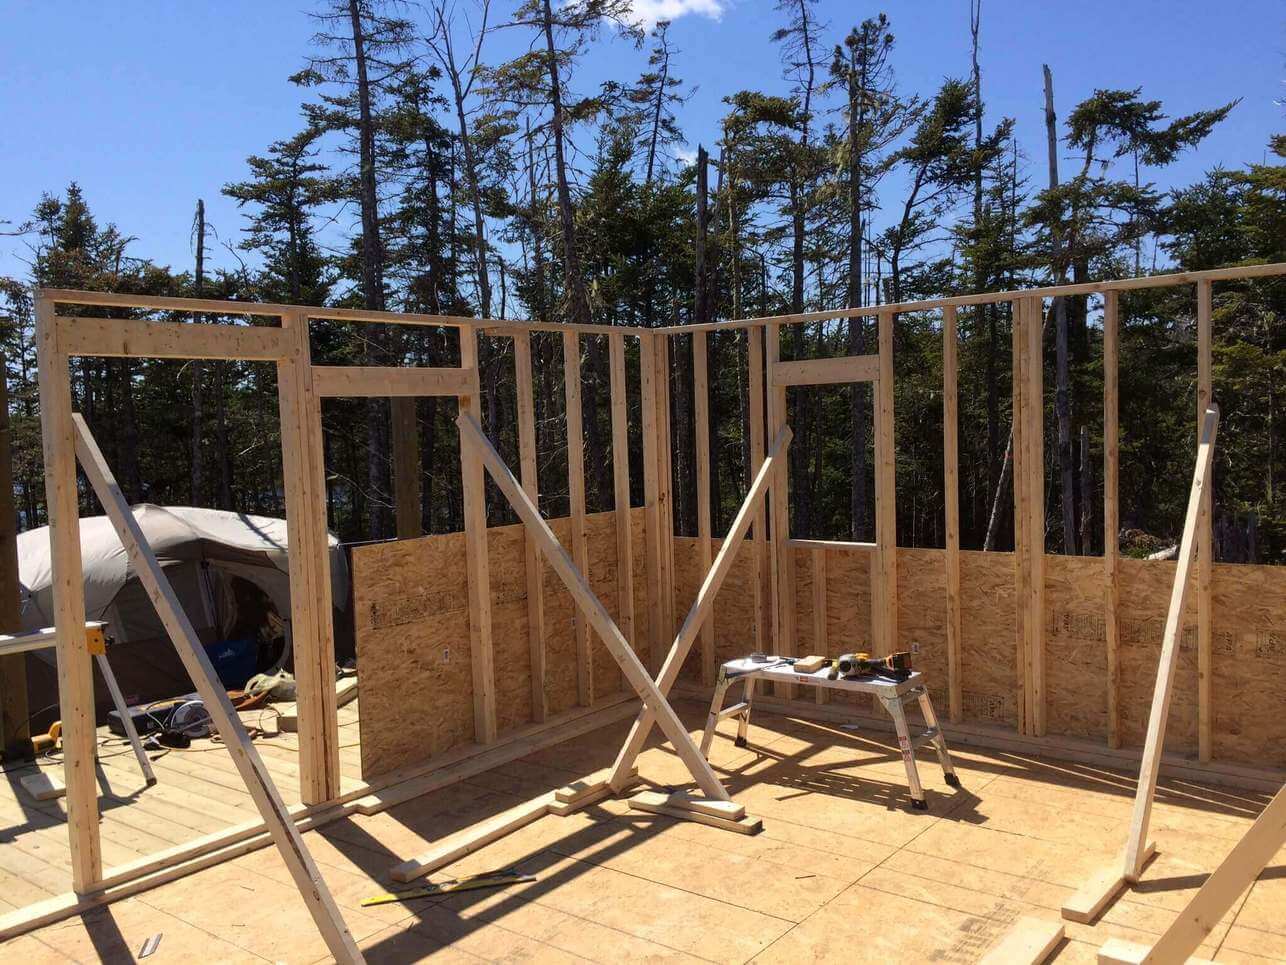
Half of the front wall with the door opening and kitchen window header.
We built the front wall (20’) in two 10′ sections as well for ease of lifting.
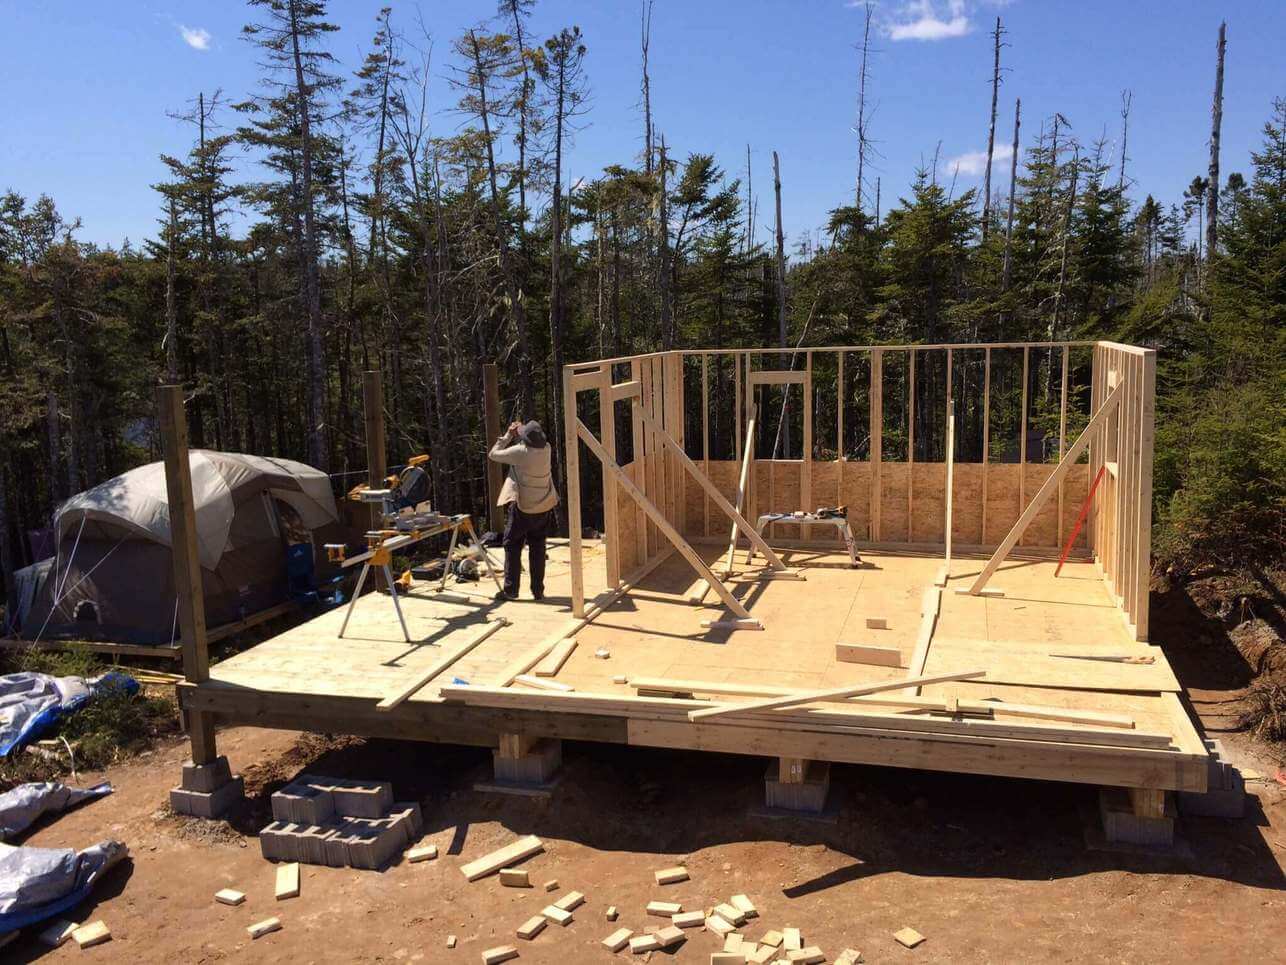
The front wall framing will have an opening for a kitchen window, the front door, and two living room windows.
We went with two living room windows for a few reasons.
On, it was MUCH cheaper to buy two windows than one large one.
Both windows still allow the same amount of light in and provide just as good a view than one large one.
Second, we wanted to be able to open the front windows (especially near the wood stove) and Home Depot didn’t have a window large enough that slides open.
We’ll give you all the window and door sizes, as well as a full cost write up in a future post once we have them all installed.
Tomorrow we’ll finish up the back wall, put up some more plywood sheathing to continue closing in the cabin and also get a head start on the upper floor joists.
Remember the living room (the walls that aren’t framed yet) will have a cathedral ceiling above so there sill be no floor joist above them.
Your Turn...
If you’ve enjoyed this post do us a solid and share it with the buttons you see on the side. Your the reason it gets out there :)
We also always make a Pinterest photo for those avid pinners out there!


how to clean solar panels
How to Clean Solar Panels: A Step-by-Step DIY Guide As you already know, residential and off-grid solar systems are amazing sources of renewable energy that are quickly growing in popularity. The large flat [...]

earthship
What Is an Earthship and How It Can Help Save the Planet Imagine living in a home that is completely self-sufficient, eco-friendly, and comfortable. A home that grows its own food, collects its [...]

3-way-switch-wiring
3-Way Switch Wiring: A How to Comprehensive Guide Here at the off grid cabin we’ve done our fair share of electrical work including 3-way switch wiring. We’ve done all the internal and external [...]

solar generator
How To Find The Best Solar Generator When we first cleared the land to build our off grid home back in 2016, we started with one of those small 700 watt Moto Master [...]

Off Grid Heating
The Best Off Grid Heating Methods Introduction To Off Grid Heating If you're Living off the grid already or planning to in the future, you already know how important it is to have [...]

off grid appliances
The Best Off Grid Appliances for Off Grid Living Introduction To Off Grid Appliances Living off the grid can be a rewarding and fulfilling experience, but it also comes with some challenges. One [...]


Hi There,
First off, I want to say that this blog you’ve put together is just amazing. Thanks you so much for putting forth the effort on this project. It’s incredibly inspirational and educational, thorough yet easy to grasp. I have two questions if you’re around though.
The gentleman you’re working with puts together the walls and lifts them square/plumb. He puts in a support to steady them one at a time with a floor placeholder and also covers the base with OSB across the bottom.
1) I don’t see a drill. Did he use a nail to steady the support and how does one get it out later?
2) Why the use of OSB across the bottom prior to the full sheathing phase?
Thanks again!
Hey there Max!
Thank you for the kind words! We’re so glad to hear that you are enjoying the build so far
To answer your questions…
1) There is only 2 of us on the build and so once we raised one wall perpendicular (2 of us lifting), one would hold it there while the other put one nail (with the cordless nail gun) through the top of a 2×4 (placed aprox ¾ up the side of the raised wall) to create a 45 degree angle.
Then we drive one nail through the bottom of the 2×4 into a scrap piece of blocking. Now we plumb the wall (as close as possible) and drive a wood screw through the top of the blocking on the floor to hold it. If we have to “fine tune” the plumb later we partially unscrew the block and tap it (not the wall) until we’re plumb. This is a much better technique than the usual method of knocking off the top of the 2×4 and trying to re-nail it plumb. When we’re done, we simply knock the 2×4 off and unscrew the wood block.
2) Our floor incorporates a sandwich technique. Here’s what I mean… We build the floor joist, then cover it with OSB, build and raise all the walls as you see here. Later, once we’re finished with the framing, roof closed in, windows/doors all installed THEN we’ll put down FOAMULAR CodeBord Extruded Polystyrene Rigid Insulation – 48 Inch x 96 Inch x 1 Inch Ship Lap Edge and then another layer of OSB. Next we cover that with CGSB Approved Vapour Barrier (6mm POLY) and lastly we’ll be putting down our laminate flooring.
The FOAMULAR core acts as a thermal break between the inside and out and is a highly effective method used in arctic homes. In addition, the first layer of OSB gets pretty mucky during the build and it’s nice to put that laminate flooring down on clean, undamaged OSB.
Thanks for some really great questions Max. We’ll be cover every bit of all this in upcoming posts so stay tuned.
Cheers!
Steve
Hey Steve,
1) Alright, gotcha. Sounds like you just pound out the support beam and then unscrew the support block when you’re ready to square/plumb. Get all your walls close to perfectly straight, the unscrew as needed. Cool, I thought there had to be a screw in there somewhere. Looked kind of tricky nailing all that stuff in.
2) I don’t think my question was articulate enough on this one. I wasn’t meaning the floor but the piece of ply nailed to the bottom half of each frame. What’s the strategy in that? Why is that useful before anchoring them up? Please forgive me if I’m missing something.
Thank a bunch!
You got it Max.
The OSB along the bottom gets nailed on after we’ve gotten at least three exterior walls plumb and square. Sometimes folks will get only two interesting exterior walls plumb and square, nail them together and then knock off the bracing only to find by the time they put up the third wall everything is off and required bracing again. This is just an extra step we took to avoid that happening. As well, we’re framing the loft floor joist before completing the rest of the main floor framing and that requires the additional rigidity provided by the OSB for working up top. You’ll see that in this post here. Hope that answered your question and hey… maybe I answered someone else’s question with that first reply LOL!
Thanks Max!
Steve
Hi Steve, It’s been a while and I thought I’d come back for another look at your amazing cabin. I haven’t seen it this finished and you’ve done a great job!
Hi this is Brock McIntyre and I love your project, I am 51 yrs old getting ready to retire and what you are buiding is exactly what I want to build for my retirement home(I live alone) I am currently preparing or my build that will start in 1.5 yrs and your project is of great interest for me…thank you so much.
Barock McIntyre