

How to Harvest RainWater for Off Grid Living: A Step-by-Step Guide
Everything You've Asked About Rainwater Harvesting Off Grid And More!
A Step-by-Step Guide To Designing & Building Your Own Water Harvesting System.

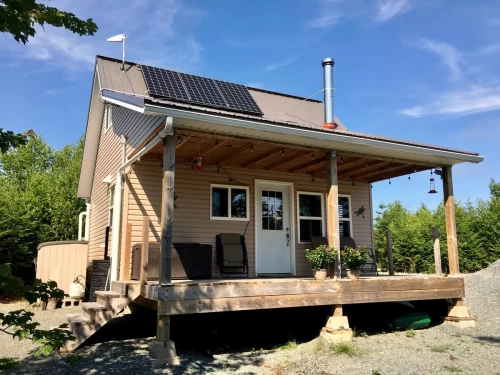
Water is one of the most essential resources for human survival, but it can also be one of the most expensive and scarce ones, especially for those who live off the grid. If you are looking for a way to reduce your water bills, conserve water, and become more self-reliant, then harvesting rainwater might be the solution for you. We’ve built our own rainwater harvesting system that includes a “first flush” component which serves to automatically clean our roof from contaminants at the beginning of every water collecting event.
So what is rain water harvesting? It’s the practice of collecting and storing rainwater that falls on your roof or other surfaces, and using it for various purposes, such as drinking, cooking, washing, gardening, and more. It is a simple, sustainable, and cost-effective way to provide free water for your off-grid home. You can also use the collected rainwater to supplement any drinking water you’ve brought or bought for your off grid home. You aren’t forced to drink it even though it can be easily and cheaply filtered to make it drinkable.
In the following blog post, I’ll show you how to harvest rainwater for off-grid living in four easy steps.
- How to choose a suitable location and method for collecting rainwater
- How to install a storage tank or barrel to store the collected rainwater including building a “first flush” system
- How to add a pump and a filtration system to pressurize and filter the rainwater
- How to connect the rainwater system to your off-grid home’s water supply
NOTE: This serves as a reference solely. Be sure to research and adhere to the rules, regulations and laws in your area.
By following this step-by-step guide, you will be able to enjoy the benefits of harvesting rainwater for off-grid living, such as saving money, reducing your environmental impact, and becoming more independent. So, let’s get started!
Want Us To Show You Our Complete Cabin Build Instructions & Costs?
You can grab our complete floor plans, materials list, cost list and a step-by-step build list as a THANK YOU for just or dropping by and checking us out!
Step 1 Choose a suitable location and method for collecting rainwater
One of the first steps to harvest rainwater for off-grid living is to choose a suitable location and method for collecting rainwater. This will depend on several factors, such as the type of catchment you want, the amount of rainfall in your area, the size and type of your roof, the space and budget you have, and the legal regulations in your state/province/country. Find the Canadian Rainwater harvesting regulations here.
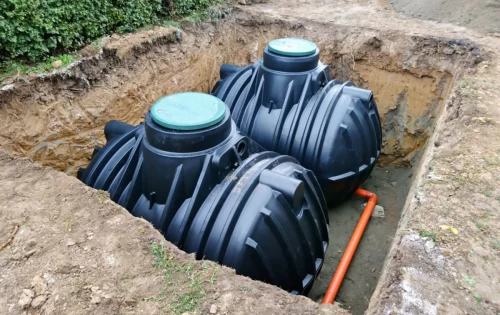
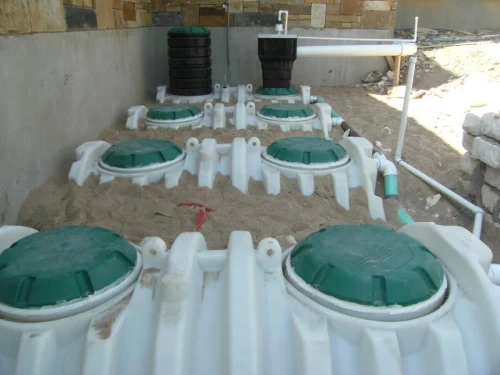
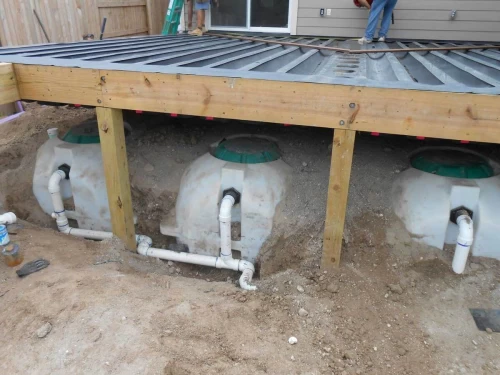
The most common and effective way to collect rainwater is by using your own gutters, which then collect the rainwater in rainwater barrels or plastic tanks. This method allows you to capture large volumes of water from your roof, which is usually the largest catchment area in your property and store it for later use.
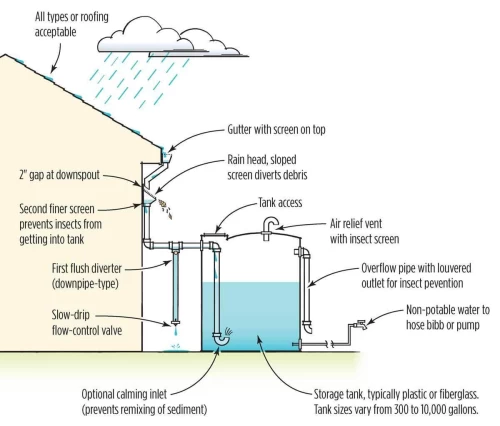
You can also store water in an underground cistern. We also make use of a first flush system to divert the first dirty water that comes from off the roof. This helps to significantly improve the quality of the water you collect.
If you do not have the option to collect rainwater from the roof, or if you want to increase your water supply, you can use other methods, such as using a large tarp placed on the ground, which then channels all the water into a barrel or cistern. This method is simple and cheap, but it requires a lot of space and maintenance. You can also use other catchment areas, such as patios, driveways, or green roofs, to collect rainwater.

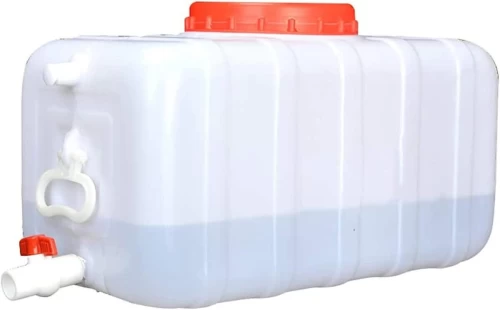
Another important factor to consider is the total storage capacity of your rainwater collection system. You’ll need a large enough tank/barrel or multiple tanks/barrels to store the collected rainwater for later use during extended dry spells and during cold weather events (winter). We also have a 300 liter (80 gallon) secondary water container in our loft that stays at cabin temperature all year long. We can easily fill this horizontal water tank with a small portable electric pump or even a small cordless drill pump. The size of your tank or barrel will depend on how much water you wish to have on hand, how often it rains in your area, and how much space you have to store your rain water.
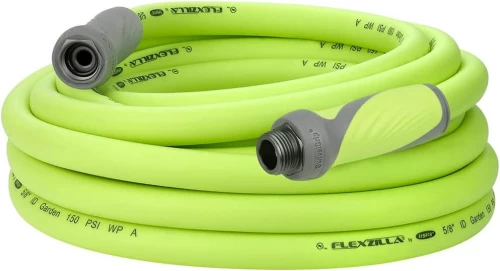
We use a small electric pump to transfer potable drinking water from a couple of 5-gallon water jugs up to the water storage tank in the loft using a drinking water safe Flexilla garden hose reserved just for this evolution.
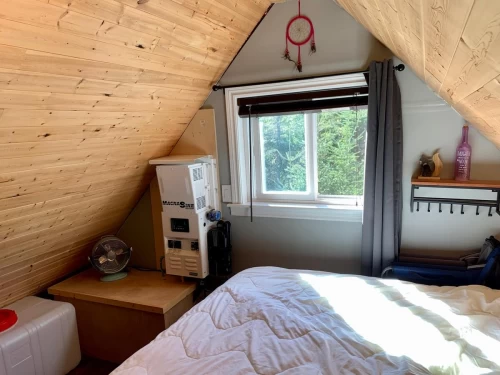
Our loft tank, in the bottom left of the above photo, holds 80 gallons (300 liters) of drinking water. There is a triangular shaped tank that we are looking to purchase to further increase the floor space. Since the loft has 45 degree ceilings we have a lot of storage space along the bottom edge.
By choosing a suitable location and method for collecting rainwater for off-grid living, you will be able to maximize your water resources and reduce your dependence on external water sources.
We may consider something like this in the future. For now we get enough rain, often enough here in Nova Scotia, that we’ve never been without water. Also, we live 60 feet from a fresh water lake and since we’re not drinking the water we can always pump it from the lake to use as shower water.
Step 2 How to install a storage tank or barrel to store the collected rainwater
1 Gather Your Materials
Before you begin, make sure you have all the necessary materials and tools on hand such as…
Rainwater storage tank or barrel
Level
Concrete blocks or a stable platform
Gutter system and downspout
First flush diverter (optional)
Overflow system
Pipe and connectors (if needed)
Prescreen or filter (for keeping debris out of the barrels)
Garden hose or pipes
T-connectors and clamps
Post barrel filter (for keeping debris out of the pump)
2 Choose the Right Location
Select a suitable location for your rainwater storage tank or barrel. It should be close to the area where you plan to use the harvested water and near your gutter downspout. Ensure the ground is level and stable to support the weight of a full tank. 55 gallons of water weigh 460 pounds. We placed our barrels on cinder blocks as we have two water barrels that are connected.
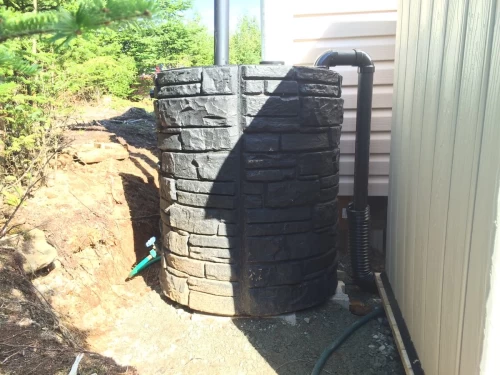
This allows us to ensure both barrels are at the same height so that when it rains each barrel always has exactly the same amount of water in them. This also allows each rain barrel to feed into one another and can also feed the pump independently. This allows us to take one barrel off line to drain, clean and do maintenance while the other is fully operational.
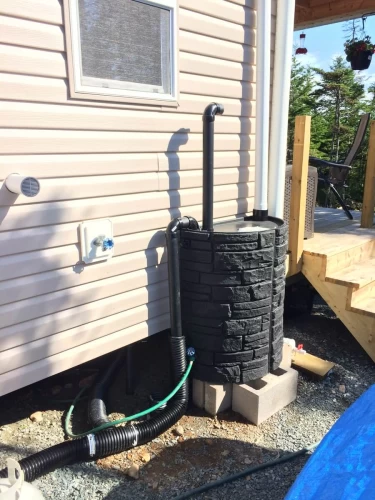
To take advantage of the rainwater that flows off your roof, your barrel should be installed at the bottom of a downspout, either on your home, garage, or shed. Initially (before we built our first flush system designed) we had the barrels at either end of the deck directly below the downspout just to test out how everything would work.

You may need to cut the downspout above ground level and insert it into the top of the barrel with a hose or a pipe. Or create a diverter system like we did. Make sure the location you choose is level, stable, and accessible. You may need to use some brackets, straps, or blocks to secure the barrel to the wall or the ground. You don’t want your barrel to tip over or roll away when it’s full of water. You also need to seal any gaps or holes in the barrel or the hose with silicone or caulk to prevent leaks and definitely mosquitoes!
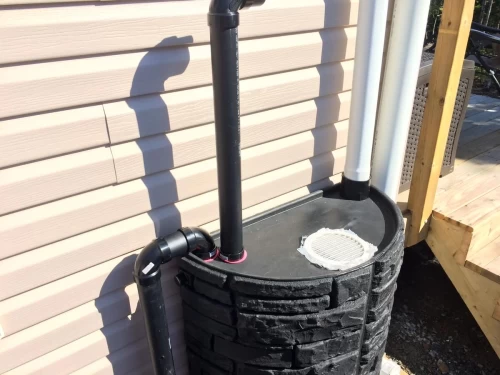
As I said we have incorporated a “First Flush” system that diverts the first flow of water from the roof away from our main catchment system and allows it to slowly drain away from the cabin. The first pass of water in any storm essentially washes your roof of all the sediments that have collected since the last rain, such as pollutants, debris, bird droppings, and other contaminants. By using this first flush system, you can protect your storage tank from contamination and ensure much better quality of your harvested rainwater.
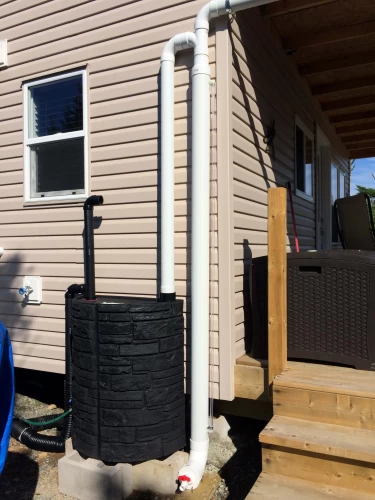
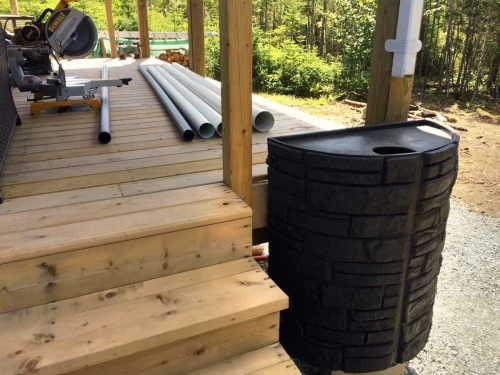
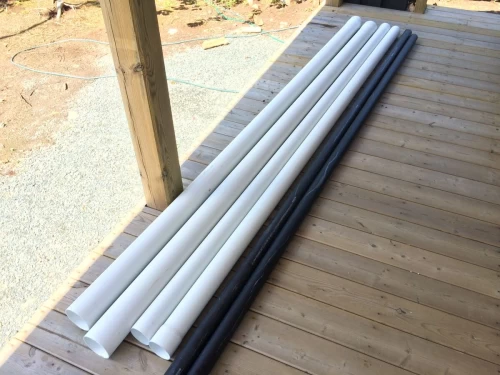
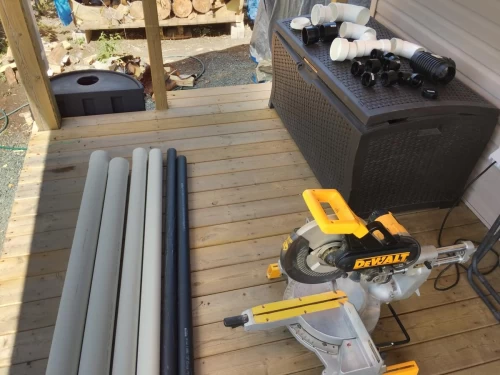
We built ours using sections of 4″ and 3″ PVC, elbows, connectors, a shut off valve at the bottom of the main catch tubes and an empty water bottle inside the main tubes. The water bottle floats to the top and blocks the main tube off and thus diverts the remaining rainwater into the rain barrel. We leave the valve open a crack which allows the main tube that catches all the roof sediment to slowly drain after the rain has stopped. This resets the system automatically for the next time it rains.
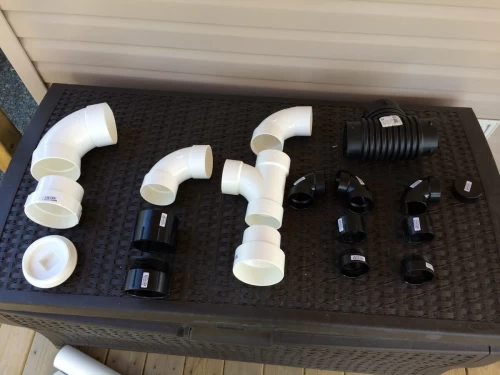
We also built a “site glass” using a few PVC elbows and a clear piece of vinyl tubing so we can see how quickly the water is filling the system and also to ensure its draining as a rate we want after the rain has stopped.
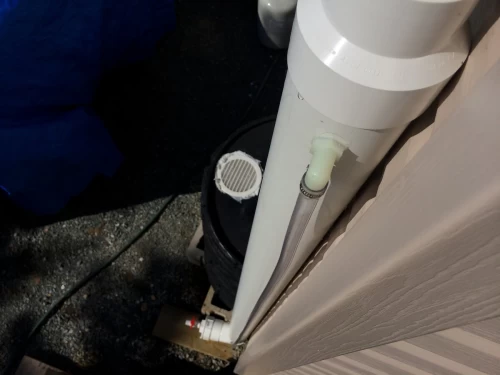
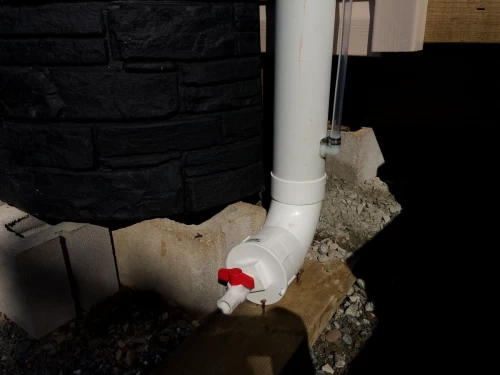
The valve at the bottom allows us to drain the collection tube at a desired rate. Sometimes if we’re getting a big storm coming we will drain the rain barrels, leave the rain barrel drains open and leave the drains at the bottom of the main tubes open to fully flush out the system. it takes only an hour of rainfall to fill both rain barrels.
Here is a detailed video explaining the set up of our first flush system by YouTuber LDSPrepper…
3 Prepare the Foundation
If you’re using concrete blocks, arrange them in a stable foundation pattern to support the tank or barrel. Ensure they are level and well-compacted. For smaller barrels, a solid, level surface is sufficient.
4 Install the Gutter System
If you haven’t already, set up a gutter system on your roof to direct rainwater towards the downspout leading to your storage tank or barrel. Install a first flush diverter if desired to divert the initial rainwater flow and reduce debris entering the tank. You can install a small plastic leaf guard in the opening of the gutter drain or a complete gutter protection system.
5 Connect the Tank or Barrel
Position the rainwater storage tank or barrel on the prepared foundation. Ensure it’s level and secured in place. Connect the downspout to the tank’s inlet, one you’ve created, or have it drain over an inlet screen to prevent debris from entering.
6 Set Up an Overflow
Install an overflow system, typically a pipe or hose, near the top of the tank or barrel. This allows excess water to flow away once the container is full, preventing overflows or damage.
7 Screen or Filter
To ensure the stored rainwater remains clean, install a screen or filter over the inlet to catch any remaining debris. You need an opening large enough to reach in and clean out the inside either with a brush or wet dry vac. There are also filters you can incorporate before the rainwater enters the barrel like this leaf eater system.

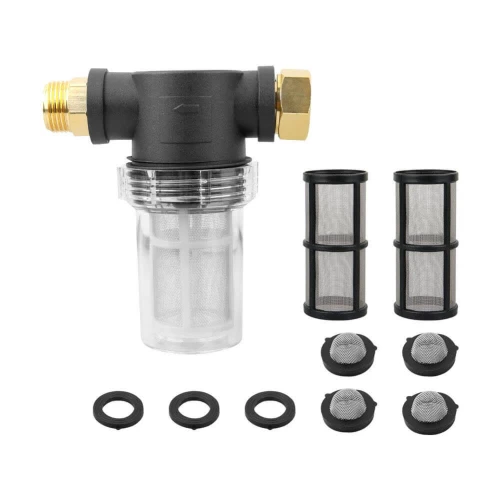
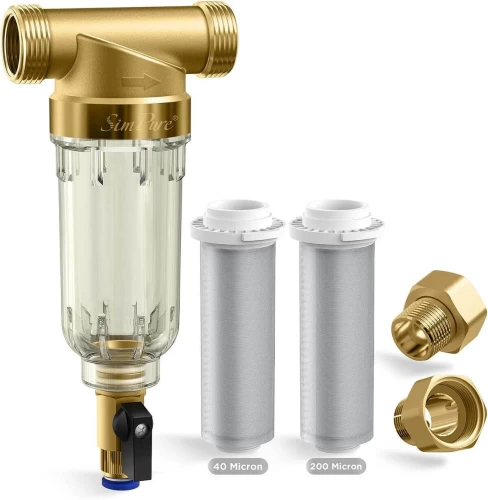
We have also installed an in-line garden hose filter on the outlet side of the tank before the water enters up from underneath the cabin and into our shurflo water pump.
8 Regular Maintenance
Check your system periodically for debris in the gutters, screens, or filters. Clean them as needed to maintain the efficiency of your rainwater harvesting system. We drain our barrels once a month, use a wet/dry vac to get the very bottom cleaned out and also add a capful of bleach to each barrel to help keep the water more sterile.
By following these simple steps, you can install a rainwater storage tank or barrel that will last and function worry free for decades.
Step 3 How to add a pump and a filtration system to pressurize and purify the rainwater
1 Assess Your Water Needs
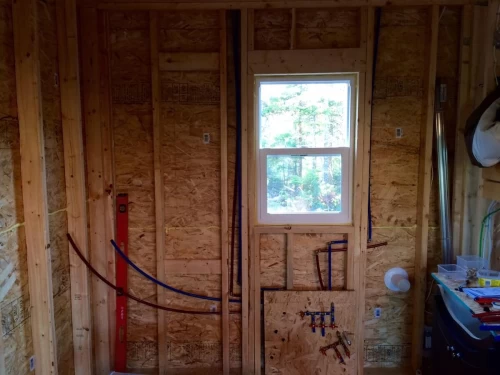
Before you start, calculate your daily water requirements to determine the appropriate pump and filtration system capacity. Consider both indoor and outdoor uses to ensure you have enough water for your household. We build a manifold to divert not only the exterior rainwater to different systems of the cabin (bathroom shower, sink, kitchen sink, exterior faucet) but also a valve section that isolates the exterior rainwater and allows us to feed solely from fresh potable water stored in the 80 gallon tank in the loft to all the entire system as well. This is imperative when the outside water is drained/frozen. Because we are so close to a freshwater lake we can easily pump lake water into our rain barrels to use for showering and as a gray water supply.
This is the style of horizontal water tank we have in the loft.
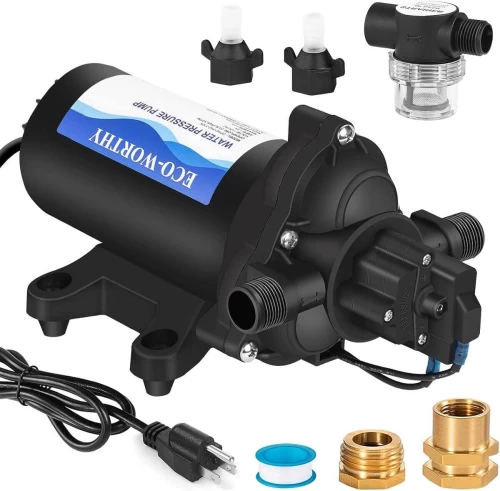
2 Choose the Right Pump
Select a water pump that suits your needs. Options include…
Submersible pumps: Placed inside the water tank, they are great for deeper installations.
Surface pumps: Installed above ground, they work well for shallow water sources.
DC or AC-powered pumps: Choose according to your available power source (solar, wind, generator, etc.)
3 Install the Pump
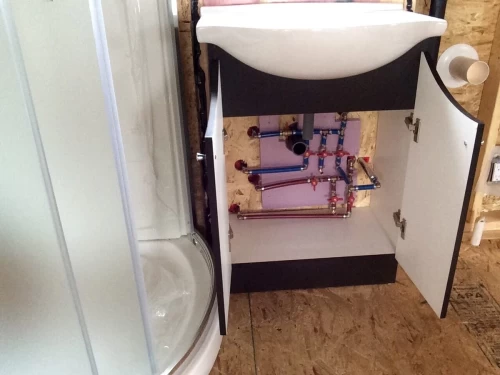
Position the pump either inside the water tank (submersible) or inside where you can access it for regular maintenance. I installed ours under the bathroom sink where I also built a manifold to isolate each system in the cabin in case I needed to service one system while still using the others. For instance I can isolate the entire kitchen sink and still use the bathroom shower, sink and outside faucet.
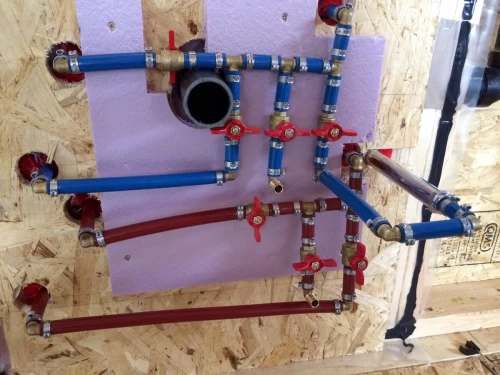
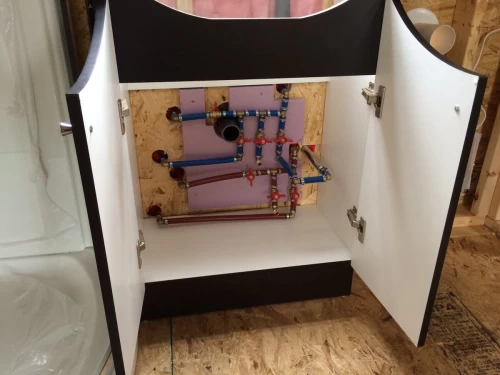
I also installed the accumulator and pump all under the sink.
4 Select a Filtration System
Choose a filtration system based on your water quality and intended use. Common types include:
Sediment filters: Remove larger particles like dirt and debris.
Carbon filters: Eliminate odors, tastes, and chemicals.
UV sterilizers: Kill bacteria and pathogens.
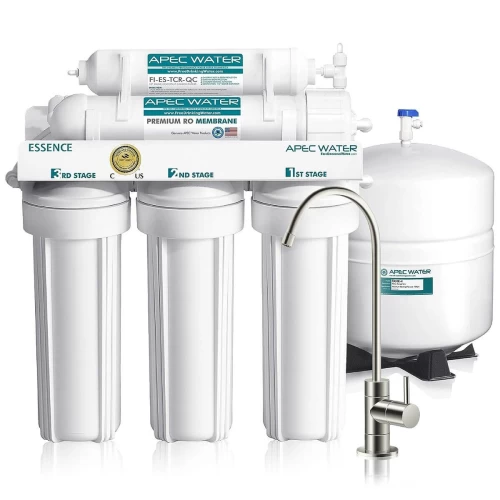
Reverse osmosis systems: Provide comprehensive purification.
We have the first flush system before the rain barrels, a post rain barrel (pre pump) filter and an interior in-line filter before the pump as well as an inline filter after the pump. We do not drink the rain water but instead have jugs of drinking water we refill as well as the 80 gallons of potable water in the loft. However, we do have water purification tabs, a Katadyn BeFree water filter and a Sawyer Squeeze PointOne Water Filter as well in the event we need to drink the rain water.

5 Install the Filtration System
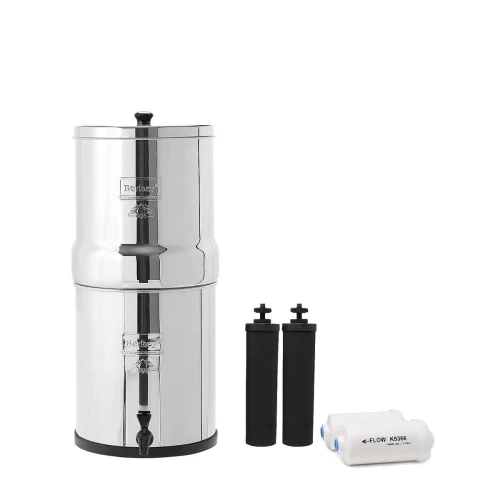
If you are installing a water purification system install the chosen filtration system after the pump, preferably under the sink or in a closet to ensure clean water distribution. Always follow the manufacturer’s instructions carefully for installation, and regularly change or clean the filter cartridges as needed. A lot of folks we know use a Berkey Water Filter although we’ve never used one. My brother has this reverse osmosis system at his off grid cabin.
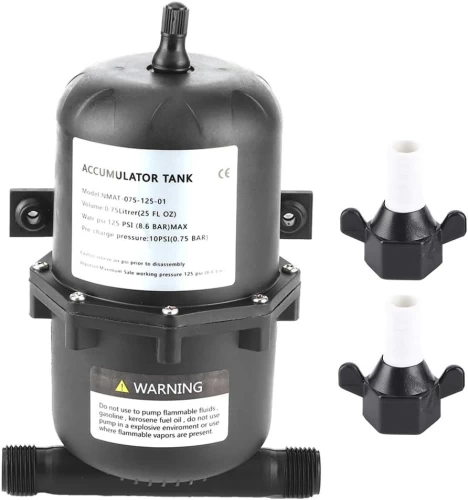
Step 6 Set Up a Pressure Tank
For consistent water pressure, add a pressure tank to your system. Also called an accumulator. It stores water under pressure by filling its reservoir under pressure with a rubber diaphragm, reducing the pump’s frequency and providing a steady flow of water when needed. We have a Shurflo 3 Gpm which suits us perfectly and provides enough water flow to run the shower and sink faucet simultaneously. I also installed an Accumulator Pressure Tank delivering 0.75 L at 125 PSI that allows us to save a vast amount of water. The accumulator allows us to slightly open the faucet on and have the water just trickle out exactly like when you’re on city water pressure instead of slightly opening the water and always having the pump run continuously, all the time, no matter what.
Step 7 Regular Maintenance
Maintain your pump and filtration system by checking for clogs, leaks, and wear regularly. Clean or replace filters and components as required to ensure the system’s efficiency and longevity. We clean our inline filters monthly and also drain the rain barrels. We also add a cap of bleach to the barrels to keep the water more sterile.
Step 8 Monitor Your Water Quality
Regularly test your rainwater for quality and use a premium drinking water test kit if you are filtering/sterilizing/purifying your water for consumption to ensure it remains safe for consumption and household use. Address any issues promptly and never let your water sit longer than a month especially in hot weather. The longer your water sits stagnant the greater the risk for it to turn unusable. Never take chances with your water!

Step 4 How to connect the rainwater system to your off-grid home’s water supply
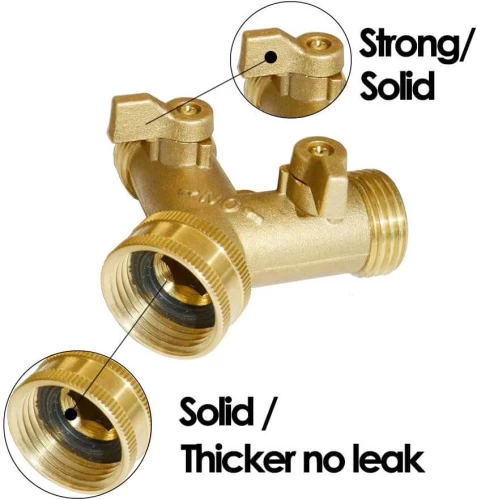
We connected our rain barrel outlets to a brass Y-Splitter using drinking water safe 5/8″ Flexilla garden hose. This then connects to our exterior in-line filter using 1″ clear braided vinyl hose which comes up underneath the cabin and into a manual shut off valve.
The manual shut off valve then goes into a Tee connector. One side of the Tee goes to our 3GPM water pump and the other side goes up to the potable drinking water tank in the loft. All the interior plumbing is 1/2 inch PEX pipe, 1/2 inch brass connectors and SharkBite clamps.
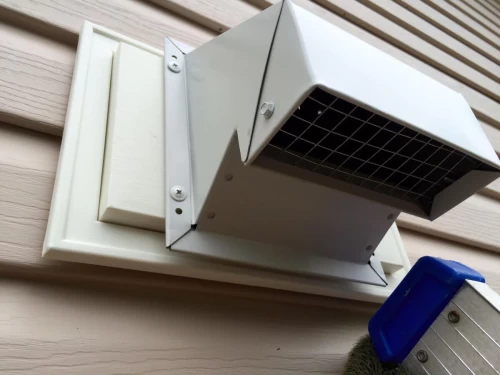
All the water is pumped through an on demand hot water heater that then feeds hot water to the sinks and shower. The hot water heater we chose is an Eccotemp L10 High Capacity Outdoor Tankless Water Heater that exhausts directly out the bathroom wall through a special stainless steel air gap port that I built. Hot water is instant and endless! We don’t use more than 30 lbs of propane in a year for hot water and that includes doing dishes in the kitchen sink.
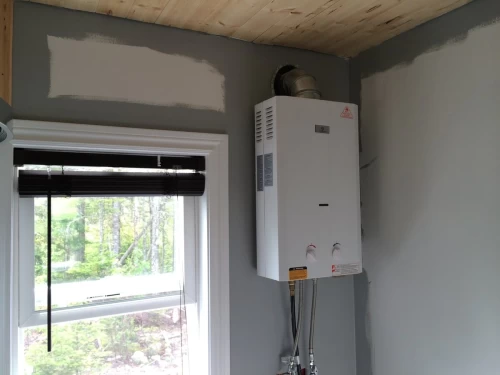
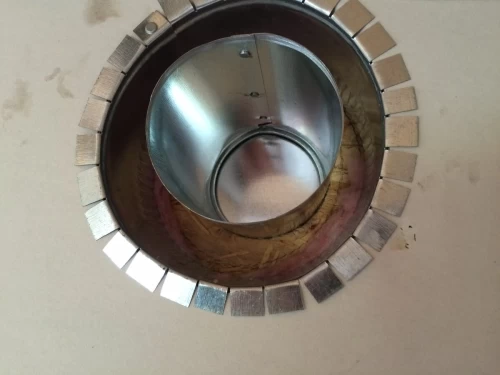
Its important the that exhaust pipe of the direct vent water heater does not come into contact with the drywall or the insulation. Hence the airgap and all metal construction of the exhaust port above. It also has a one way flapper that prevents air from coming back into the cabin.
To drain the greywater from the sinks and shower we have incorporated S or P traps under all the drains and combined all the drains into one ABS pipe that exits under the cabin and into a pre dug septic field.
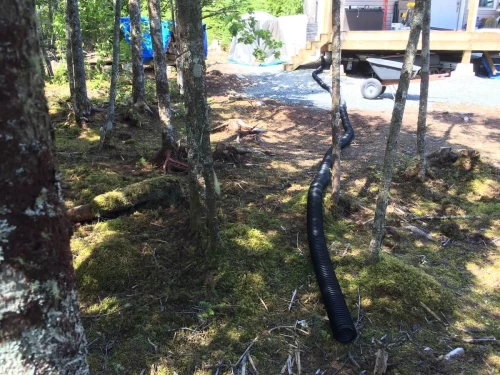
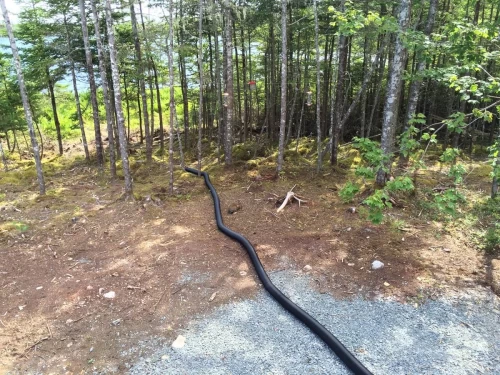
The drain line seen above has since been buried under ground.
However the only gray water we produce is soapy water. Our toilet is a Separett toilet and diverts the liquids and solids so there is no requirement for a septic system. That’s a whole other topic we’ll detail in an upcoming blog post.
Conclusion
Rainwater harvesting is much better than unnecessary water wasting.
Rainwater harvesting is a simple and effective way to collect and store water for your off grid living needs. By following our steps, you can install a storage tank or barrel to store the collected rainwater and use it for various purposes, such as irrigation, washing, flushing toilets, and even drinking. Rainwater harvesting can help you save money, conserve water, and protect the environment. It can also provide you with a reliable and sustainable source of water in case of emergencies or droughts. So what are you waiting for? Start harvesting rainwater today and enjoy the benefits of having free and clean water for your off grid living. We hope you’ve learned something new. If you have questions ask them below. we have an entire off grid community that loves to help us out and answer questions and share their experience.
Here are some additional Rainwater Harvesting resources we think you might find helpful…
This is a detailed video of “Rainwater Harvesting on a small structure created by Homesteadonomics
Be sure to poke around the site for more informative off grid living info including the complete build of our off grid cabin, a complete solar system guide and a mastering off grid living guide for off grid beginners guide.
Additional Solar Resources:
1. offgridgrandpa.com
2. simplyoffgrid.com
3. offgridpermaculture.com
4. sustainablyoffgrid.com
5. livingoffgrid.home.blog
7. ideasfourhome.com
8. practicaloffgridliving.com
9. rainsaucers.com
10. en.wikipedia.org
11. bluebarrelsystems.com
Your Turn...
P.S. If you enjoyed this post about How to Harvest RainWater for Off Grid Living: A Step-by-Step Guide then why not share it.
Share This Story, Choose Your Platform!
It’s how we keep growing our off grid community here and lets us know we’re posting the right kind of info you’re looking for.
Here’s a special Pinterest PIN for all our Pinterest fans out there!

Let us know what you think in the comment section below.
And be sure to join the rest of the off grid community here and follow along with the build of our cabin!
We’ll update the Building The Cabin section every time we complete a new phase of the build so be sure to check in and watch the progression.

how to clean solar panels
How to Clean Solar Panels: A Step-by-Step DIY Guide As you already know, residential and off-grid solar systems are amazing sources of renewable energy that are quickly growing in popularity. The large flat [...]

earthship
What Is an Earthship and How It Can Help Save the Planet Imagine living in a home that is completely self-sufficient, eco-friendly, and comfortable. A home that grows its own food, collects its [...]

3-way-switch-wiring
3-Way Switch Wiring: A How to Comprehensive Guide Here at the off grid cabin we’ve done our fair share of electrical work including 3-way switch wiring. We’ve done all the internal and external [...]

solar generator
How To Find The Best Solar Generator When we first cleared the land to build our off grid home back in 2016, we started with one of those small 700 watt Moto Master [...]

Off Grid Heating
The Best Off Grid Heating Methods Introduction To Off Grid Heating If you're Living off the grid already or planning to in the future, you already know how important it is to have [...]

off grid appliances
The Best Off Grid Appliances for Off Grid Living Introduction To Off Grid Appliances Living off the grid can be a rewarding and fulfilling experience, but it also comes with some challenges. One [...]


Leave A Comment