

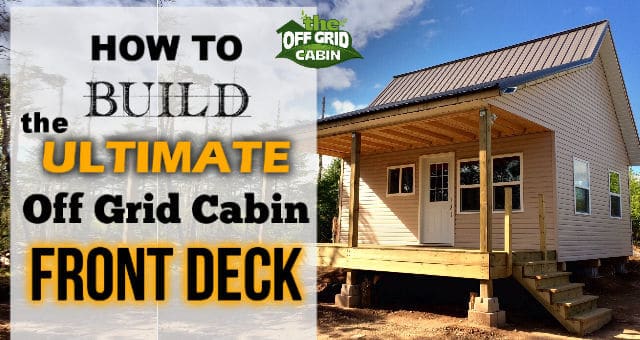
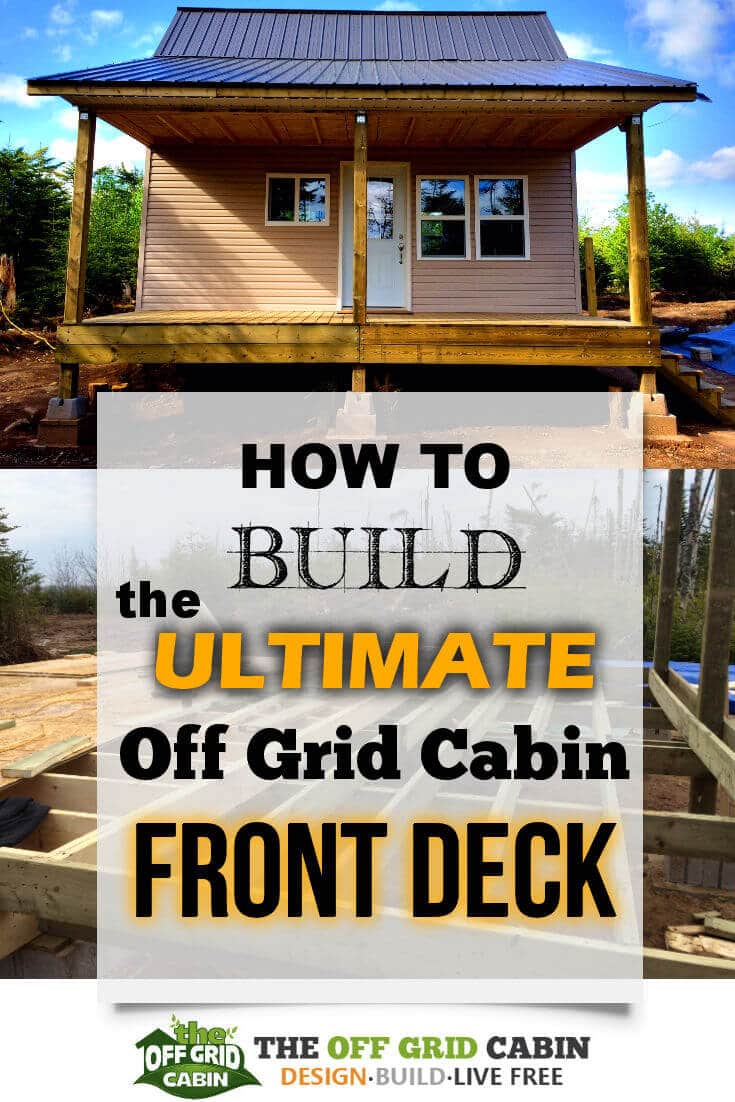
How To Build The Perfect Font Deck
Ready to soak up some rays from the front deck of your off grid cabin?
Imagine relaxing in your favorite Adirondack chair on the front deck of your off grid cabin.
The sun shines and a warm breeze slides over your arms while you breathe in the the sweet fresh scent of pine.
Birds are singing as you gaze out through the trees to the glistening lake just beyond.
This is how we built the front deck for our off grid cabin.
Today we cover the step-by-step “how to” of our 8ft x 20ft pressure treated covered deck.
You can fine tune our method or copy it to the inch.
Either way, you’ll end up with a rock solid front deck that will stand the test of time in any weather and in any climate.
It’s fast and easy to build and took us only one day.
How To Build The Perfect Font Deck
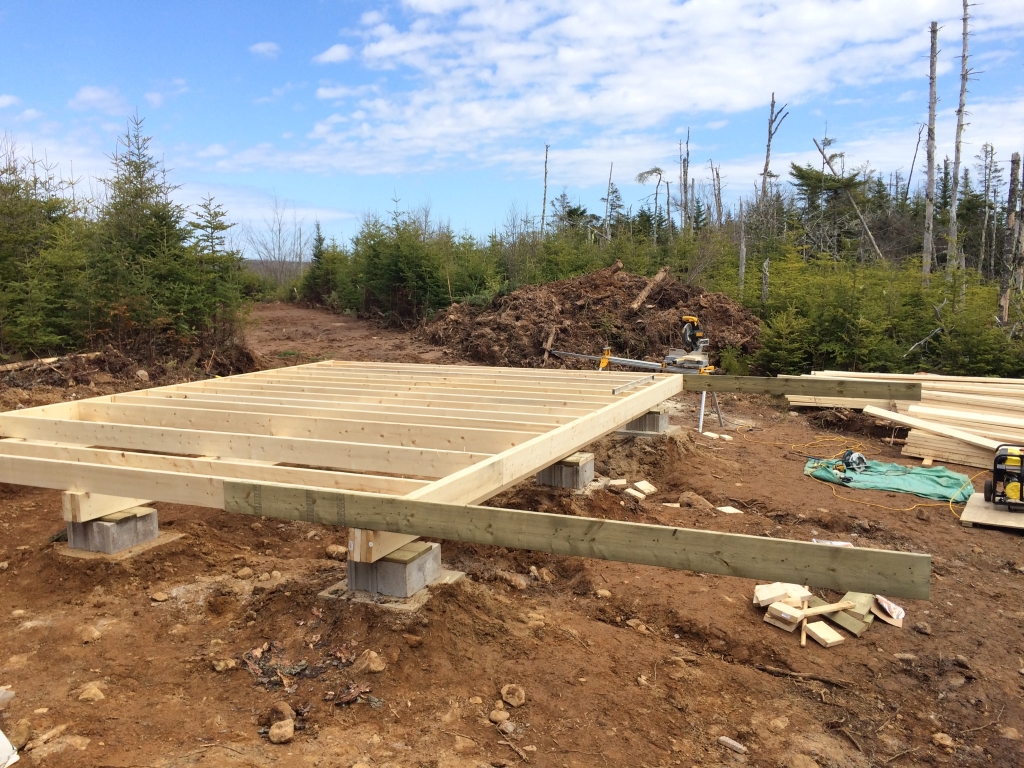
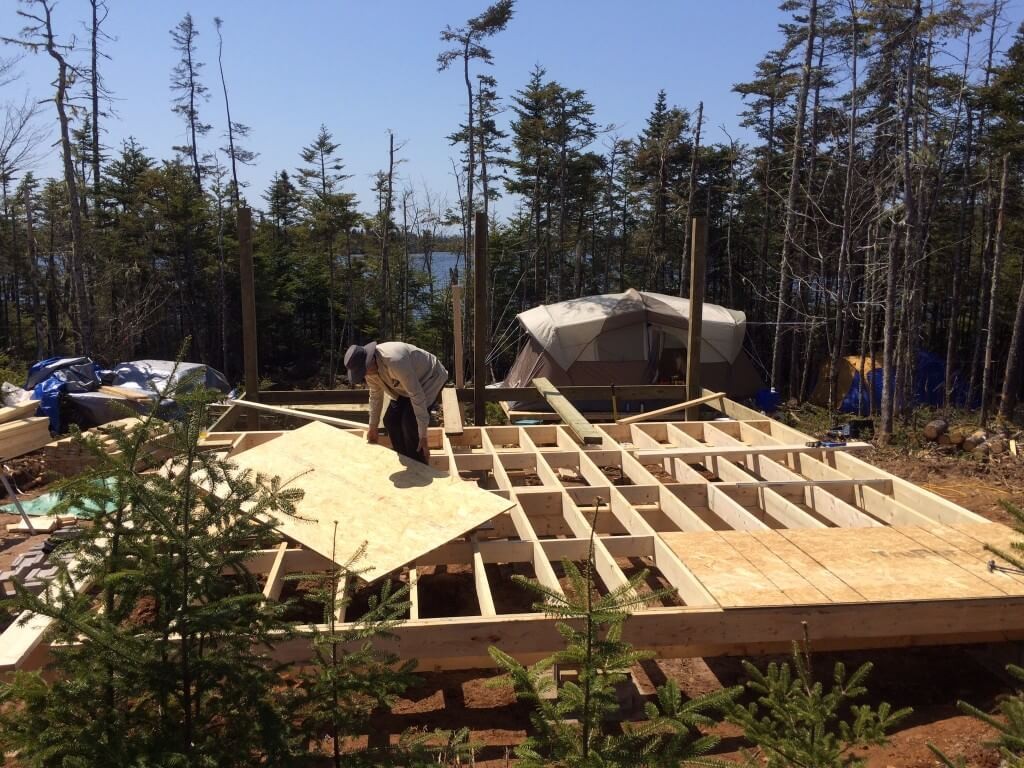
In the last cabin build post we showed you how to build the best foundation for an off grid cabin.
We finished up the concrete block footings, the three main floor support beams, and the floor joist.
The design considerations for our cabin foundation were…
- Inexpensive design
- Can be built in a singe day with just two people
- Requires no heavy equipment
- No digging post holes
- No pouring cement
- Only requires a level and some basic hand-tools
- Provides the ability to level the cabin easily during the build and in the future
- Affords an excellent thermal break for colder climates like ours
This is where we finished off with the foundation last time.
TIP: Always prevent regular lumber from coming into direct contact with cement/concrete by using a scab of pressure treated wood.
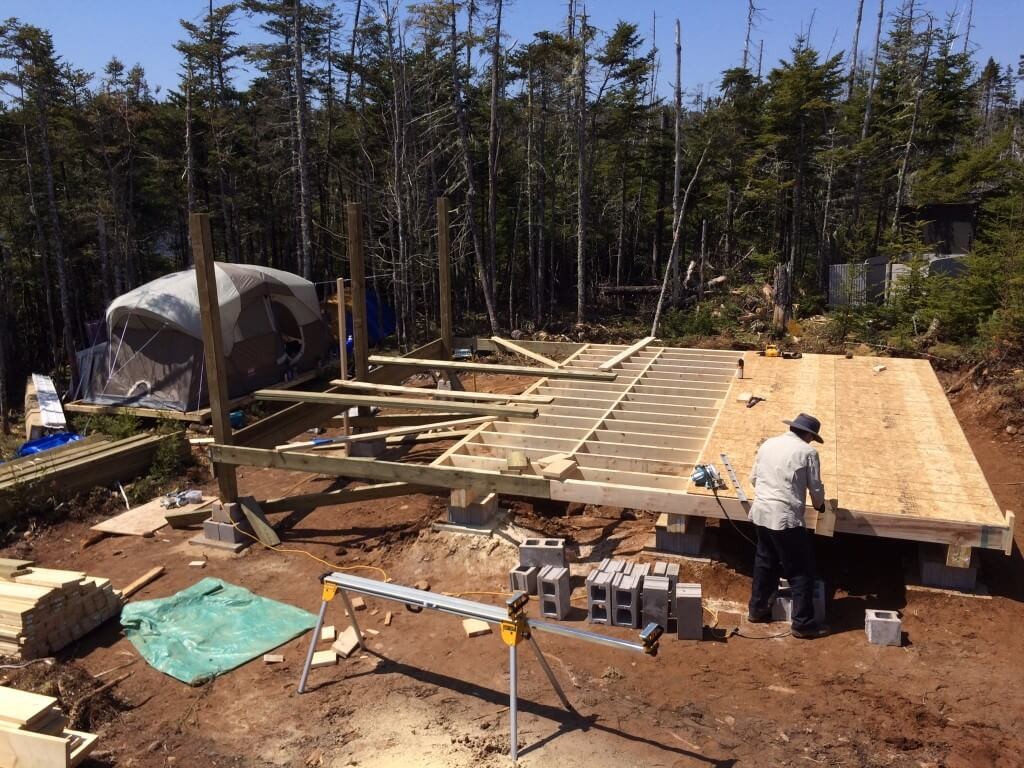
Designing The Front Deck
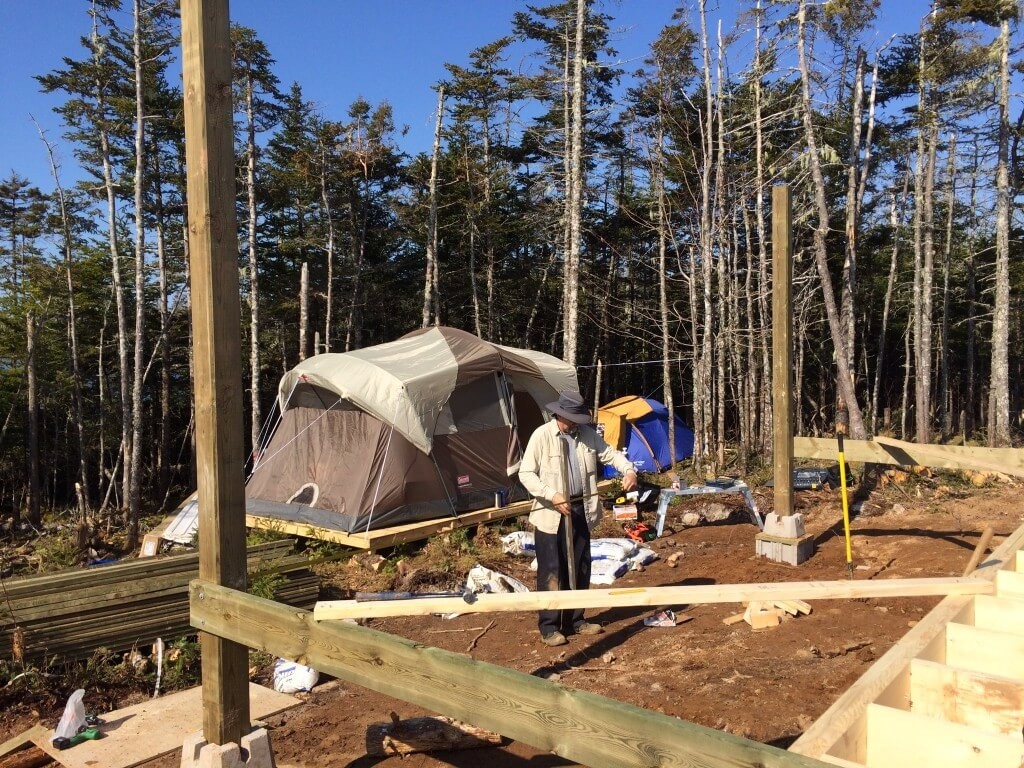
The front deck dimensions are 20′ x 8′ and consists of three 6″ x 6″ pt deck posts used to support the steel roof.
The attic space created above the deck will provide a weather proof crawl space/storage area.
The pitch of the main roof will be 12/12 while the portion over the deck will be 6/12.

This will aid in snow removal in winter and rain collection in summer.
FYI: The pitch changes from 6/12 pitch (22.5 degrees) over the deck to 12/12 pitch (45 degrees) near the top of the roof . We went with the 12/12 pitch (45 degrees) for the top 6 feet of the roof facing the front of the cabin because this matches our latitude exactly and is the perfect angle required for our solar panels.
We’ll also install two 7 Watt LED pot lights above the deck from inside the crawl space.
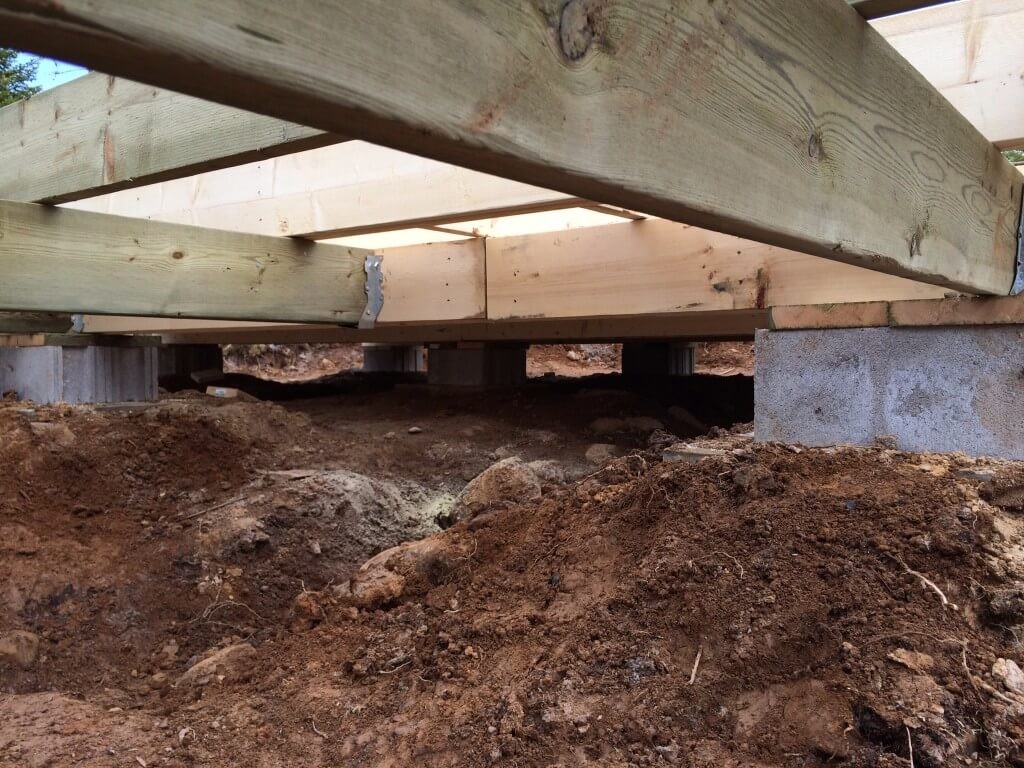
Front Deck Footings
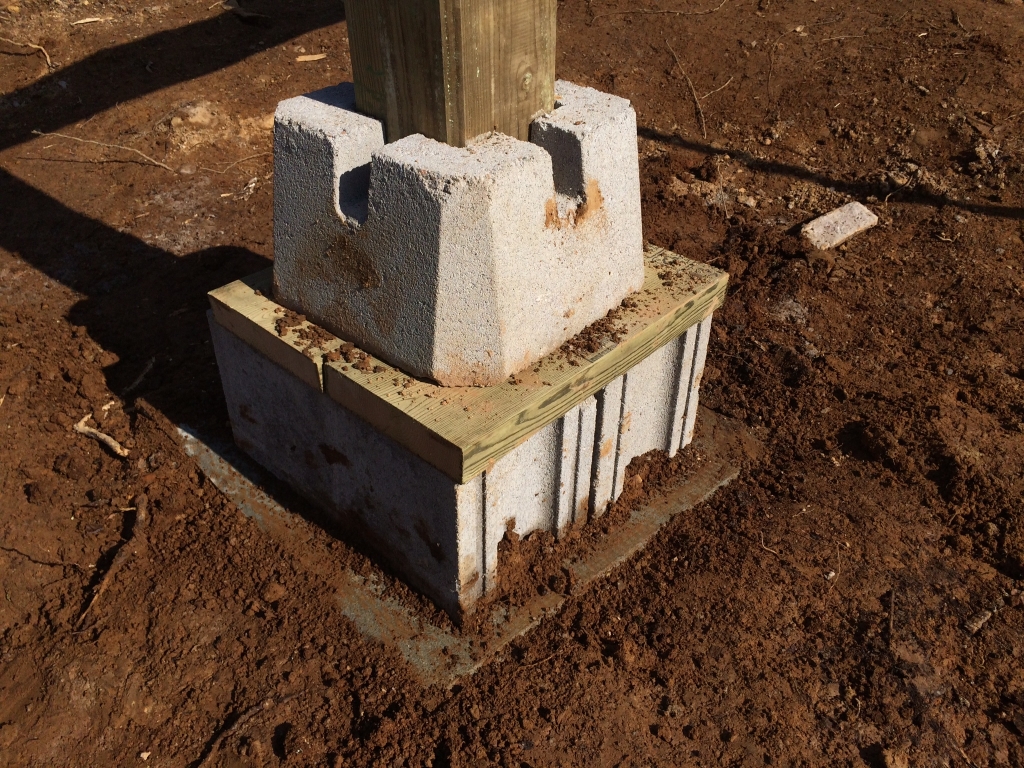
Just like the 8 footings for the main cabin floor joist, we used crusher dust and concrete pads to built our footings.
We leveled the ground down to undisturbed soil and then put down a layer of crusher dust to finely level the base.
Then we placed our 24″ X 24″ patio slab paver pads and made sure it was tamped down and level.
Next, we placed 2 cinder blocks side by side to bring the deck blocks up to an approximate height.
You shared the exact blocks and pads we used in our last post How To Build The Perfect Foundation For An Off Grid Cabin right here.
We topped the cinder blocks with scabs of pt wood for a solid surface for the deck block.
TIP: You can fill the cinder block with expanding foam or cement to prevent snow/ice from building up inside and potentially cracking the block.
Lastly we put down our 4-way concrete deck post block.
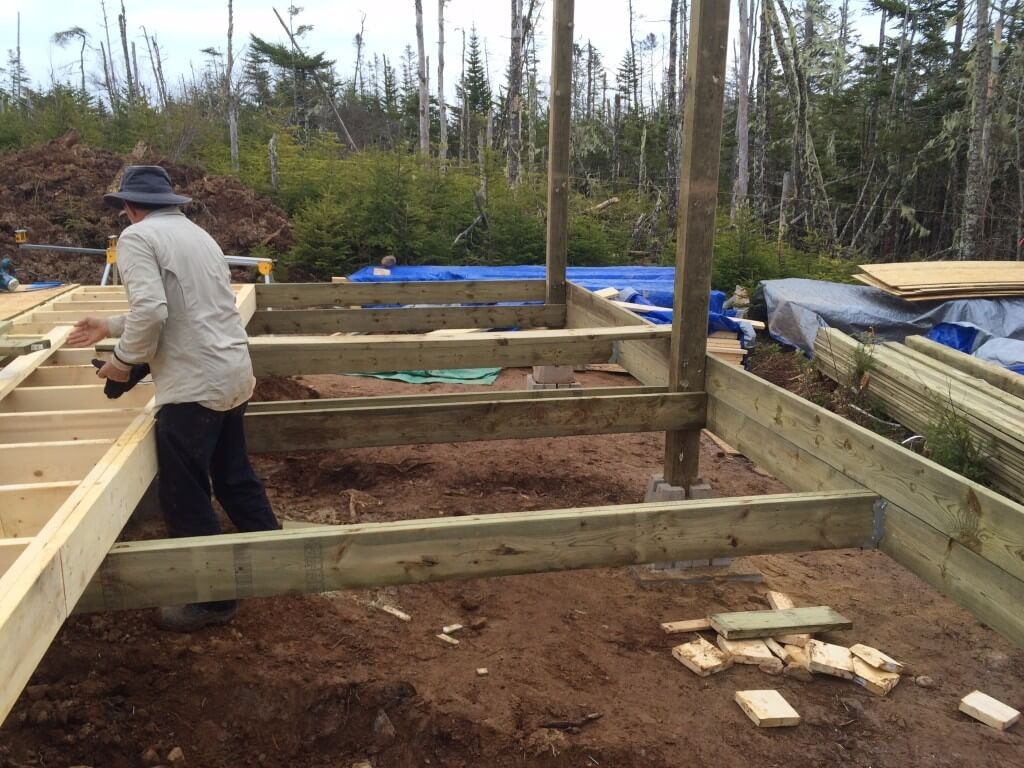
Framing The Front Deck
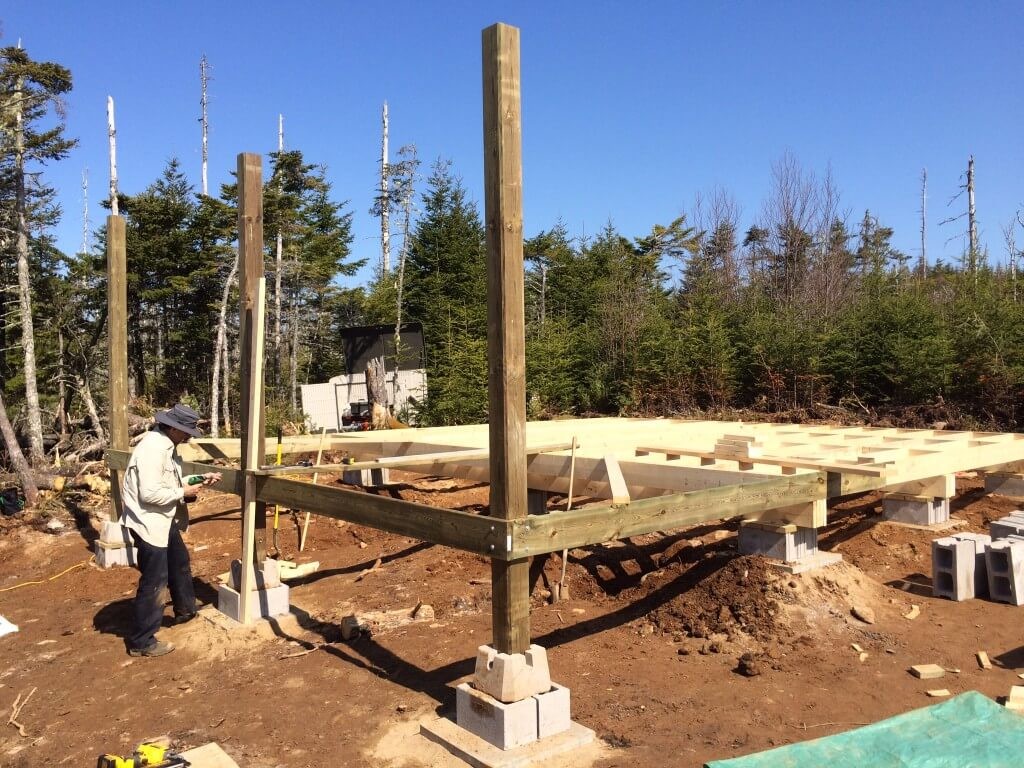
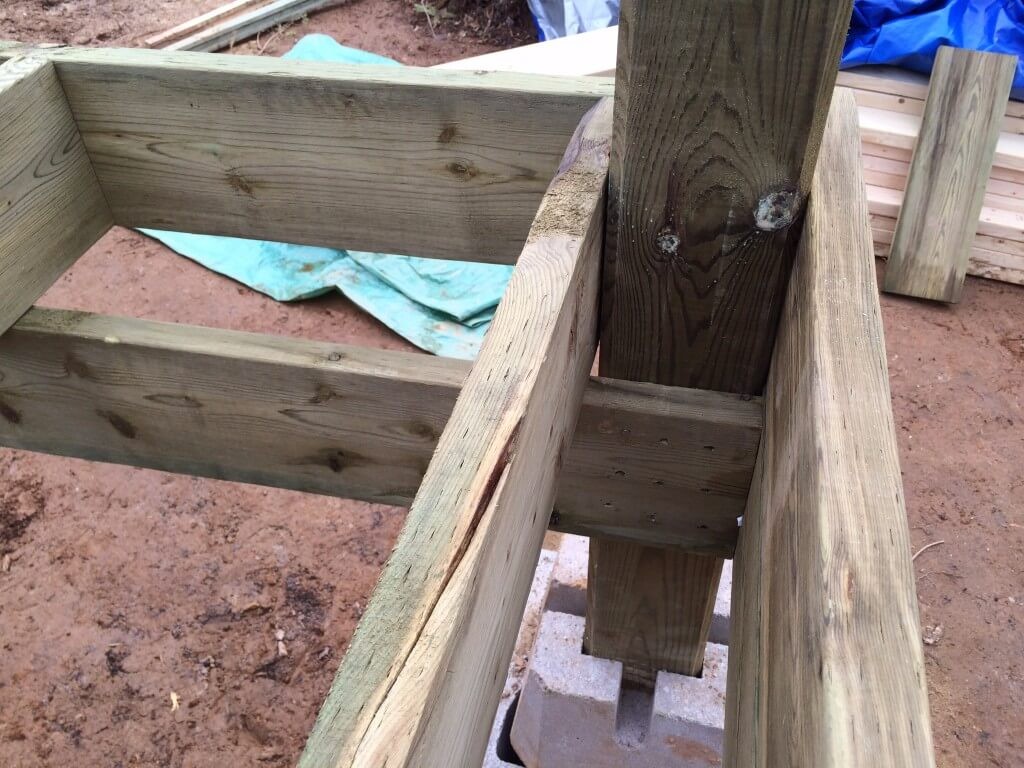
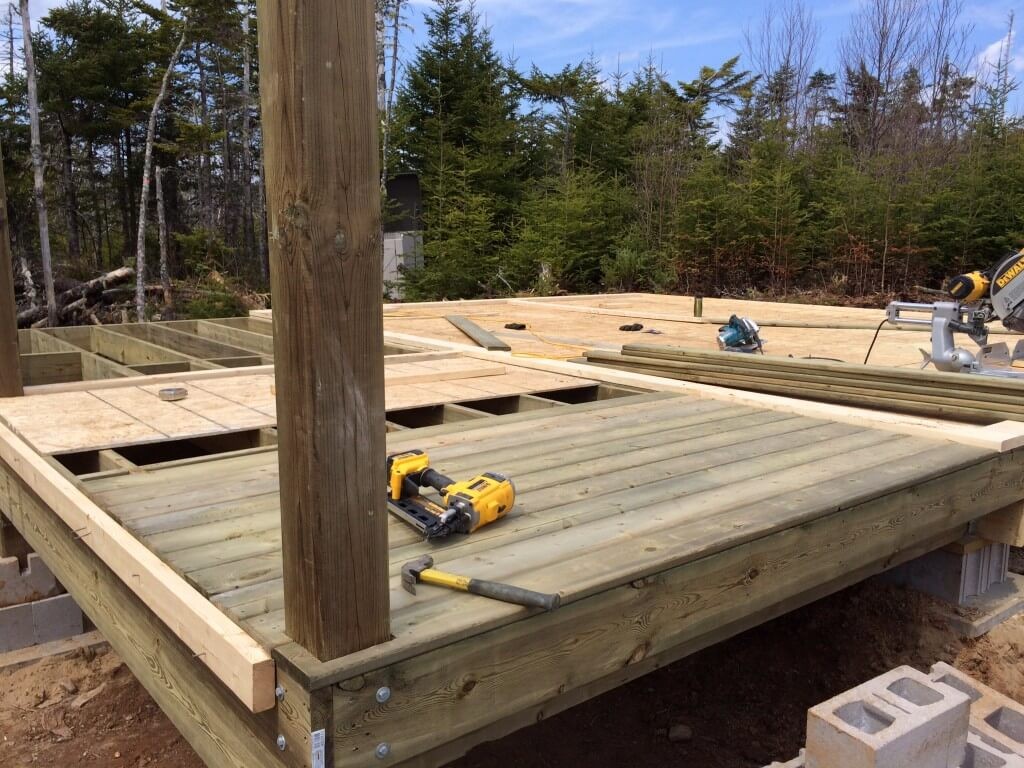
Once we finished leveling and installing the front deck footings we then installed the first two 6″ X 6″ deck posts.
We used the exiting pressure treated runners to attach the posts.
After installing the two end posts we can now find the exact center for the middle block and post.
Middle deck post installed and leveled.
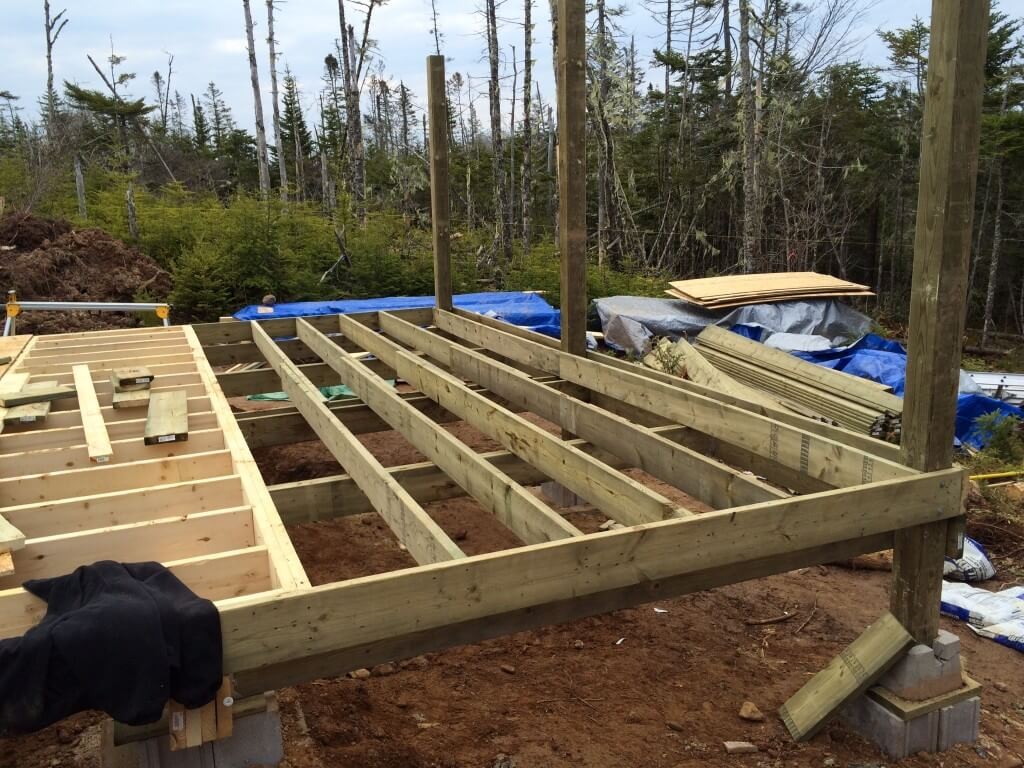
Notice we’ve installed floor joist bracing using 2×4’s for the main cabin floor joist.
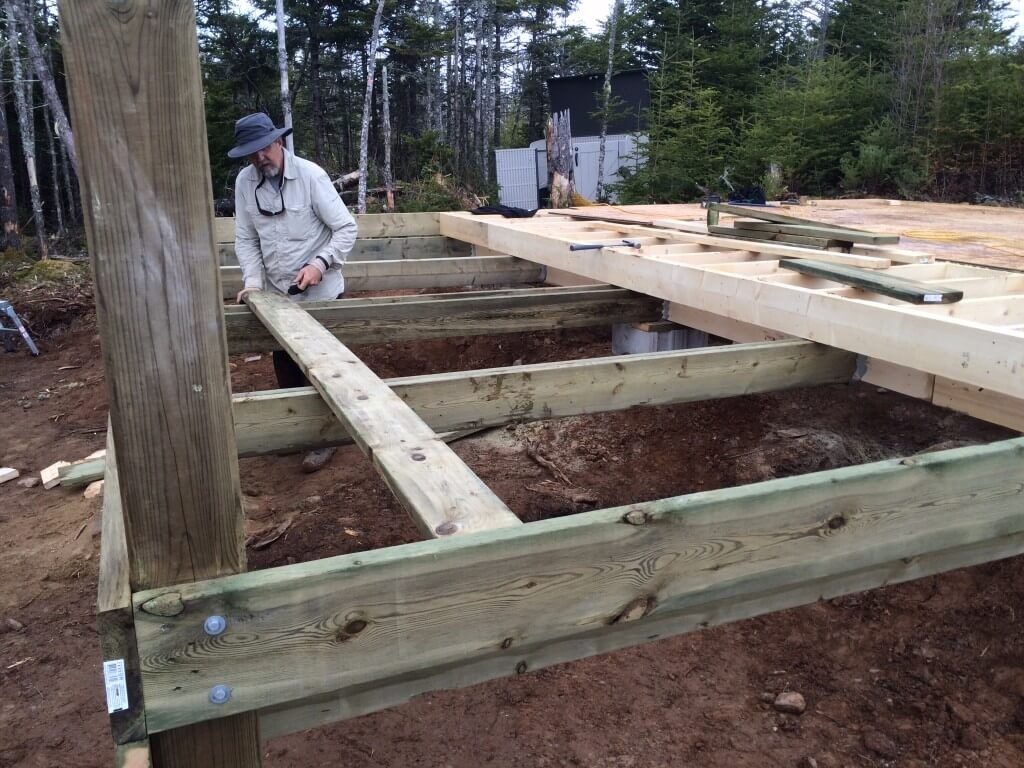
Securing the front of the deck joist with galvanized lag screws and washers.
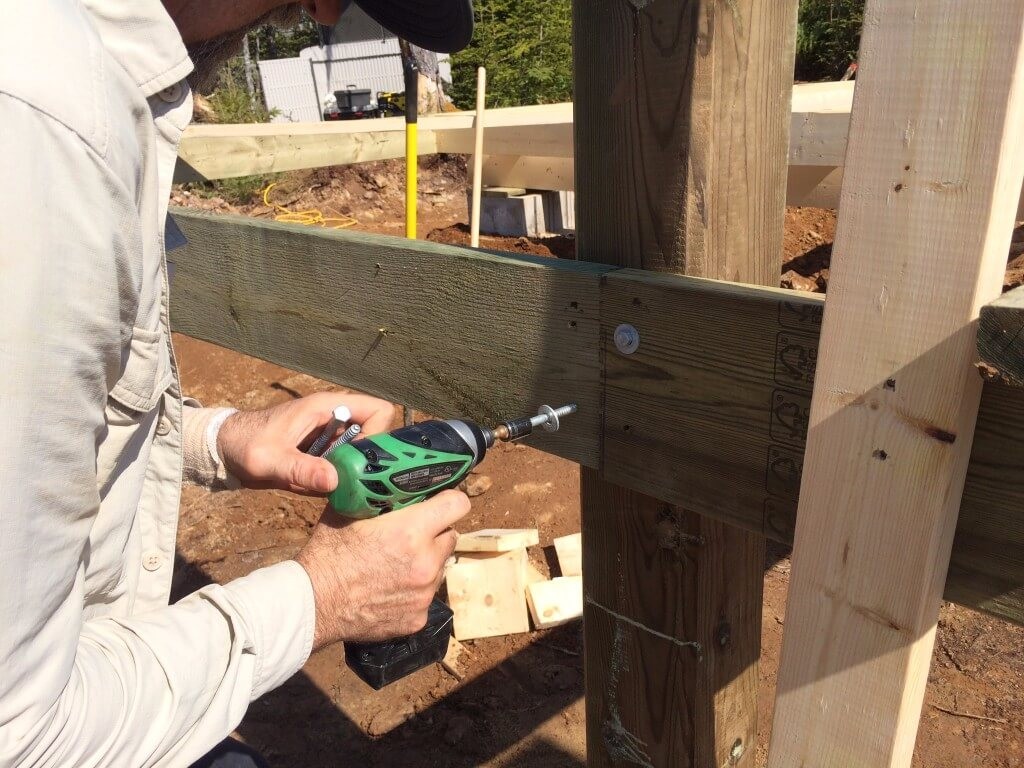
This Hitachi cordless drill and impact driver was incredibly effective at hammering in the long lag bolts.

This is another handy and relatively inexpensive tool that we used throughout the build and long afterwards.
We found this particular Hitachi model very lightweight, quite powerful and the charged lasted an entire day.
Best of all it came it came with two batteries and recharges very fast.
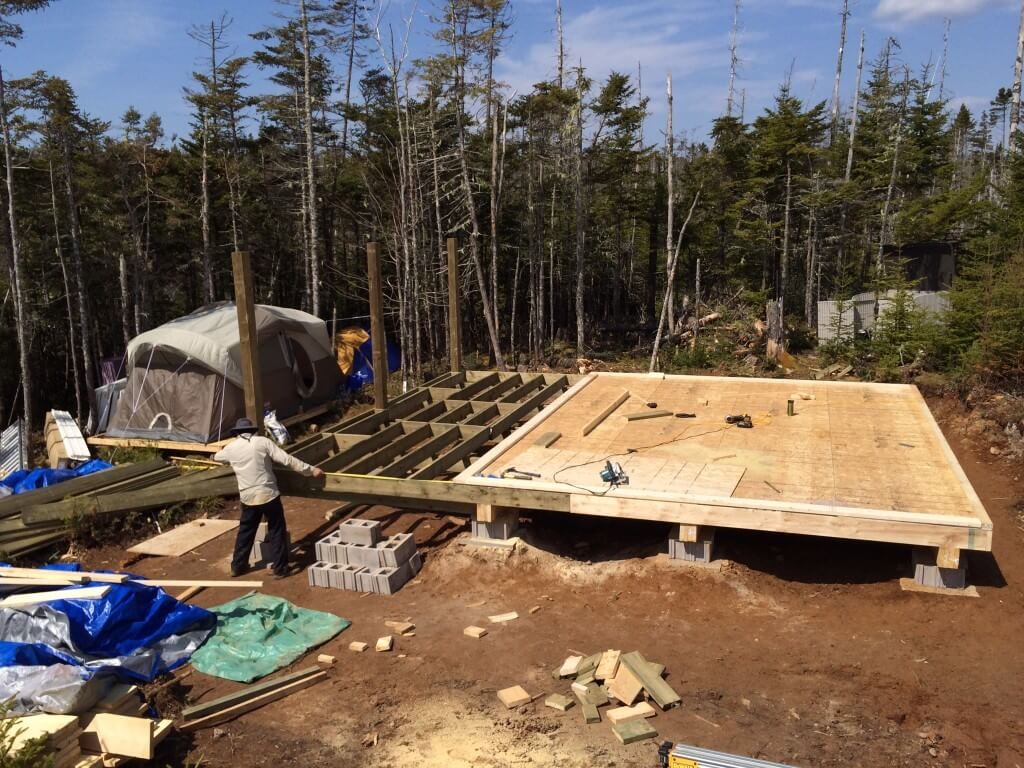
Next, we used PT 2 x 8s doubled up as the support for the deck’s main joist runners.
The support beams are secured using joist hangars.
Placing the first 2×8 floor joist.
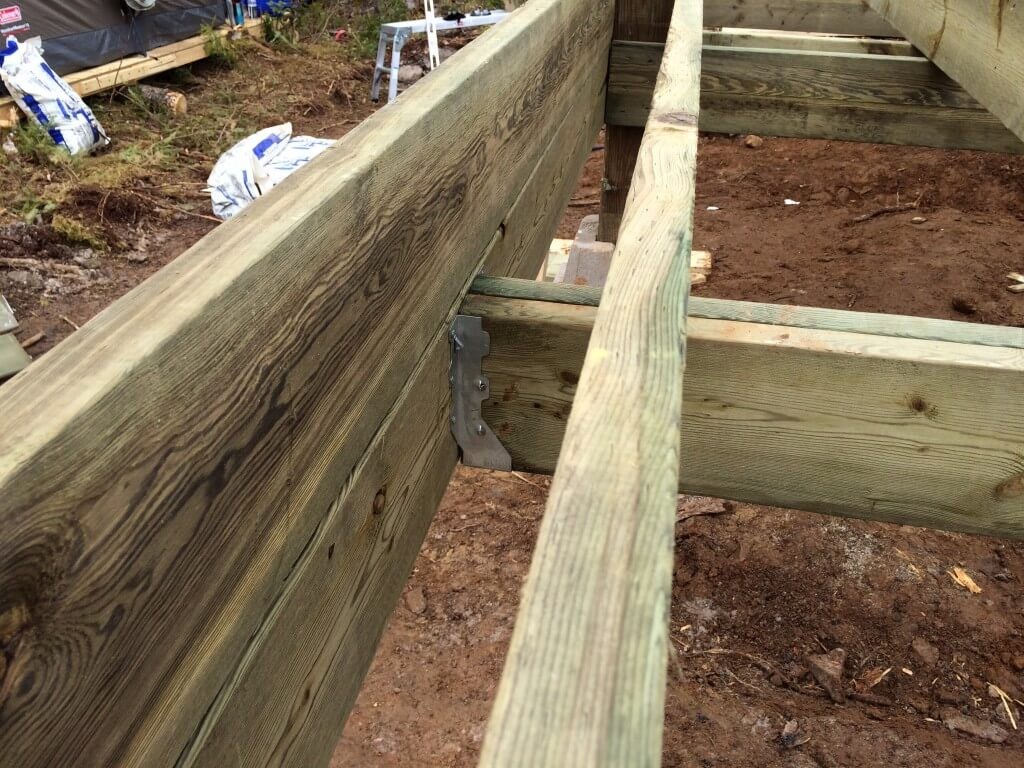
We overlapped the 14ft PT 2x8s.
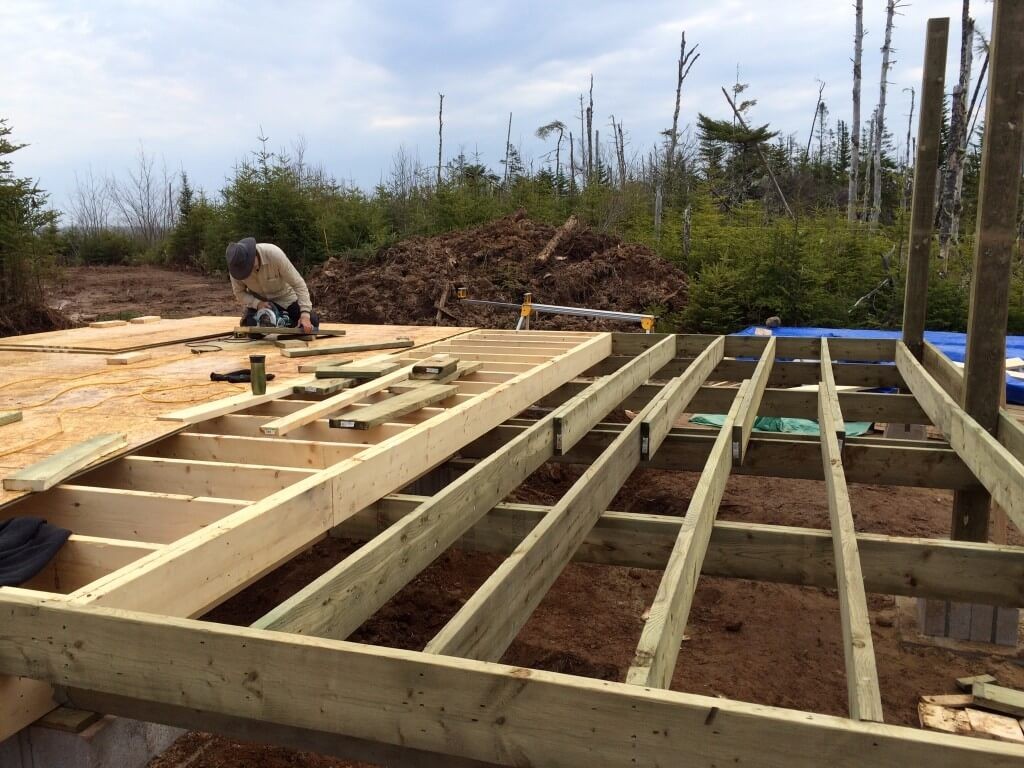
Making some cross bracing pieces for the front deck floor joist.
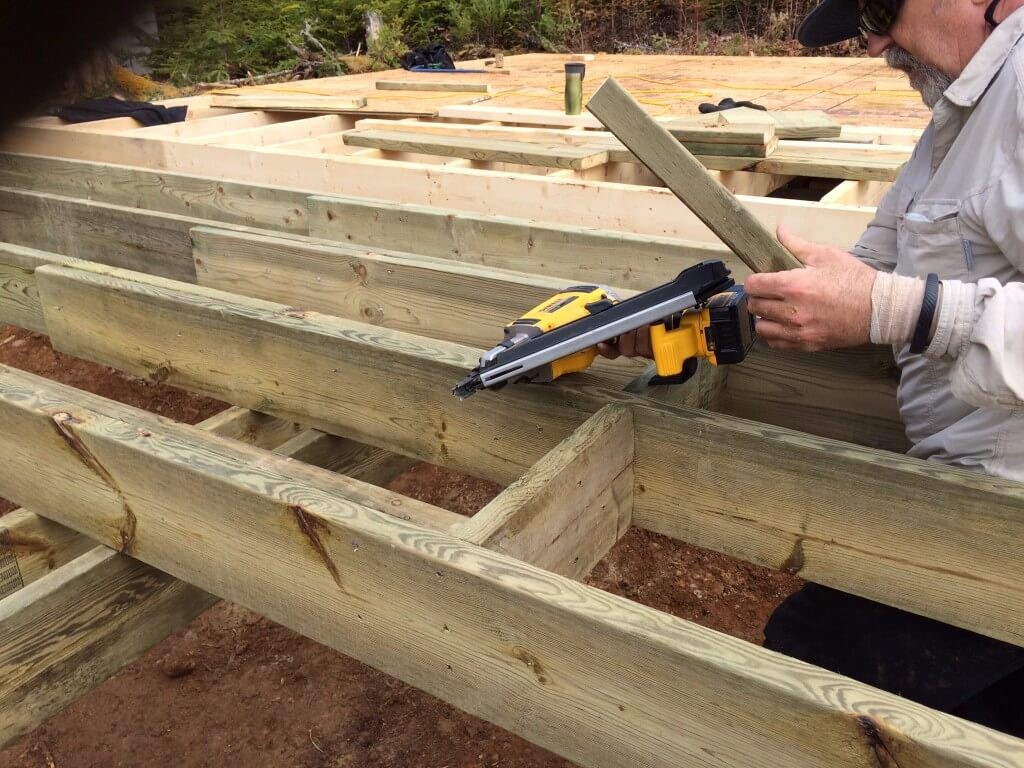
This was made incredibly fast and easy thanks to the DeWalt cordless framing nailer.

![]()
![]()
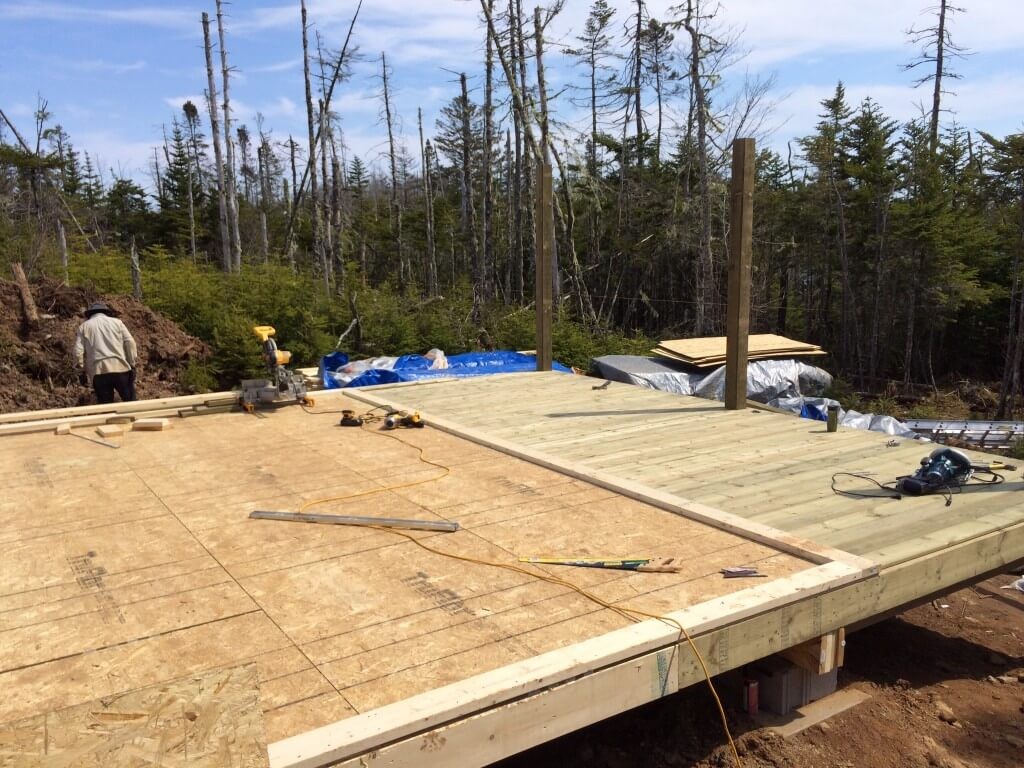
Completing The Main Cabin Sub-floor
Now it’s time to put down some 3/4″ T&G OSB onto the main floor joist.
Remember that the floor design consists of the following…
We will be laying down 3/4″ OSB subfloor and then a layer of 1″ thick rigid pink foam (FOAMULAR C-200 Extruded Polystyrene Rigid Insulation – 24-inch x 96-inch x 1/2-inch butt edge) to act as a thermal break between the inside and outside of the cabin floor.
The bottom layer of the main cabin sub-floor “sandwich” is complete.
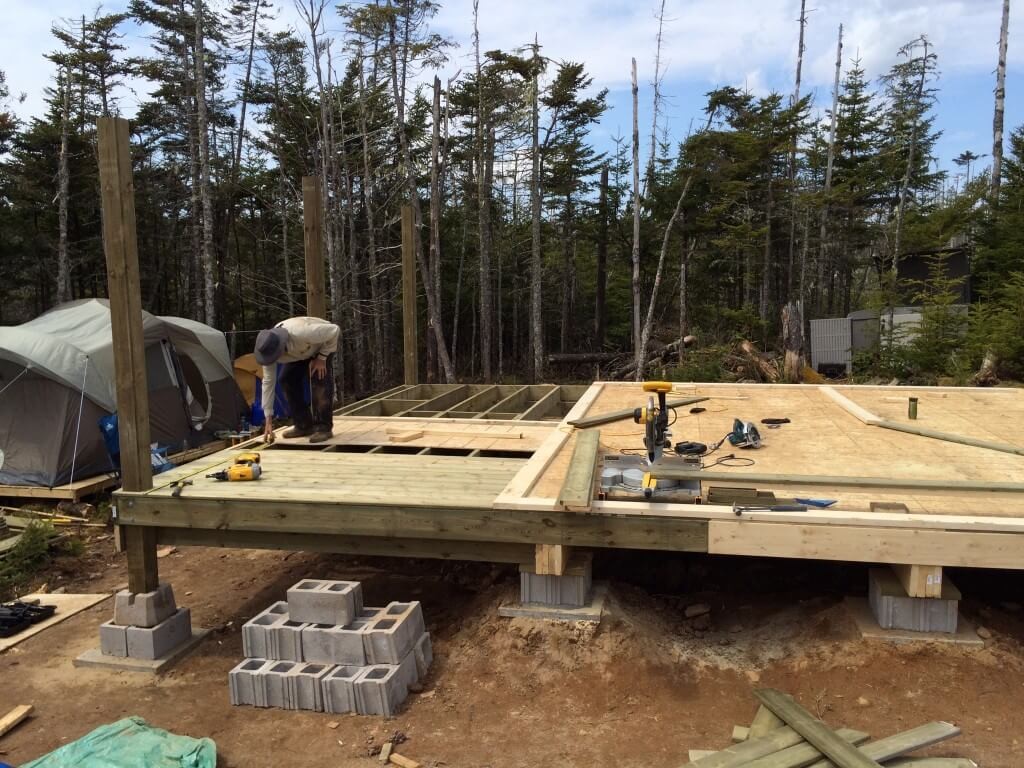
Installing The Front Deck PT Deck Boards
We designed our front deck so that the direction of the deck boards would run front to back.
TIP: If the lumber store your dealing with does not have the exact size of lumber you’ve ordered they will often times substitute it with boards of greater length.
This was the case when we ordered our 8ft deck boards and we ended up with 10ft deck boards instead.
Another MUST HAVE to save a lot of time and energy is a compound miter saw.
We used ours for almost every cut and would not be without it.
It’s perfect for making precision cuts on everything from lumber, to PVC pipes, to flooring.
The model we used is the DeWalt 12″ double bevel sliding compound miter saw. It has a double bevel for making more intricate cuts like those used to install molding.

![]()
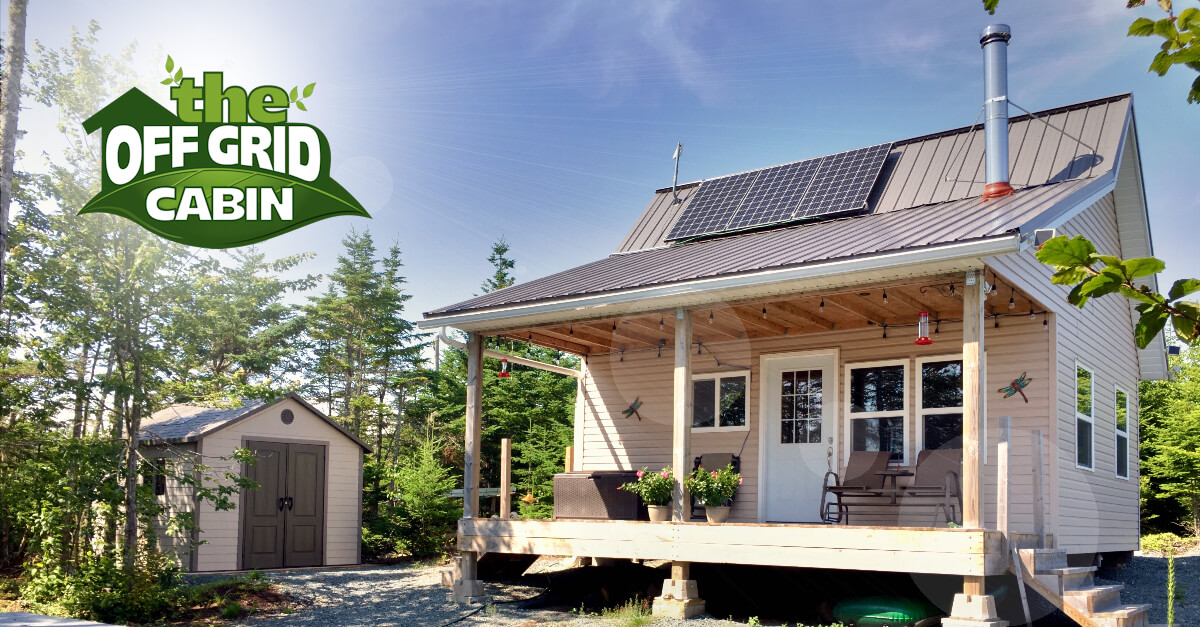
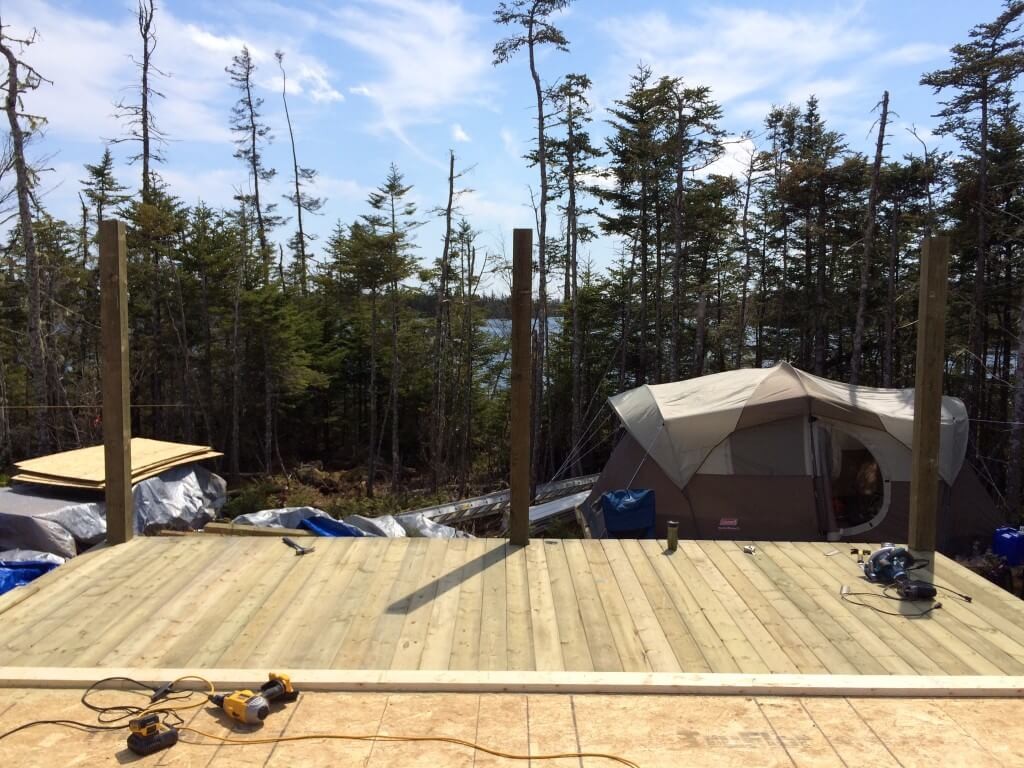
Finished Front Deck and Sub-floor
The front deck floor boards and posts are now complete.

Time to trim some trees to see that lake!
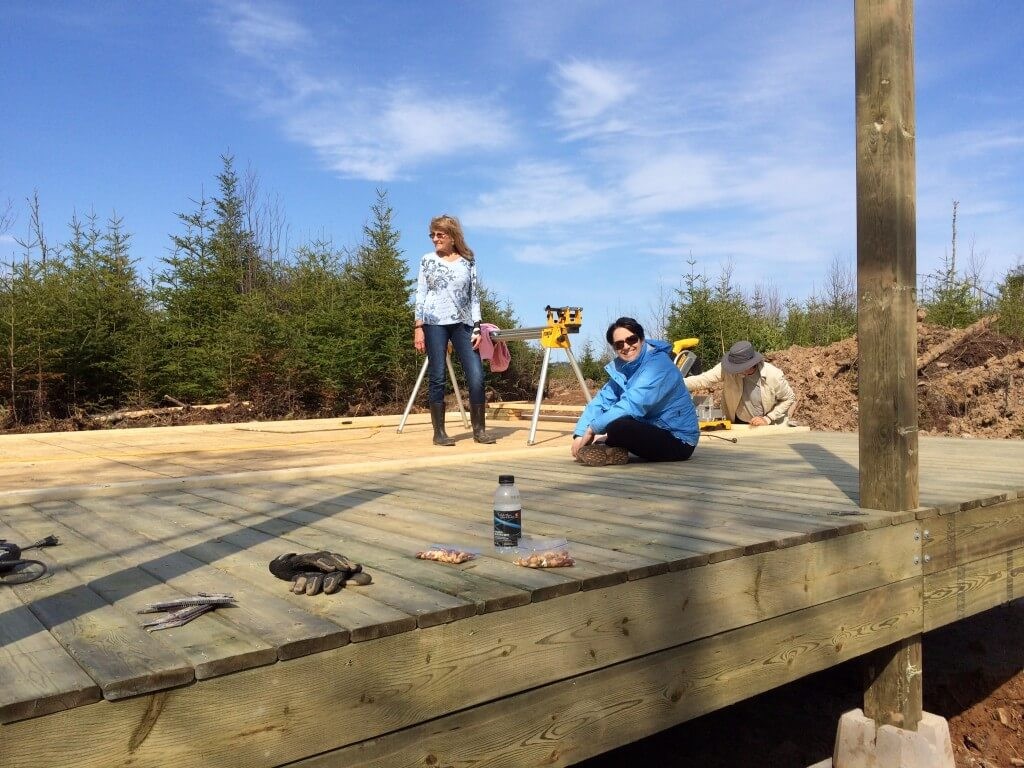
There’s something incredible satisfying about no longer having to sit on the ground, working in the mud and finally having a large work surface to… well to work on.
In the next phase of the cabin build we’ll be raising the walls so get ready for some framing action.
Be sure to subscribe to our off grid newsletter to stay updated on all the latest.
If you’ve enjoyed the progress so far please let us know below and share.
See you at the top!


how to clean solar panels
How to Clean Solar Panels: A Step-by-Step DIY Guide As you already know, residential and off-grid solar systems are amazing sources of renewable energy that are quickly growing in popularity. The large flat [...]

earthship
What Is an Earthship and How It Can Help Save the Planet Imagine living in a home that is completely self-sufficient, eco-friendly, and comfortable. A home that grows its own food, collects its [...]

3-way-switch-wiring
3-Way Switch Wiring: A How to Comprehensive Guide Here at the off grid cabin we’ve done our fair share of electrical work including 3-way switch wiring. We’ve done all the internal and external [...]

solar generator
How To Find The Best Solar Generator When we first cleared the land to build our off grid home back in 2016, we started with one of those small 700 watt Moto Master [...]

Off Grid Heating
The Best Off Grid Heating Methods Introduction To Off Grid Heating If you're Living off the grid already or planning to in the future, you already know how important it is to have [...]

off grid appliances
The Best Off Grid Appliances for Off Grid Living Introduction To Off Grid Appliances Living off the grid can be a rewarding and fulfilling experience, but it also comes with some challenges. One [...]


Steve – first I hope you are feeling better. Second, on the house side are the joists for the deck attached directly to the 4×8 support beam? Looks like it from the picture but want to make sure I am not missing something. Thanks!!!!!
Hi Jim!
Yes the bottom deck joist beams are attached directly to one of the 3 main beams that support the cabin framing (the 3 “main beams” are sitting on the concrete pads). The deck joists are attached with joist hangars to the main beam. I believe there are total of 6 of these pressure treated support beams. On top of those 6 beams we have the overlapping 2x8s that make up the deck joist. Lastly we put 8 foot deck boards on top to finish it off.
Hi Steve! I see that you’ve added some cross-support to the main home floor joists – I’m assuming so that you have more support for the 4×8 OSB sheets? Are those cross-supporting members 2×6 like the joists, or are they 2×4?
Hope you’re well, Steve!
We’re trying to do our cross beam supports and can’t figure out how to toe nail them with such little room to work. We can’t get the dewalt in there at the right angle to make this work. How did you secure your cross members?
Hey Lisa. You can simply stagger the cross bracing so that you can either toe nail the brace in or what we did was to use our DeWalt cordless nailer. The nail gun is only 13.25 inches long and 13.5 inches in height so it easily fits between the 16″ OC joists.
Happy Father’s Day, Steve!