

Framing Our Off Grid Cabin Walls In Just 3 Days!
Today is the second of three days that it took us to frame the off grid cabin walls.
It took my father and I just three days to frame in all the the cabin walls, windows, doors, and even start on the second story loft floor joists.
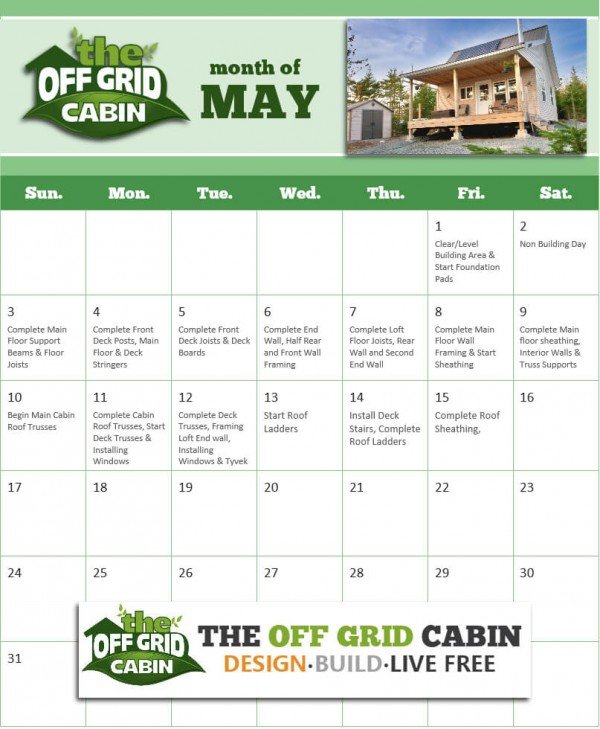
In fact, we built the entire cabin from start to finish in just 15 days.
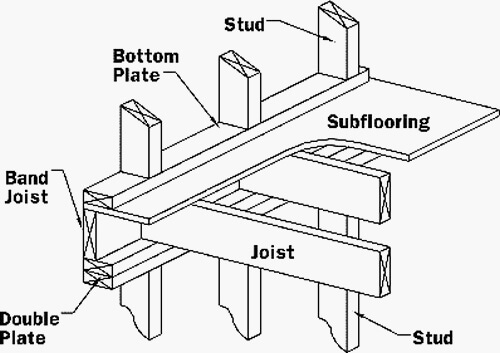
We also covered a quick “How To: Framing 101” class to help situate newcomers to the framing terminology.
Feel free to open this page up in a separate window and follow along with the terminology.
Here's Where We Left Off Yesterday
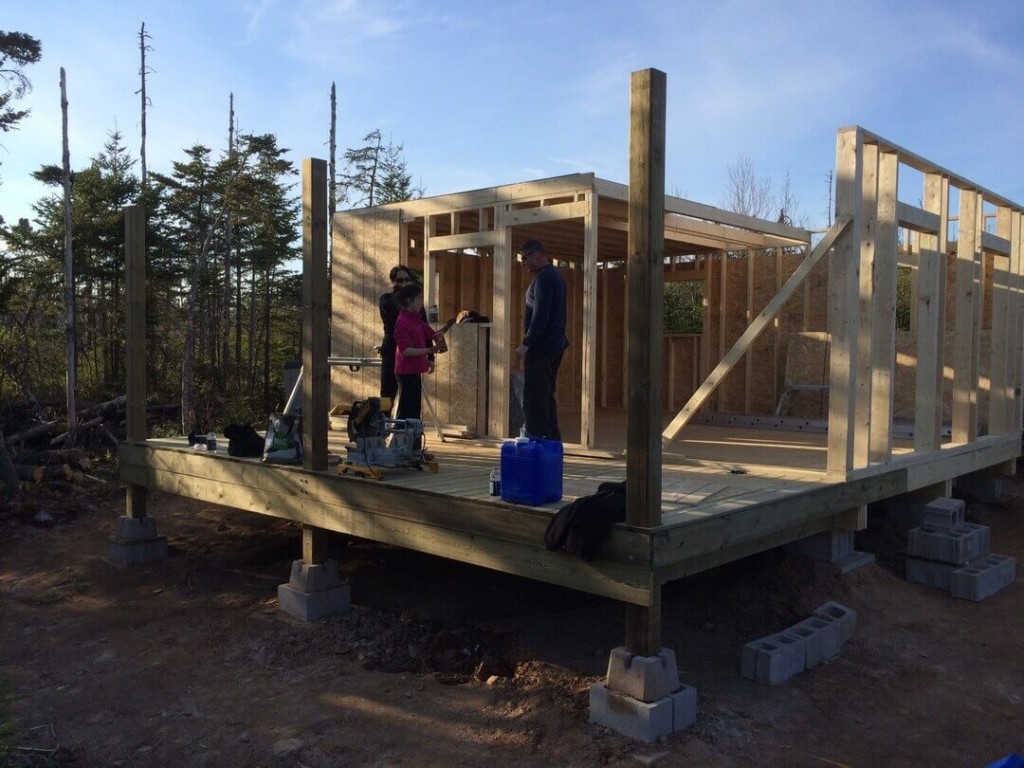
We started by framing the exterior wall at one end of the cabin.
The wall went up quickly.
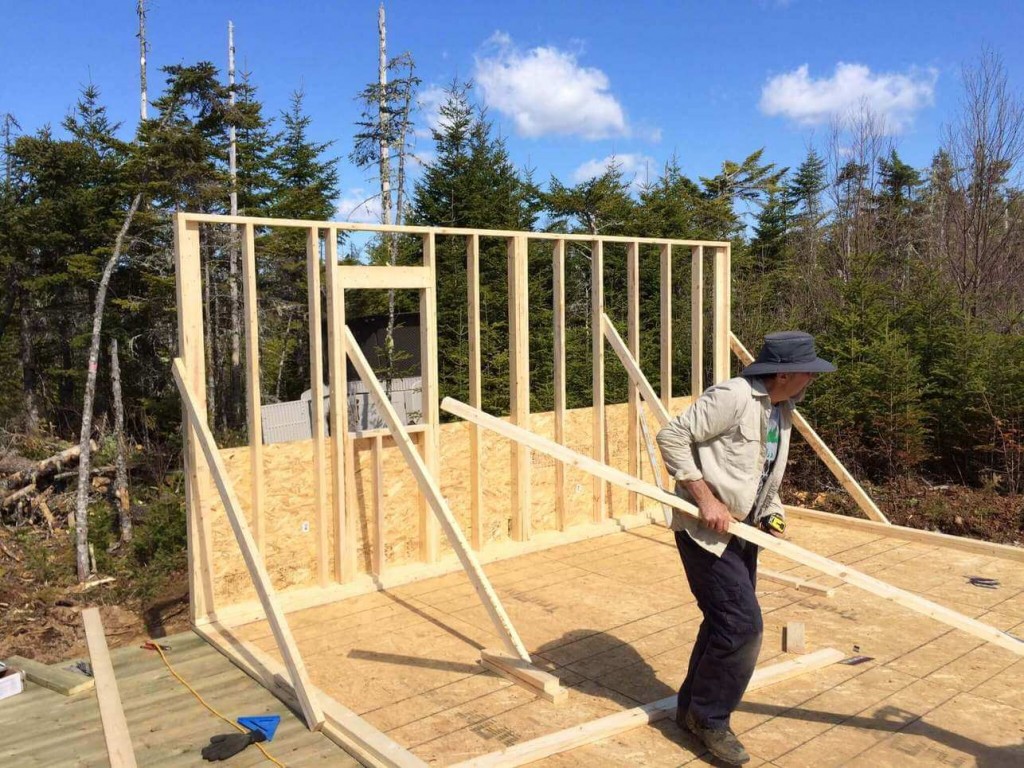
We also finished half of the front and back walls as well.
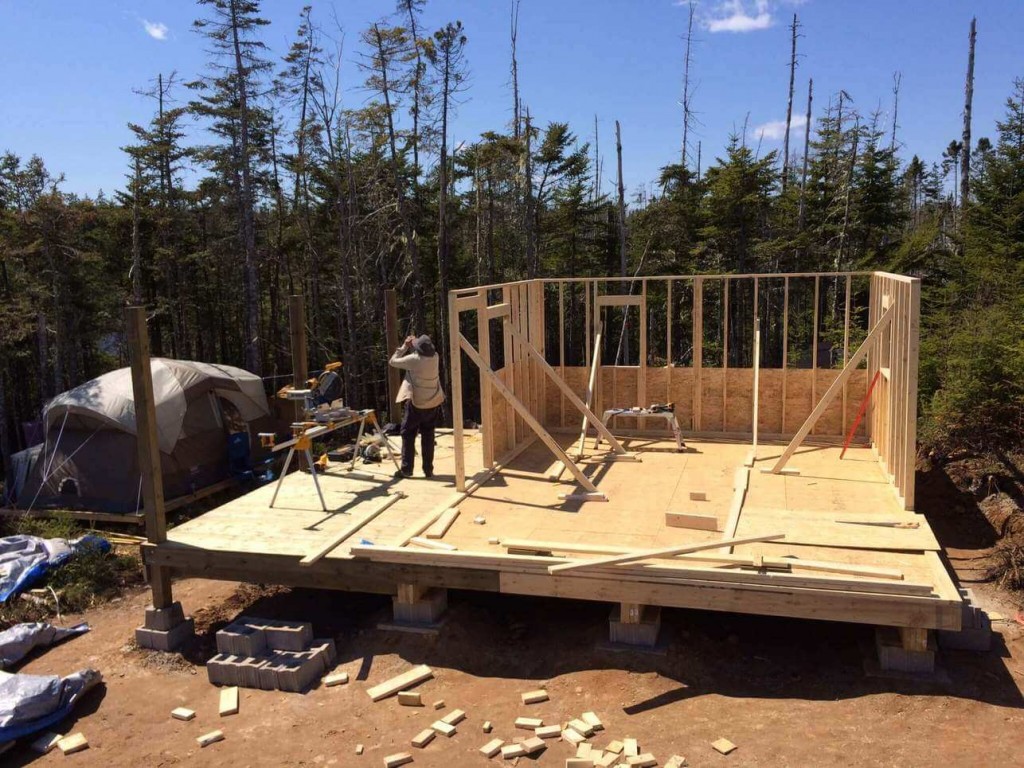
They are build in halves to reduce the lifting weight and also to accommodate building the loft floor joist.
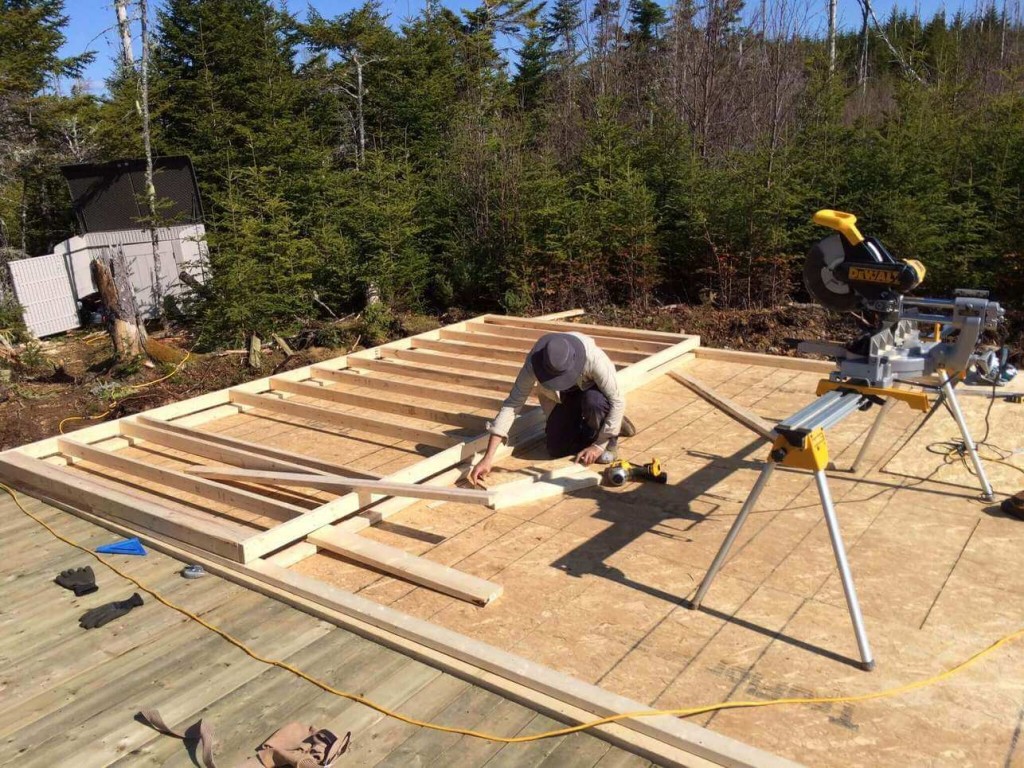
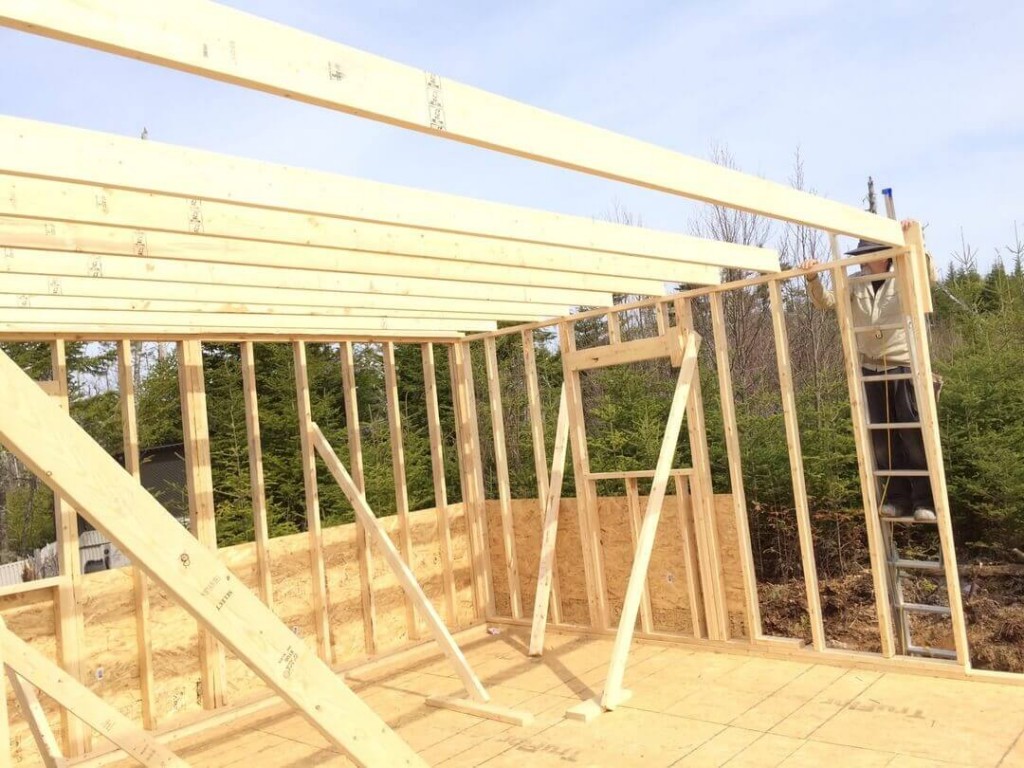
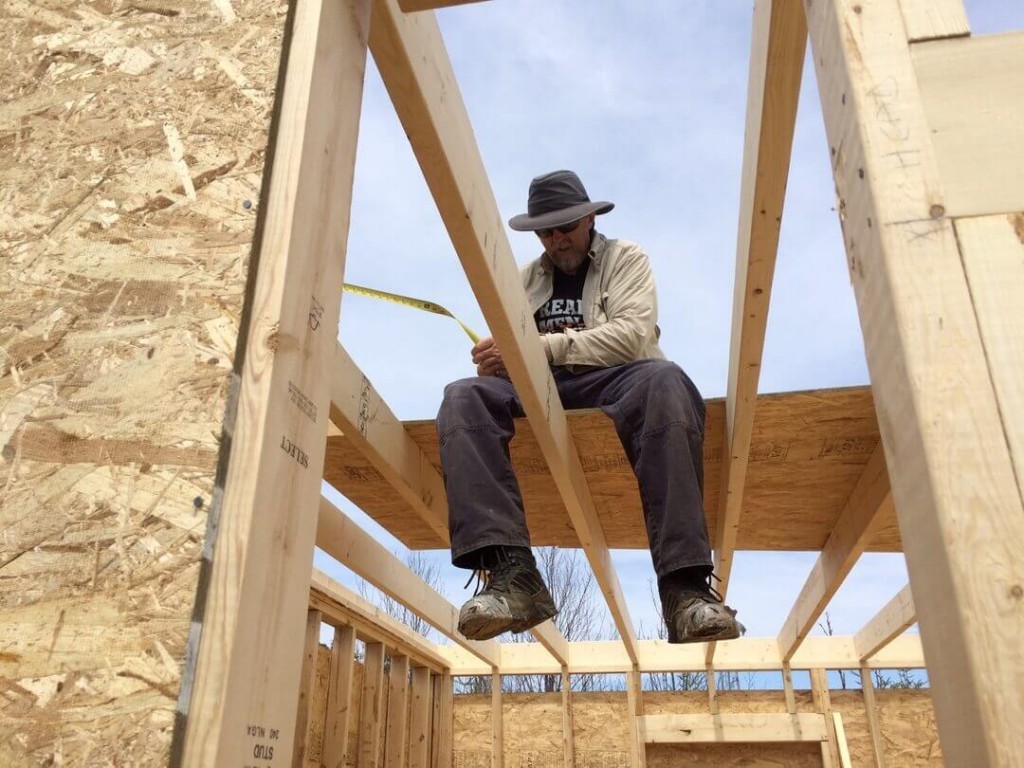
Framing The Loft Floor Joist
To frame the second floor loft joist we used 16 foot long 2″ X 6″s spaced 16″ O.C.
We’ll use 7/16″ 4′ X 8′ OSB for the sub-floor.
Over all dimensions of the loft floor are 16ft X 12ft.
There will be an opening for a folding staircase.
Here’s a sneak peek to understand where the folding access ladder will go.
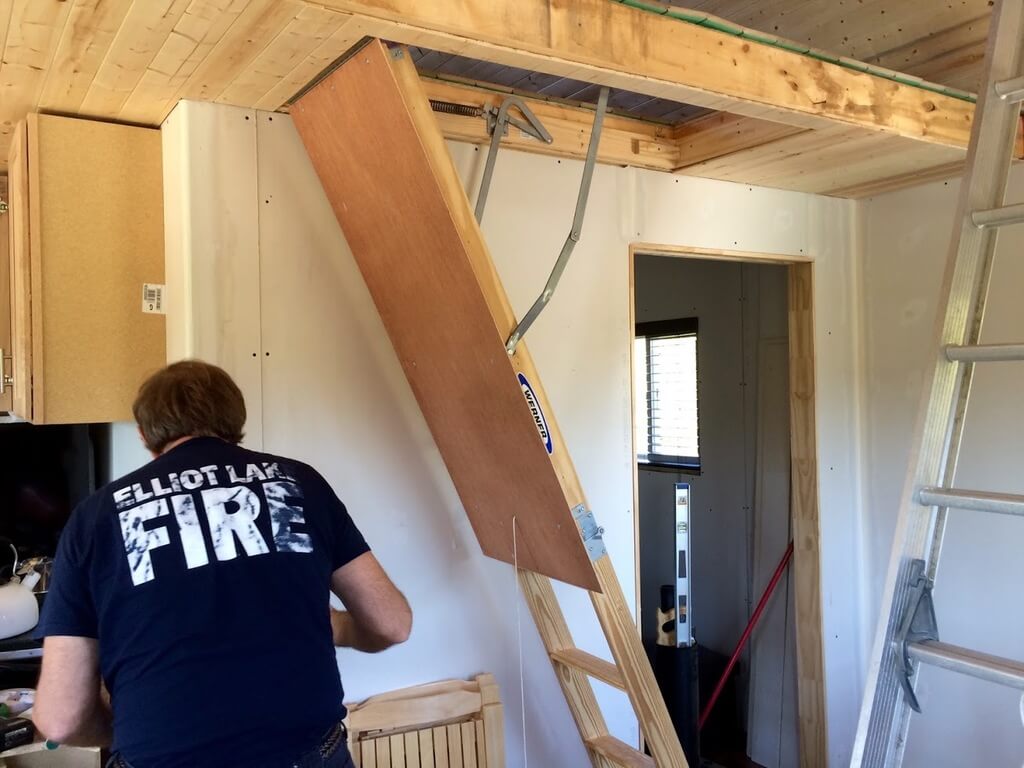
Using a attic access style folding staircase allows for much more room on the main floor.
The ladder can be folded up out of the way when we need more room in the main floor and when the loft isn’t in use.
The upstairs loft will also have a westward facing window to watch the sunset at night right from the bed!
The walls of the loft will be angled at 45 degrees providing plenty of standing headroom.
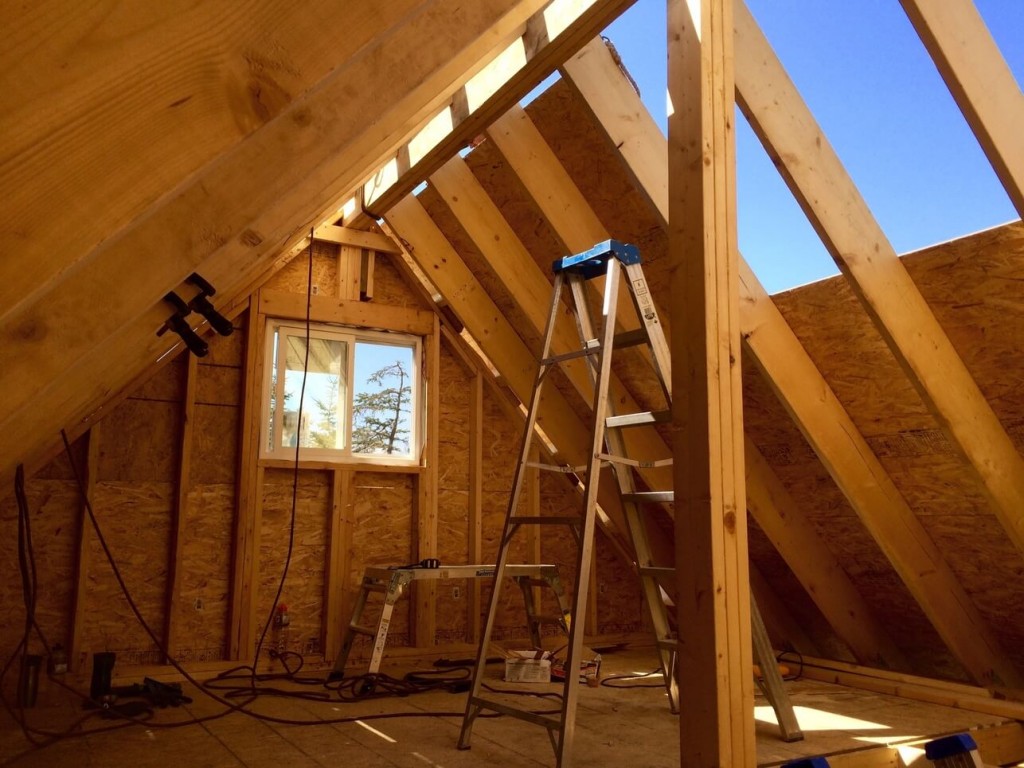
We will also utilize the lower portion of the walls (where the loft wall meets the floor) to store the solar system battery bank as well as the winter fresh water supply (all covered in upcoming posts).
We’ll also have an access hatch going from the inside of the loft into the crawl space located above the deck.
Measuring out and cutting the 16 foot loft floor joists.
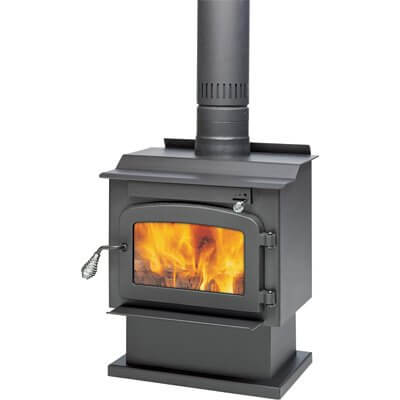
In the photo above you can see our wood stove protected in plastic.
We’re going with the Drolet Pyropak as it’s the smallest wood-stove available that has the all important glass door.
This is a 40,000 BTU wood-stove with a 1000 sq ft capacity.
Our cabin has an overall square footage of 512 sq ft so this will more than do during even our coldest Canadian winters.
![]()
Once we get up on the second floor that lake in the distance is going to look amazing!
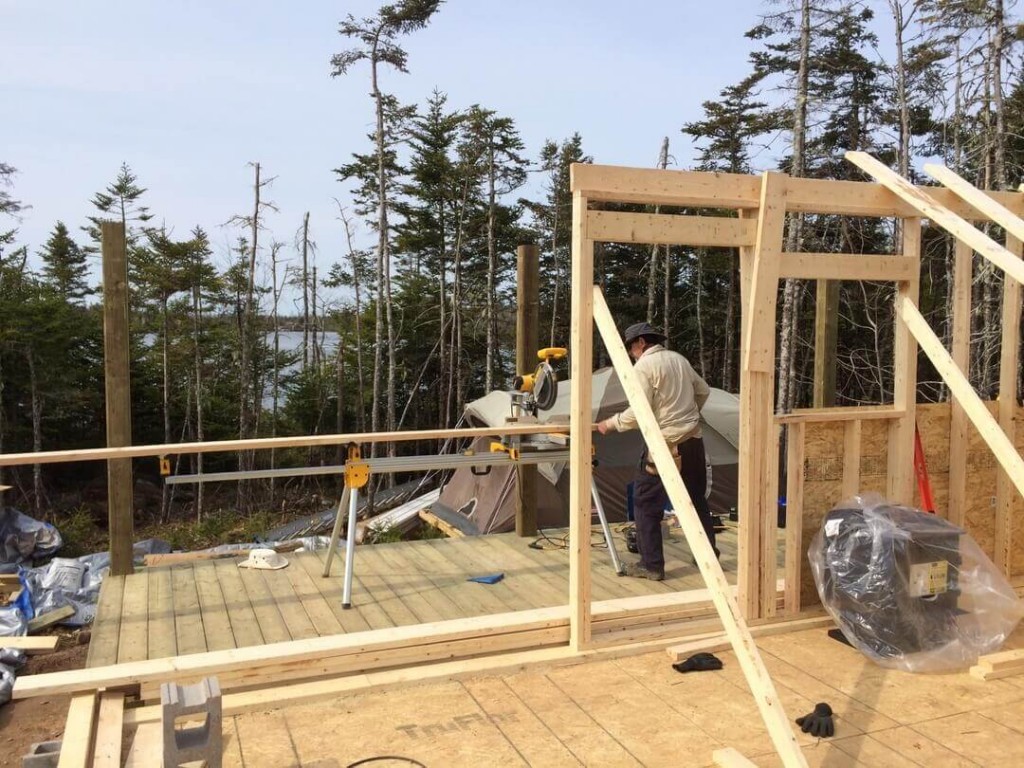
We made full use of our DeWalt 12-Inch Double Bevel Sliding Compound Miter Saw and this heavy duty miter stand made cutting the 16 foot joists a snap. Highly recommended during a project like this and easy to run of of a generator.

TIP: We used a 2″ x 6″ as a Band Joist. See the photo below.
We are not creating a Double Plate on top of the main walls because the transition (along the top of the wall) from the loft to the framing around the main living-room space will involve a height change. Details are further down on the page.
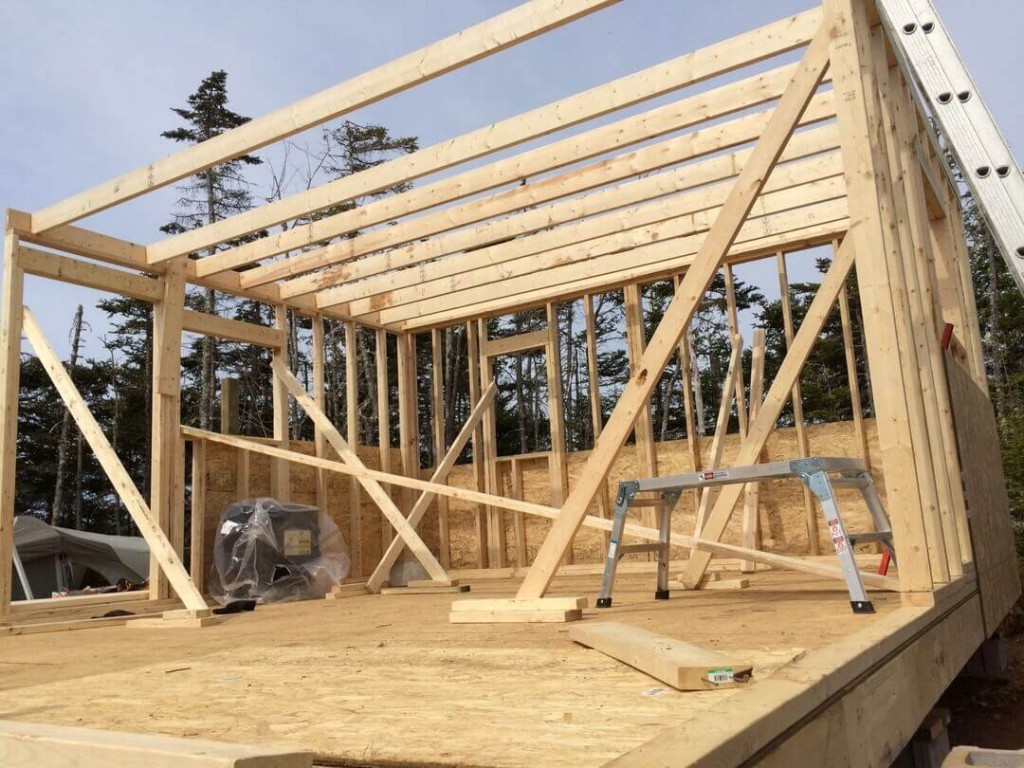
Putting up the first of the loft joists.
![]() We’ll be leaving a gap between these two floor joists for now to create the opening for the folding stairs.
We’ll be leaving a gap between these two floor joists for now to create the opening for the folding stairs.

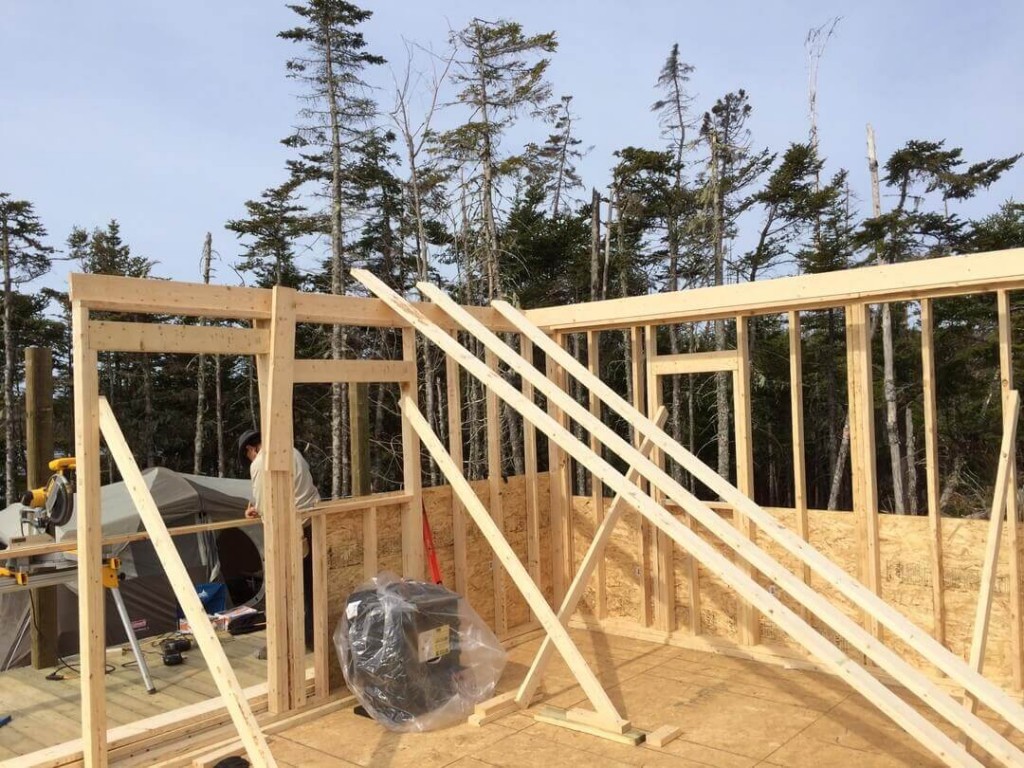
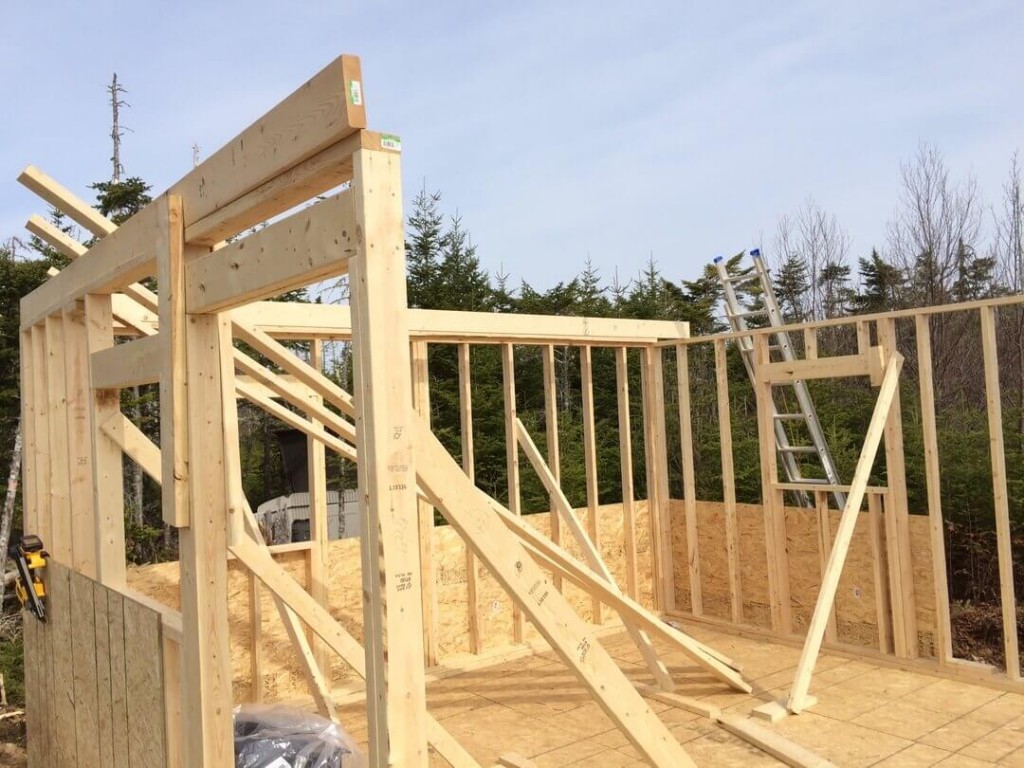
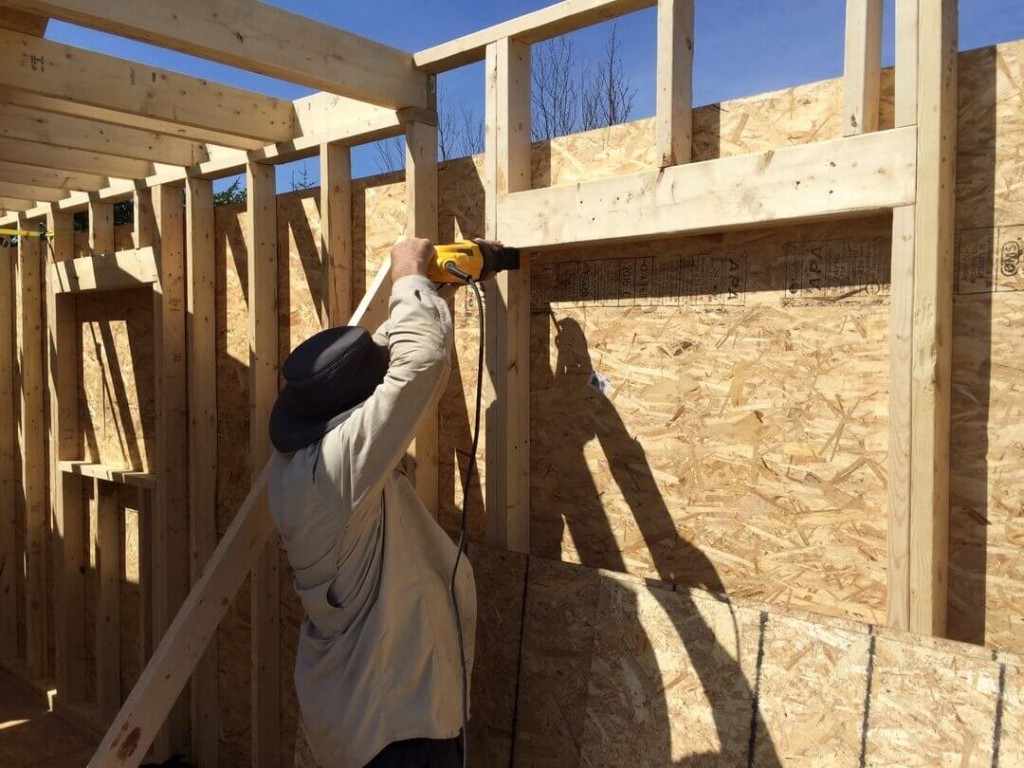
Framing The Main Floor Rear & Side Walls
The rear wall is framed but we still have to finish up the window framing.
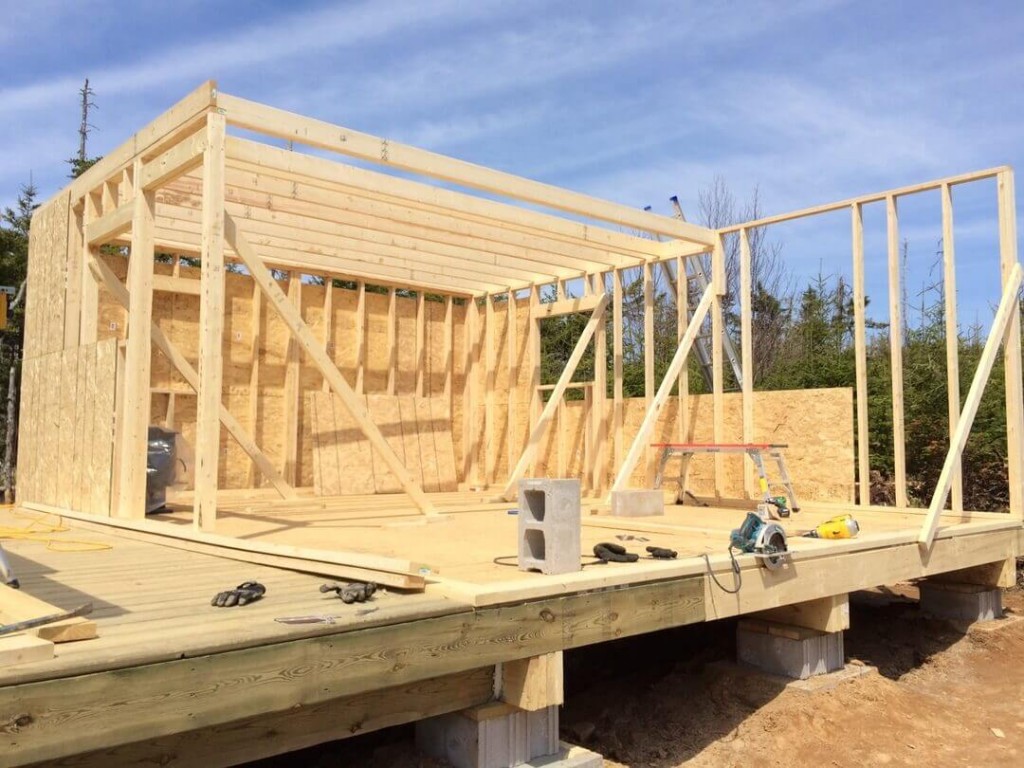
You’ll see our trusty DeWalt cordless framing nail gun. This build would easily have taken twice as long without that one tool!
The main living room rear window is framed and we’ve started to put up some OSB sheathing to help keep everything rigid.
TIP: Drill a 2″ hole at all the four corners of the sheathed window opening and use a reciprocating saw to cut out the excess plywood. You can also drive a nail through all four corners, connect them with a chalk line and use a skill saw from the outside.
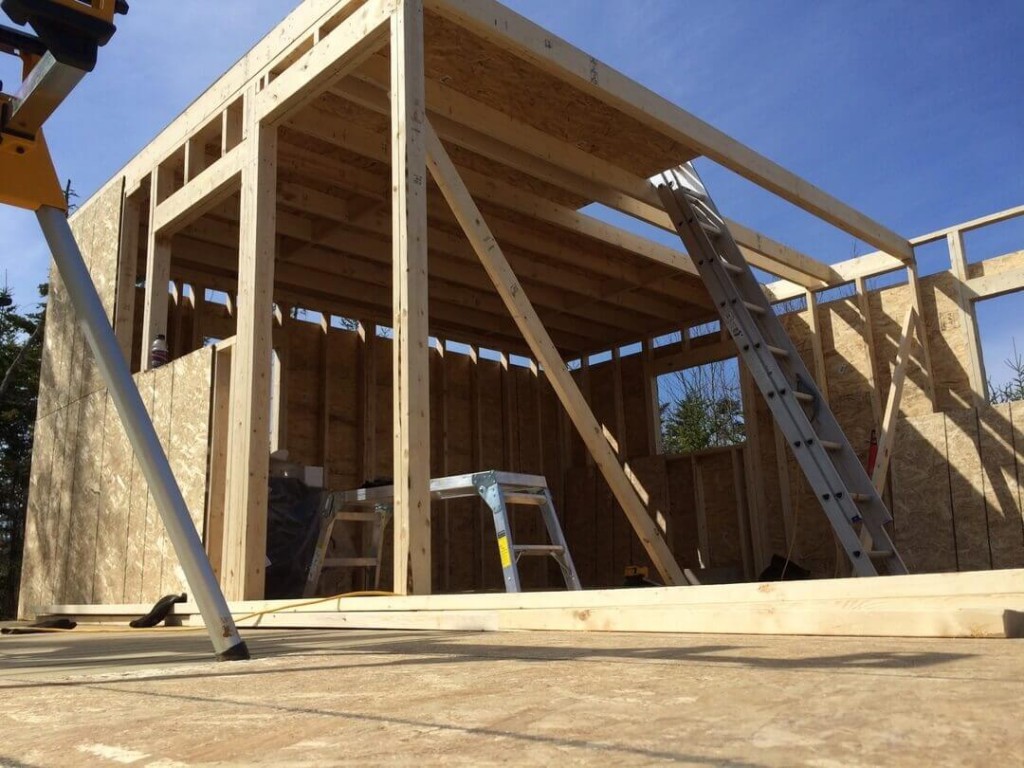
Notice the height transition from the loft joists to the top of the main living room wall.
Now everything is at the same height all the way around.
Completing The Loft Sub-floor
We used 7/16″ 4′ X 8′ OSB Plywood for the sub-floor.
We will be installing the same laminate flooring used on the main floor.


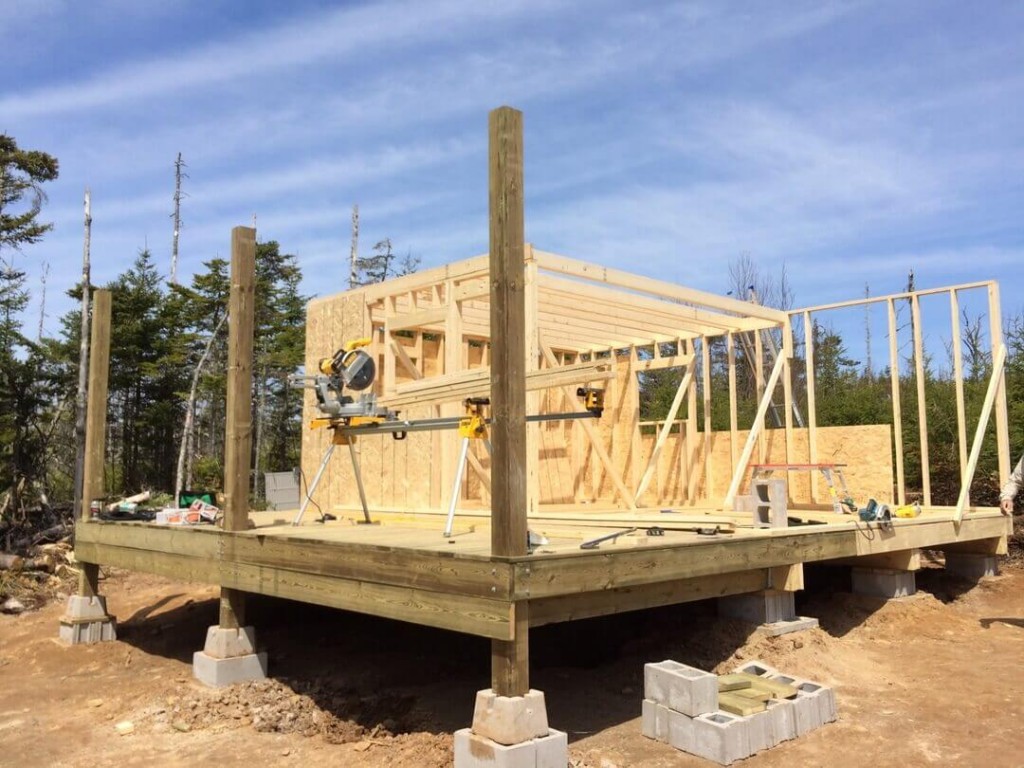
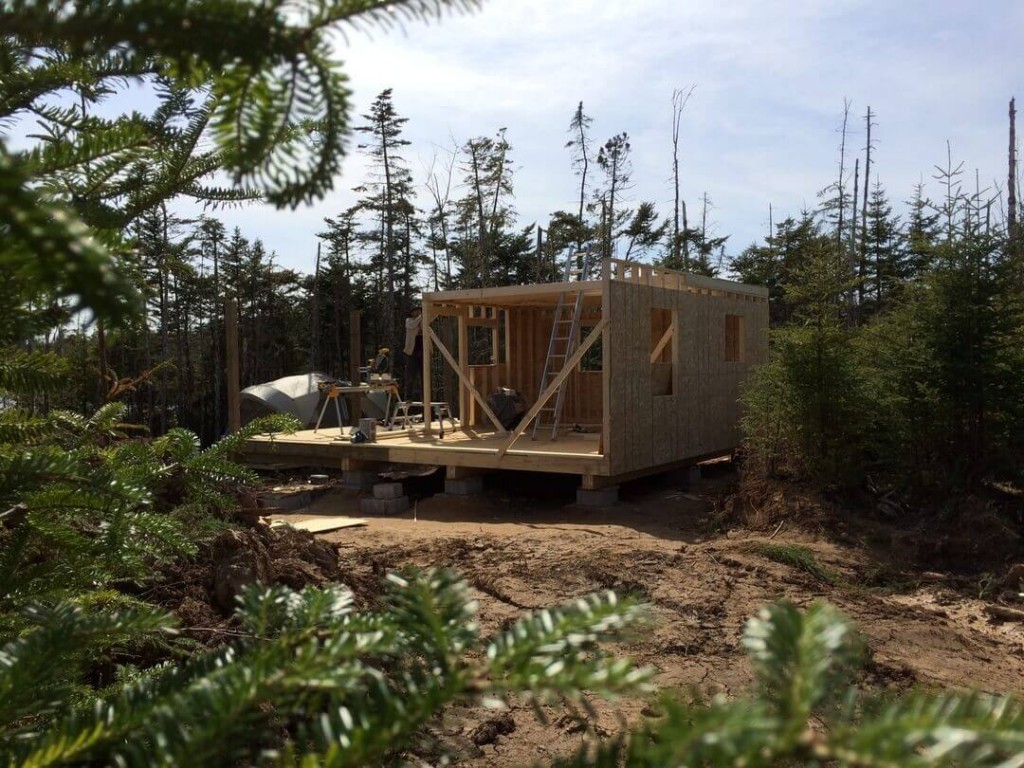
At this point today we’ve…
- installed the loft sub-floor
- completed the framing of the rear wall
- completed the framing of the side walls
- installed exterior sheathing on the framing we’ve completed
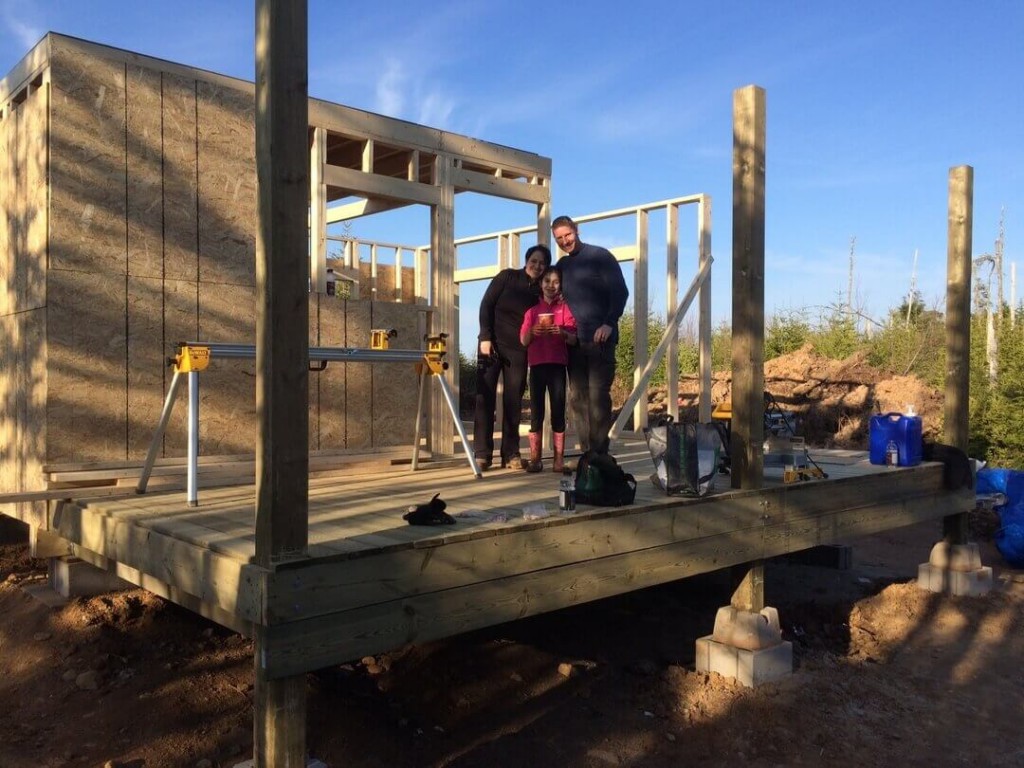
Then the “inspection team” arrived with Tim Hortons :)
Ready To Check Out The Next Step Of The Build?
Your Turn...
Comment below and let us know what YOUR #1 Favorite Tool would be that would help YOU speed up your building and make YOUR life easier.
We’ve already put together a list of the 63 Must Have Off Grid Tools which you can check out here!
If you’ve enjoyed this post do us a solid and share it.
Your sharing is the only way it gets out there!
We also always make a Pinterest photo for those avid pinners out there!


how to clean solar panels
How to Clean Solar Panels: A Step-by-Step DIY Guide As you already know, residential and off-grid solar systems are amazing sources of renewable energy that are quickly growing in popularity. The large flat [...]
earthship
What Is an Earthship and How It Can Help Save the Planet Imagine living in a home that is completely self-sufficient, eco-friendly, and comfortable. A home that grows its own food, collects its [...]

3-way-switch-wiring
3-Way Switch Wiring: A How to Comprehensive Guide Here at the off grid cabin we’ve done our fair share of electrical work including 3-way switch wiring. We’ve done all the internal and external [...]
solar generator
How To Find The Best Solar Generator Impact-Site-Verification: c336f89e-c692-4afd-99d9-0150f7329466 When we first cleared the land to build our off grid home back in 2016, we started with one of those small 700 watt [...]

Off Grid Heating
The Best Off Grid Heating Methods Introduction To Off Grid Heating If you're Living off the grid already or planning to in the future, you already know how important it is to have [...]

off grid appliances
The Best Off Grid Appliances for Off Grid Living Introduction To Off Grid Appliances Living off the grid can be a rewarding and fulfilling experience, but it also comes with some challenges. One [...]


Great job! I guess my number one tool would be a good generator to run the power tools.
# 1 tool is a polaski
Thank you for the opportunity to get a free tool. I’m also in the process of building an off grid cabin. It seems to be taking forever with the local government regulations holding me back with getting my permits. But if I had a choice I’d any free tool, it would be a wood splitter. After clearing my building site, I ended up with more logs than I know what to do with. A log splitter would make this job tolerable. Thanks for the information you guys are sharing in your blog. It really does help people like myself to know what’s in store ahead.
Definitely a cordless Dewalt Framing nailer if I had the lumber, if it was a primitive build then a Stihl chainsaw with a mill attachment
I’d love (& need) a sliding compound mitre saw.
I would love a portable band saw mill with tracks, motor and everything.
Great fun! We would love to have a chop saw!! Merry Christmas 🎄
We share a obsession…I also lust after a 20V DeWalt cordless framing nailer!
Definitely the 20v nailer
Portable sawmill
Tools are usually worth their weight in Gold.
The 1 tool I could not build anything without is a 12″ multi angle miter saw with stand.
My faveorite tool would be a log De-barker that fits on a chainsaw makeing quick work of that very time consuming process!!! Iam driveing to alaska in june of 2018 to build a log cabin on the little susitna river in houston AK!!! Im so exicited to do this though a little worried about getting the foundation square n plumb!!! A challenge!!!
For me, I’m planned to build my off grid cabin in the Ozarks. I have 80 acres of mountain property that’s rich with hardwoods like oaks, hickory, black walnut, and cedar. Using my own trees to build my off grid cabin will drastically cut the monetary costs of this build. Having a portable bandsaw mill will pay for itself many times over on my property. That would be the one tool above all others I would choose first.
I could do with a decent power screwdriver – would save so much time, and help with my arthritis!
Love your work.
Being a girl that likes to build stuff and I have the basics generator, solar system. hand tools, etc, I’d have to say a ROTORAZOR is the next tool on my wishlist.
Thank you for sharing.
My favorite tool is a cordless 5 1/4″ skill saw. It is great for quick adjustments.
Thank you for the chance to possibly get the tool I would love to have for my off grid cabin. I think for sure it would be a saw mill that the cutting device is a chain saw on it rail system.
Crossing my fingers.
Have a Merry Christmas and a happy New year.
I’m buying my first house in Jan or Feb. A new DeWalt miter saw would be a dream come true.
I will need to do some repairs since it is a fixer upper! You are giving someone an awesome gift 💝 God bless you all and your families the rest of this year and all of next!
I’m buying my first house in Jan or Feb. A new DeWalt miter saw would be a dream come true.
I will need to do some repairs since it is a fixer upper! You are giving someone an awesome gift. God bless you all and your families the rest of this year and all of next!
Thank-you for your blog and for an opportunity to win a much needed tool. I would say most useful for this old lady, me lol would be a good generator. Thanks buddy!
I’d have to go with a portable sawmill. Even the Harbor Freight band-saw one would make the dream of self-sufficiency within reach, financially. On a side note, I finally got a pneumatic framing nailer and it has been an amazing addition to my tools. I have a spinal injury and that thing makes it so I don’t need help unless I want the company. I can imagine that the Dewalt 20V makes light work when used on big projects. Thanks for the opportunity and keep yourselves healthy! A cabin won’t build itself.
I’m in hopes of buying a few acres and a small unfinished shed and I would hope my new favorite tool would be a Ryobi 18 volt One+Ones sliding compound miter saw to help me do all of the woodworking planned for the inside and to help with the furniture builds to furnish the inside too ,,,
You guys are awesome! The house looks amazing! I think my favorite tool would be a table saw. I’ve needed one for so many projects! It’s hard to make nice cuts when all you have is a circular saw in some cases lol. Keep up the good work! I enjoy reading your articles.
Your journey building your cabin is inspiring to watch. If I had a choice of tools… a solar generator would be on my wish list.
Merry Christmas to you and yours
Great blog and great pictures! For sure my favorite tool would be the DeWalt 20v cordless nailer! Merry Christmas to everyone on the blog!
What a wonderful thing to do! My favorite tool would be the cordless framing nailer! Wishing you and your family a very merry Christmas!
Abundant blessings!
To finish off my cabin build the tool of my choice would be a 12 1/2″ portable thickness planer for finish cabinetwork, trim & furniture.
Love your thread. I’d have to say a generator capable of using my tools in the woods to build a cabin while be on my list. Keep up the great work.
Looking good! My number 1 tool would be a 20v DeWalt framing nailer.
My favorite tool would be the 20v DeWalt framing nailer. Great job!! Like following your step by step building progress!!
I would have to say a portable generator as well. Having a number of tools that would work in a remote area the greatest need for me would be a portable generator.
Thanks for this opportunity and really enjoy your site.
Merry Christmas to you and your family.
Cordless framing nailer or cordless mitre saw. Our last build would’ve been much easier with both of these tools. Thanks for letting us follow along on your journey!
Awesome read. Thanks so much for sharing this..
Great article! Our favorite tool while building our off grid house in Montana is a Porter Cable 20v battery operated impact driver. We are currently putting up some rafters, and it really comes in handy!
Everything looks great, we are starting to clear our little piece of land now to start our home away from home
Hey thanks David. Please keep us updated with your build. We’d love to follow along :)
My favourite tool is my hubby. I couldn’t make any building work happen without him. I know his favourite tools are Ryobi cordless, although he does need a good generator to recharge them. At the moment we have to go offsite to recharge the batteries. I love your work guys, all the way from Australia.
Hey there Judy!
So glad to read your comment :)
My wife and I both got a smile out of that one for sure!
I agree that cordless tools make off grid life so much more convenient. From the quietness of not having to run a generator fulltime (as with regular powered tools) to being able to recharge ours with just sunlight and not ga$$$.
Thanks for the kind words all the way from down under. It never ceases to amaze me that we can reach anyone anywhere these days with the internet.
Cheers Judy!!
Steve and Mireille
Steve, first off thanks for your replies when I have emailed you. I tried the Dewalt cordless framer, loved it but had to return it as it kept alarming (the yellow flashing light) that it was jammed when there was no jam occurring. Still had to stop and clear it for it to keep working. So I returned it and we’ve been swinging hammers since. Would like to get another cordless, so my question is how reliable has your unit been? Perhaps I just got unlucky when I bought it (through your click through, I’ll add). So, should I give it another chance? Or try another brand?
I do have a lot of other Dewalt 20v products and have been very happy with them.
Hey there Ed!
Thanks for the support by using our link. Very much appreciated.
The only issue I’ve run into with our DeWalt cordless nailer (model DCN692M1) is that when the battery gets low I’ve had the odd nail not fully fire out and I need to stop right there and recharge. It’s only happened at the end of the day and simply because we only have the one battery. A backup battery would fix this but to be honest I’ve never really needed one that bad now that the cabin and garage it finished.
However a few things I’ve noted…
1. The gun has 2 firing modes, sequential and bump fire. I’ve never had it misfire when set to the sequential mode and make certain that I let the motor fully spin up before trying to fire it. It take less than a second to spin up but if you just pull the trigger and start punching the head it won’t work or will miss feed. I got firing the gun too fast on the bump stop setting and found it would miss feed if I didn’t slow down just a bit.
2. As the magazine count gets down to 4 or 5 nails remaining the dry fire lock out feature can sometimes partially fire the pin and not actually send a nail down range. To fix this you can slide the firing pin back in with a screwdriver and of course, not let the nails run down so low.
3. To clear any false jam situation with the yellow flashing light, I found it easiest to simply slide the battery out of its locked position for a split second and then back in. You don’t have to remove it, just slide it a bit. Only happened a few times.
Over all I have to say that this is still my favorite tools for off grid building. I can drive nails into places that I just can’t swing and it shaved weeks of our build time. It made holding up a rafter, a beam or a framed wall with one hand and driving in several nails a breeze! I like that there’s no compressor running in the background, no CO2 cartridge to buy and replace and lastly no hose to drag around.
Thanks again Ed and I really hope you find a product that works best for you. I’ve read through a lot of the FAQs on Amazon and its still got 4/5 stars from 150 customer reviews.
Cheers!
Steve
Steve, now that you’ve gone a winter with your pad foundation, how did it go? How much movement did you have? We just got our “other” buildings done this season, rebuilt the homestead log cabin, and will get going on the 2 cabins next Spring. Would love to simplify my foundation, but unsure if your system will move too much as we are in Alaska and have a 4′ ft frost line. At least here in this new site on the Kenai Peninsula for us there is no discontinuous permafrost like we had back in Fairbanks.
Congrats on your build(s) Ed!
I’ve very happy to share that our foundation has now gone through two winters and a third will shortly begin. The footings under the main cabin haven’t settled/shifted a millimeter! The entire cabin is square, level, plumb and rock solid as the very first day we built it. We went with this design so that it could be easily shimmed with nothing more than a carjack and a pieces of lumber. But so far there’s been no need as for the main part of the cabin itself.
Now I say the main part of the cabin because the left corner footing, of the three that support the front deck, did drop aprox one and a half inches over the past three years. It didn’t affect anything and we simply jacked up the corner, slid a pressure treated piece of deck board on top of the footing and lowered it back down.
I’ll keep reporting back if anything does shift. A lot of people have asked about this particular set up but again it was the right move for our climate and soil conditions.
Hey Ed do keep us in the loop of your build(s) ok. We love hearing from folks living the dream :)
Cheers!!
Steve
we have all of our reclaimed lumber ready to start. we would like to have the DeWalt nailer.
Thank you for sharing all of the building tips. my tool would be the nailer
Portable sawmill for sure to use existing trees in build
My only question is at this point, with all those beautiful dead standing pines, did you consider doing a log cabin instead? Butt & Pass method is a lot easier than framed walls IMO. Plus, free wood!
Hey John! Our first idea was indeed to build a log cabin. However, as we searched for land to buy and build our home on our requirements fell more towards a lake front property that was isolated from others, big (bit not too big) and accessible by vehicle. At the time I was fighting cancer and needed to get to and from the build site relatively easily. The property we choose “looks” like it has plenty of trees but the section we actually own would not have provided the size/number of trees required to build a cabin of this size. It’s not off the wish list yet though! Just need more property more conducive to harvesting tree for building.
Really enjoy your blog. We plan on starting our own home soon. We can’t be off grid due to my husbands breathing issues. He is on oxygen full time. My dream tool is a planer, because I plan on using a lot of rough lumber to build the house and most of the furniture.
A compound sliding miter saw! I just love the way it sounds, and I cannot, for the life of me, make perfect straight miter cuts with a handsaw and miter box.
Thanks for sharing all of this! Ya’ll have really inspired me to take on building a little getaway this summer, in Northern NM.
My #1 tool would be a generator! Nothing happens without some power! Looking forward to building my little off-grid cabin in the Smokys this year.