

Here's How To Perfectly Select And Expertly Install A Front Door
So, why are we so picky over a front door?
So you’ve bought the perfect piece of land to build your off grid home on. It has the lake, the trees, the mountains. Everything you’ve dreamt of. You’ve designed the ultimate floor plan and have every detail worked out from exactly where you’ll place the wood stove, to the proper size of solar system battery bank, to the make and model of your on demand propane hot water heater all figured out. Heck you’ve even picked out the kitchen sink.
Great! So what’s left?
How about the first thing you’ll see and do every time you enter your home.
Your front door!
Selecting the right entry door for your off grid home, and installing it properly, will most certainly save you money in heating and cooling costs. It also plays a significant role in make your living environment far more comfortable. Especially in the dead of winter or during those blistering hot summer days and nights. Warm air in the winter is a precious commodity when you’re off grid. Just like cool air is in the hot summer months. A properly installed front door will help ensure that air is kept where it’s wanted.

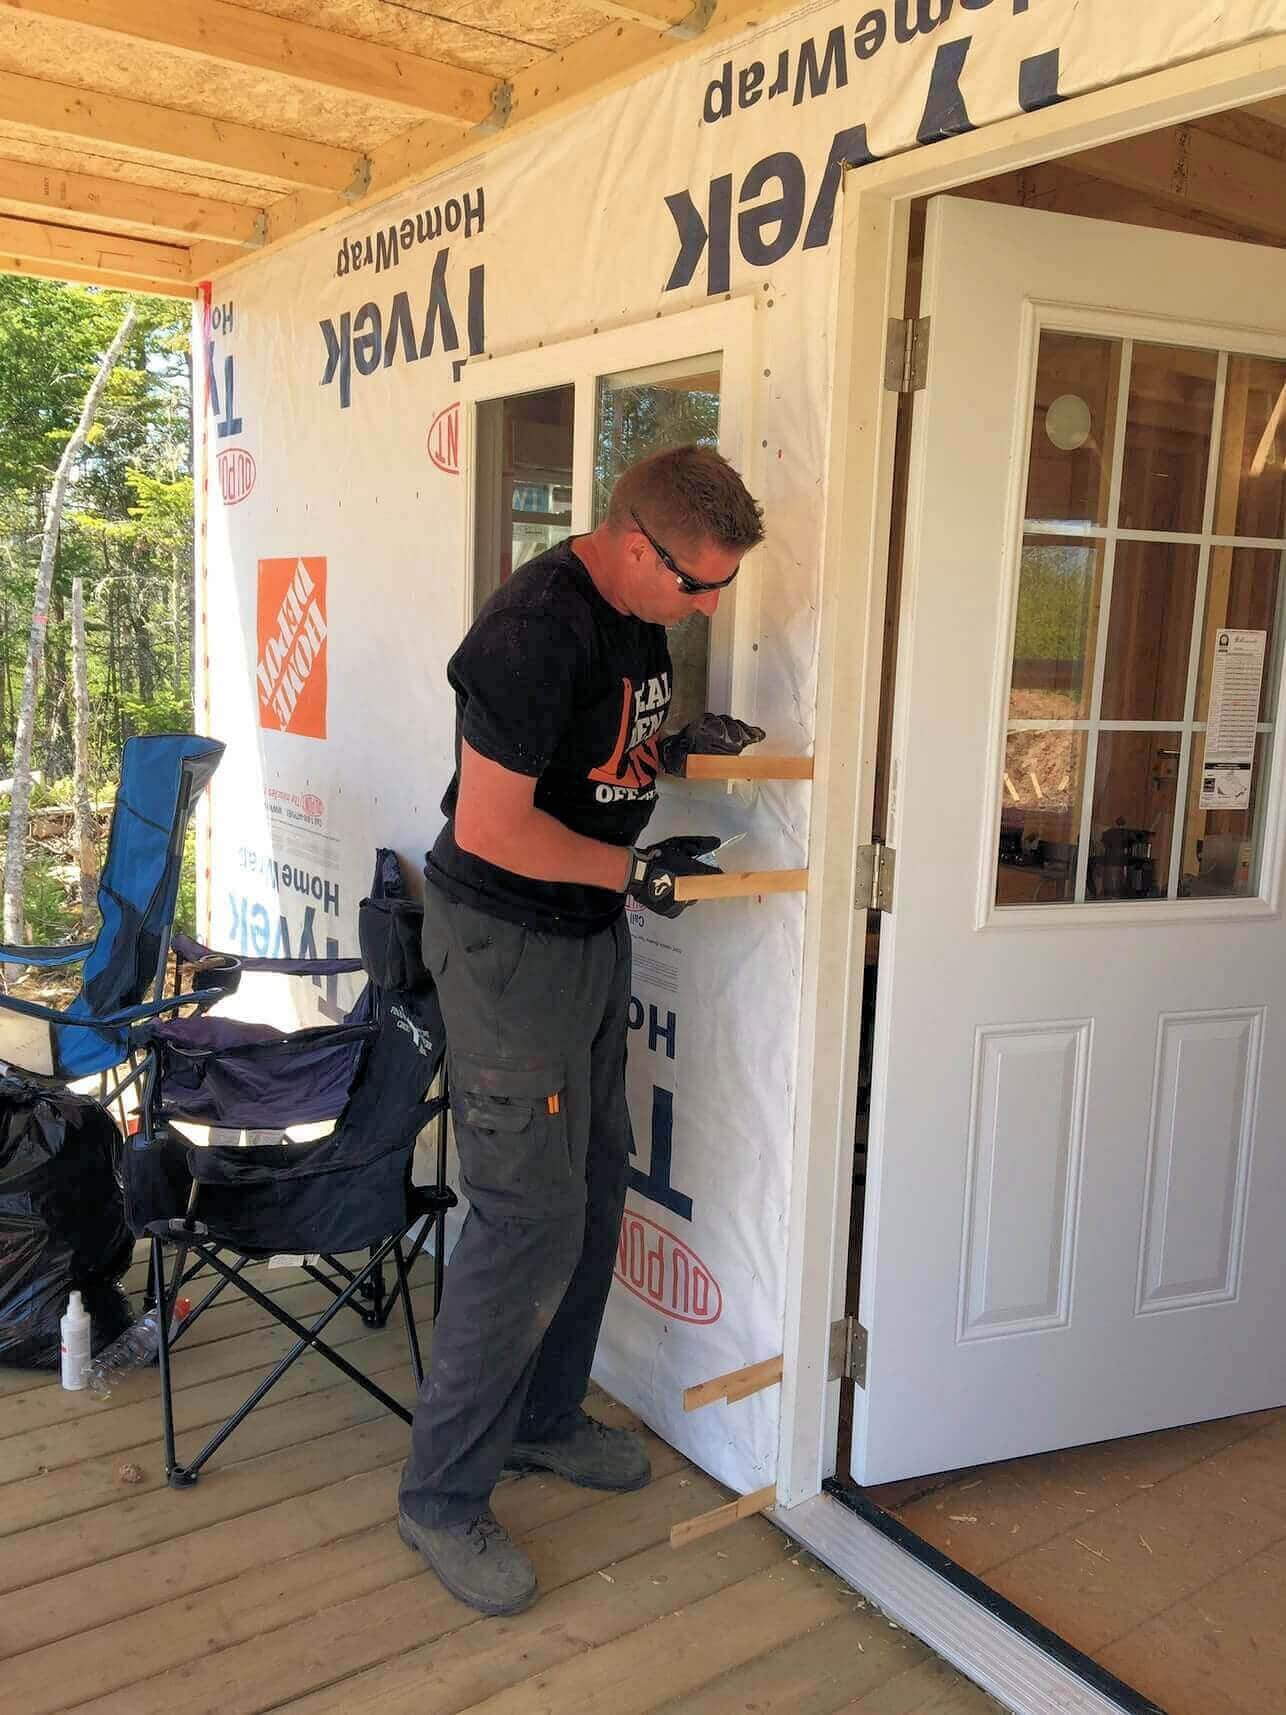
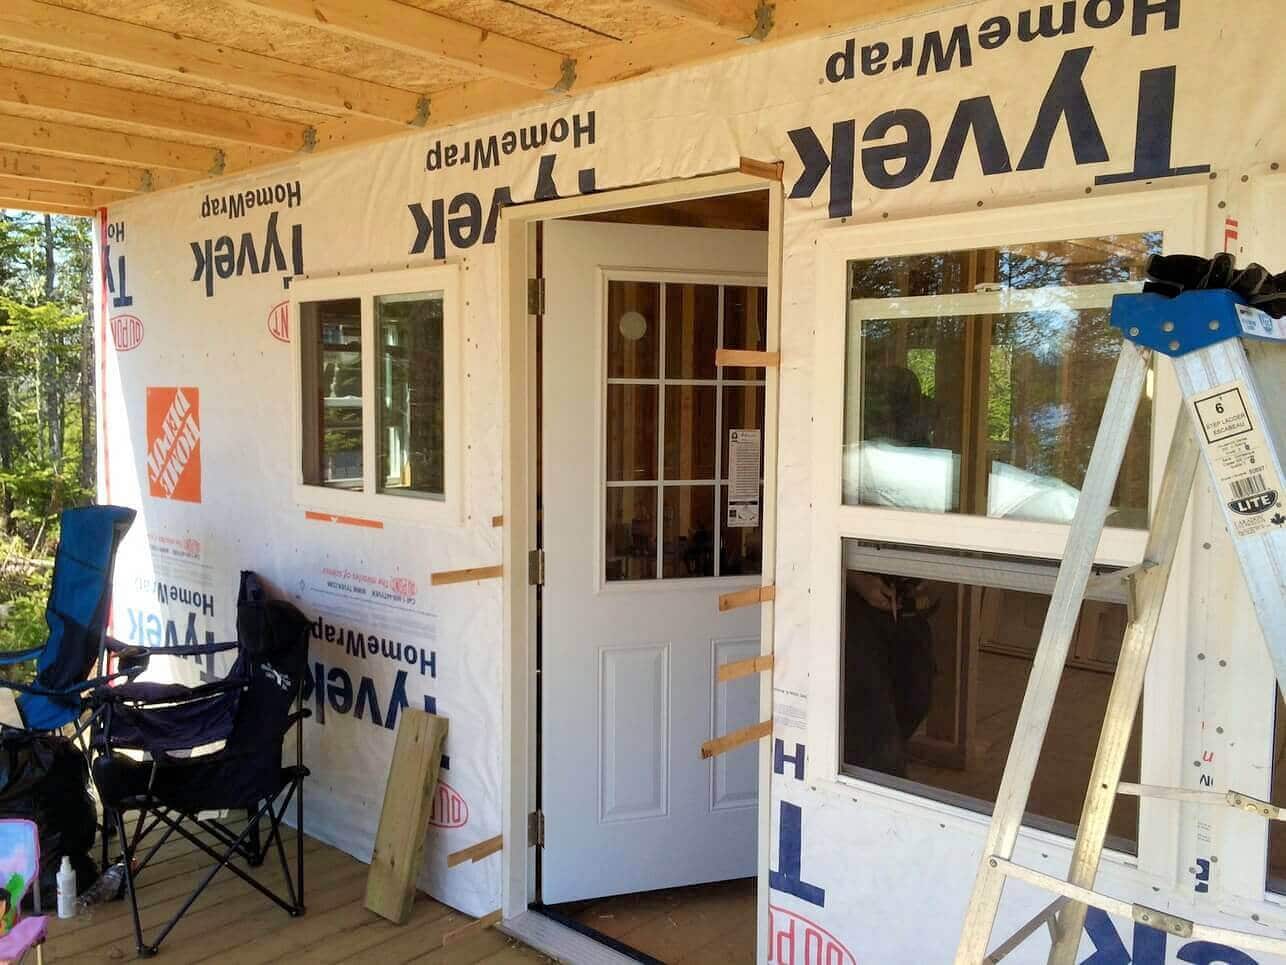
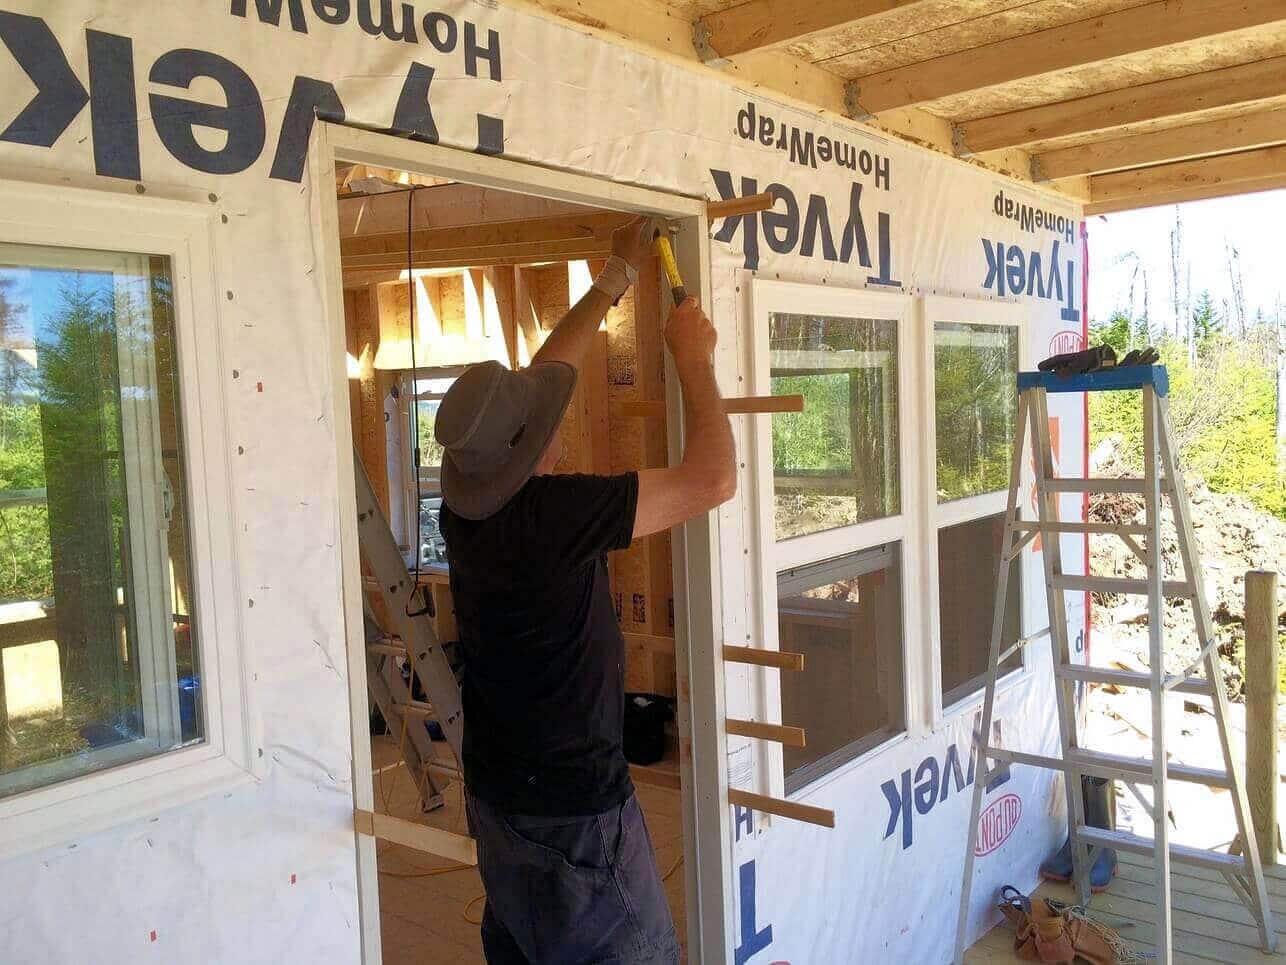
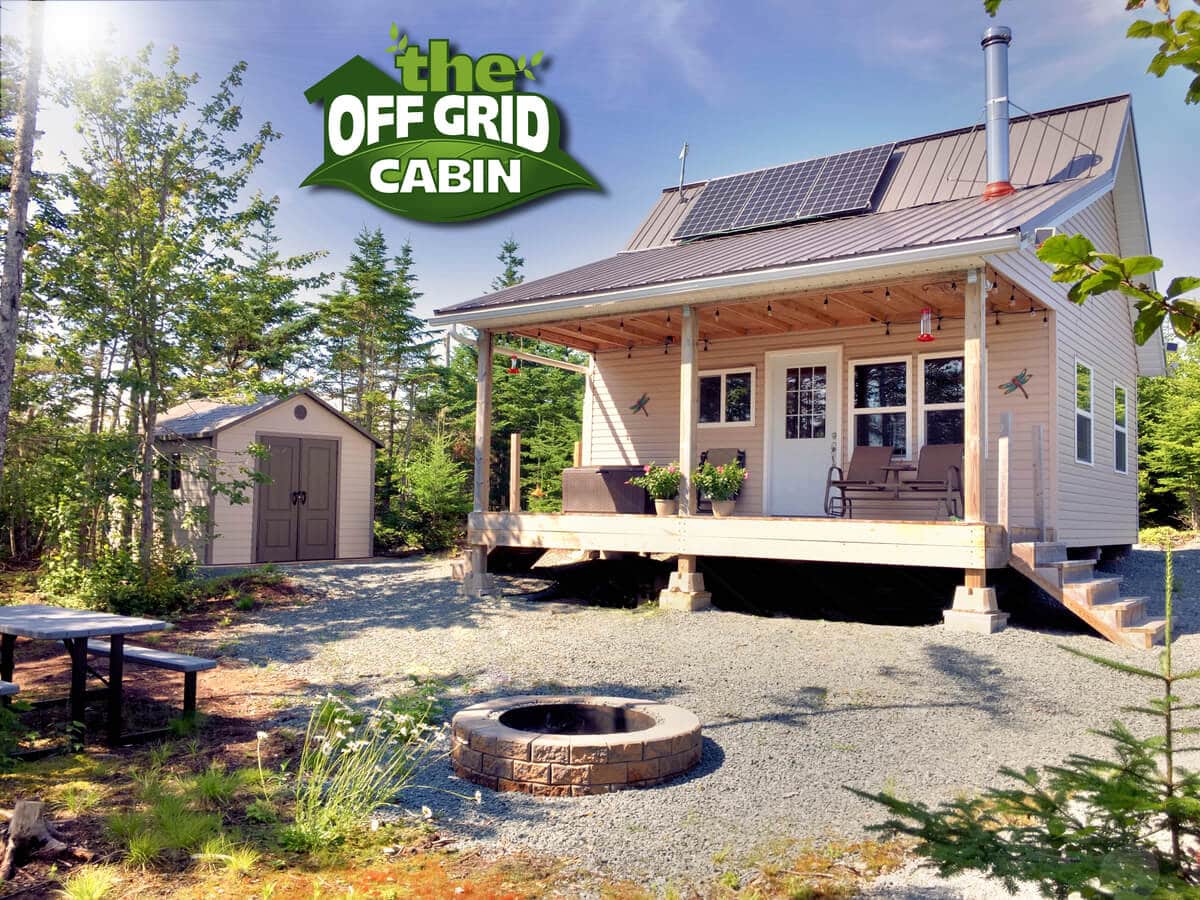
Today lets walk step-by-step through the installation of our own off grid cabins front door.
11 Essential Factors To Consider When Choosing Your Front Door.
- Size
- Security
- Availably
- Acoustics
- Affordability
- Energy Efficiency
- Warranty & Durability
- Purpose & Functionality
- Architecture & Aesthetics
- Maintenance & Repair Costs
- Solar Heat Gain Coefficient
TIP: We describe the 11 essential factors in detail here. Be sure to review them before you select the windows and doors for your off grid home.
For those who are following our off grid cabin build, you’ll recall we completed the entire framing in just three days. And that’s with just my father and I working alone.
I can’t emphasize how critical it is to rough in your window and door openings properly. When done so, the window and door installation can easily take less than a day. In fact, we installed all nine vinyl windows plus the exterior entry door in less than one day.
You can see how we roughed in the window and door openings over a three day period beolw.
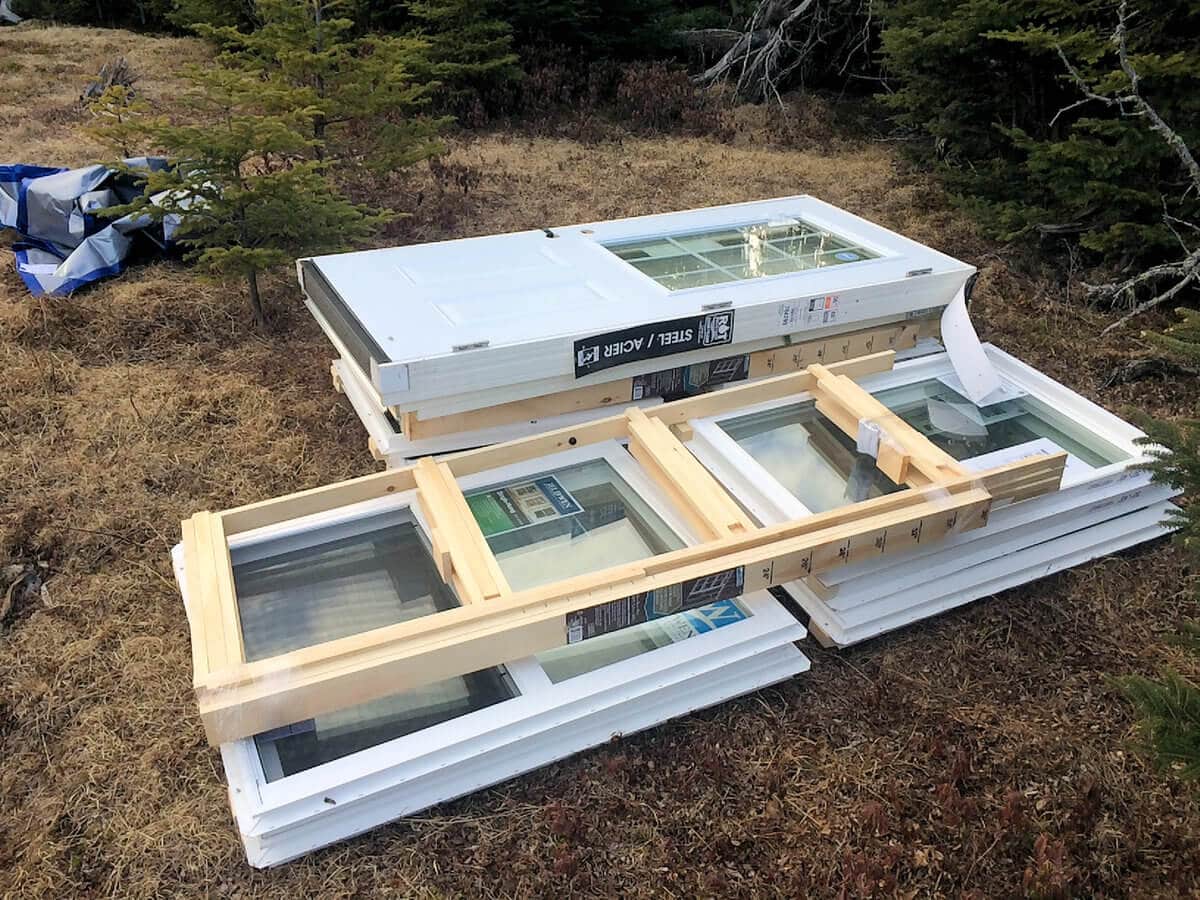
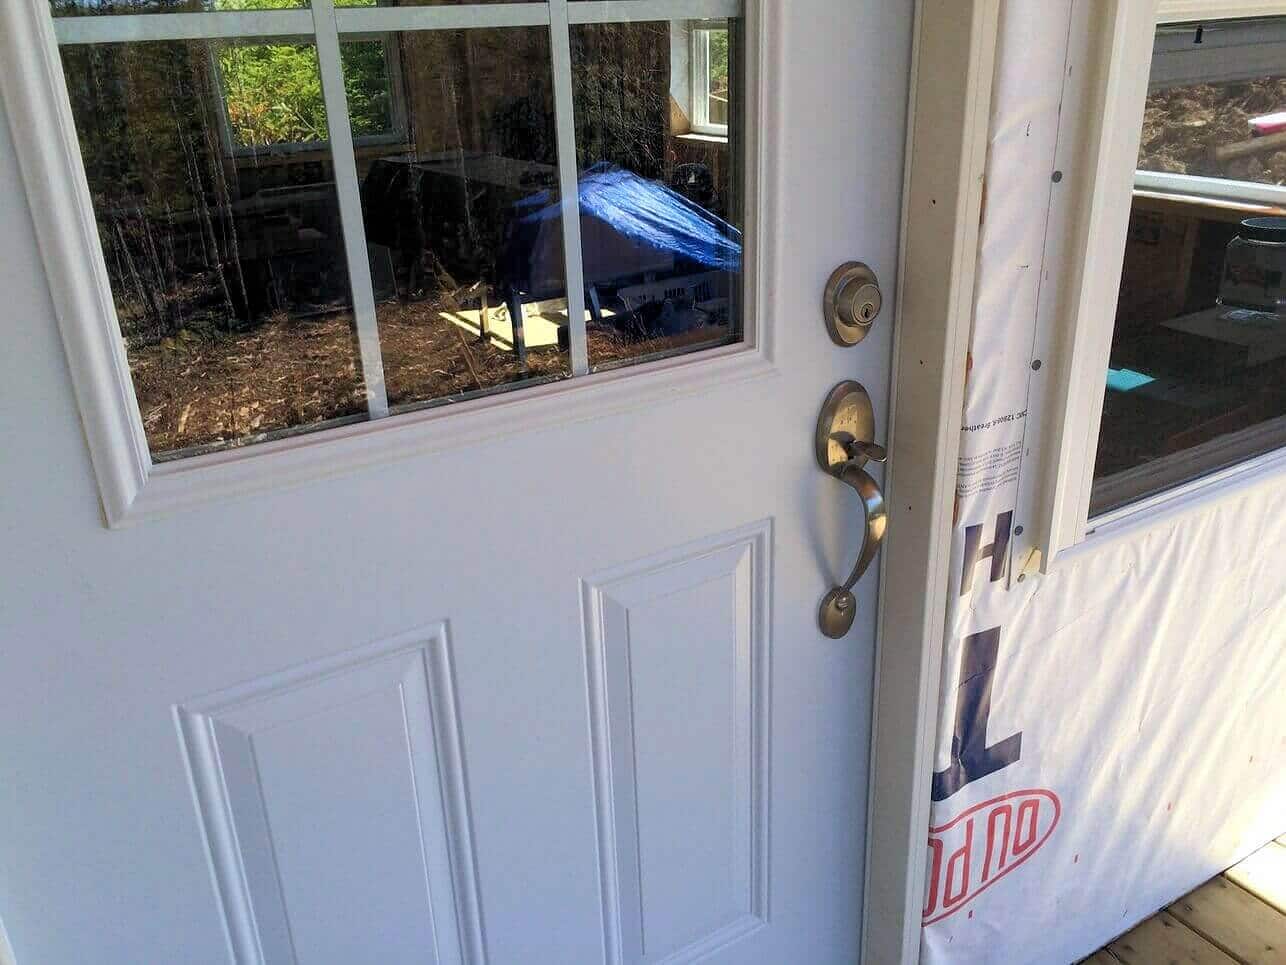
The Door We Choose
Considering the 11 factors, and applying them to our climate here in Nova Scotia, we decided upon a Masonite 36-inch x 4 9/16-inch 9-Lite Internal Low-E Front Door from Home Depot for our cabin exterior front door.
There are several benefits to selecting a foam core steel door.
The window allows in much more light. For our floor plans that means more light into the kitchen and front living room areas.
Energy efficiency is one of, if not the most important factor of exterior doors. The low-e gas window and foam core design provide an excellent insulation factor.
Steel doors are extremely durable and strong. That means better security and keeping any nosy wildlife on the outside.
Lastly, a steel door requires little maintenance. It can easily last the lifetime of your home.

If you recall from our post about delivering 20,000lbs of building materials we mentioned that by purchasing all our building supplies from one location Home Depot gave our overall order a considerable discount. This front entry door is just one example of that discount. Normally priced this door is $398 but we only paid $299.
While this is the only exterior door for our cabin we have two interior sliding pocket doors.
Sliding pocket doors are perfect for saving precious space in a home with a small floor plan like ours while still maintaining privacy.
TIP: Because our doors were selected ahead of time we knew the exact rough opening requirements simplifying the framing process.
Chances are good that you can find your specific door installation procedures and rough opening requirements online. We copied the Stock Keeping Number (SKU) from our Home Depot receipt and simply pasted it into Google. The exact door came up and we then used the name of that door to find the manufacturer’s website.
Masonite even has a specific webpage with step-by-step video instructions of how to install their, prehung interior doors, prehung exterior doors, or a prehung patio door. They also offer printable installation guides that you can take to your build site to ensure those rough openings are framed to exact parameters.
Want a complete cost breakdown of our 24ft x 20ft off grid home including the building materials list?
SHOW ME THE COMPLETE PACKAGE!Installing The Exterior Front Entry Door
To make the door installation process quick and easy gather up your tools and any required material before you begin.
Please note: many of these links below are affiliate links, so when you purchase any of these items through the links on this page, we will receive a small commission that is used to help keep The Off Grid Cabin running. We’ve found that Amazon has excellent product descriptions, detailed personal reviews, and some of the lowest prices available.
These are all products that we either personally own, use or support and if you purchase items through these links, you have our sincere thanks!
- Level
- Pry bar
- Hammer
- Utility knife
- Wood shims
- Tape measure
- Expanding foam
- 2 1/2″ Wood screws
- Cordless drill & drill bits
- Caulking & caulking gun
Remember to inspect the door thoroughly for any cracks, dents or missing hardware before installation.
Step 1
The overall rough opening dimensions should be ¾” wider and ½” taller than the outside dimensions of the door frame. Check that it is square, level and plumb. Have a clean subfloor and if required apply any flashing in a manner to prevent entry of water.
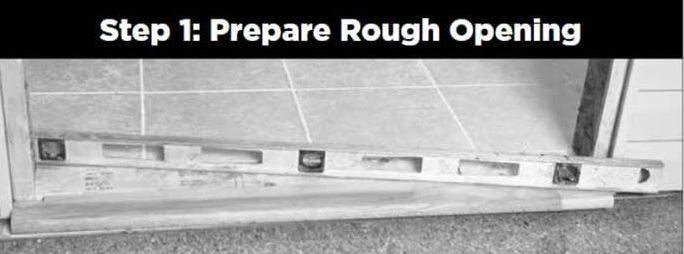
Our pre-hung exterior door features a pre-installed rot resistant composite bottom rail and aluminum tread flashing already attached. This makes the entire installation process incredibly simple and fast. Consider a prehung door unless you’re changing out an older door and the frame is still squ
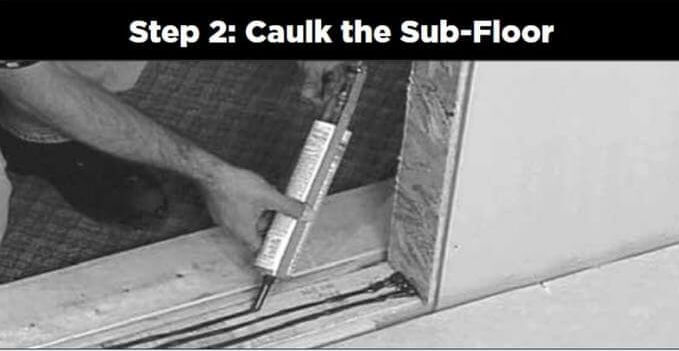
Step 2
Apply three ¼” lines of caulk along the length of the subfloor, the first line starting approximately 1” from the inside edge.
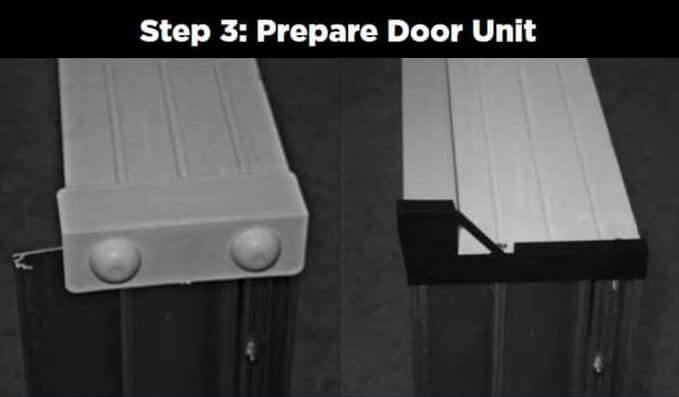
Step 3
Remove all the packaging materials from the door such as nails, staples and screws.
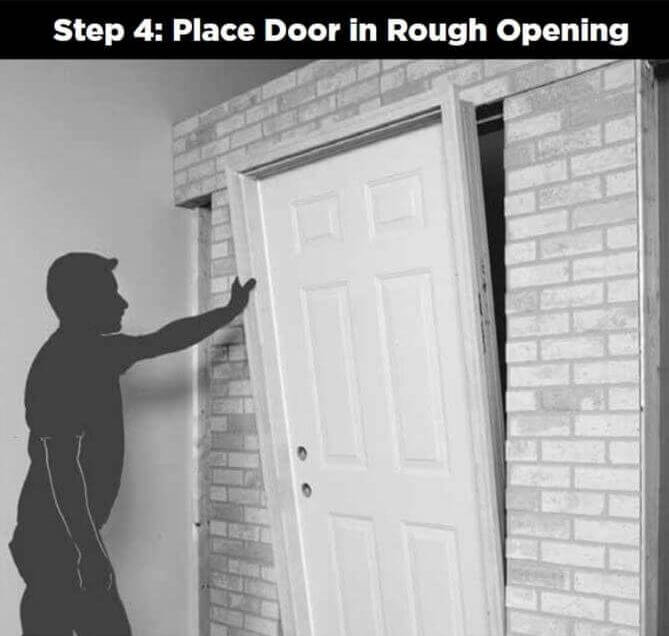
Step 4
Set the door in the rough opening and install the wood shims in the correct locations and sequence.
Step 5
Stand on the inside of the door and center the door in the opening.
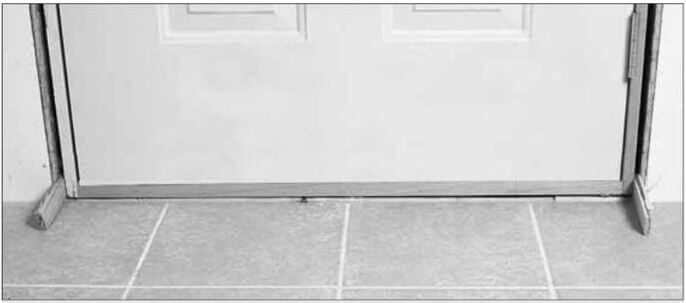
Shim tightly at the bottom corners of the door unit (points A below).
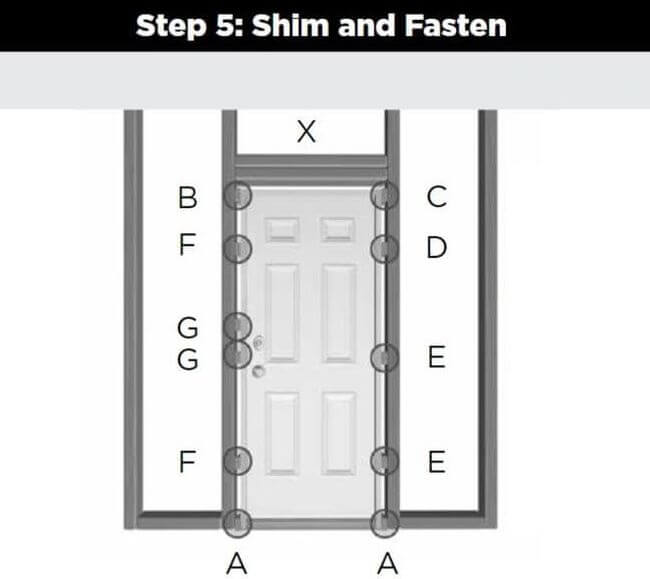
This will keep the door centered and the frame tight against the sill.
Shim the top of the door on the latch side (Point B photo above)
Install shims until there is a consistent 1/8″ gap between the top of the door slab and the frame header.
Shim the hinge-side of the frame (Point C photo above). This will hold the door tight in its position relative to the frame. The door should operate freely with nothing but shims holding it in place.
From the outside and with the door closed, ensure that the frame is in a straight vertical plane (not twisted). To do this check that the weather-stripping on the latch side is evenly compressed along the entire height of the door slab without any pinching or gaps.
Ensure that there is an even gap across the top of the door slab.
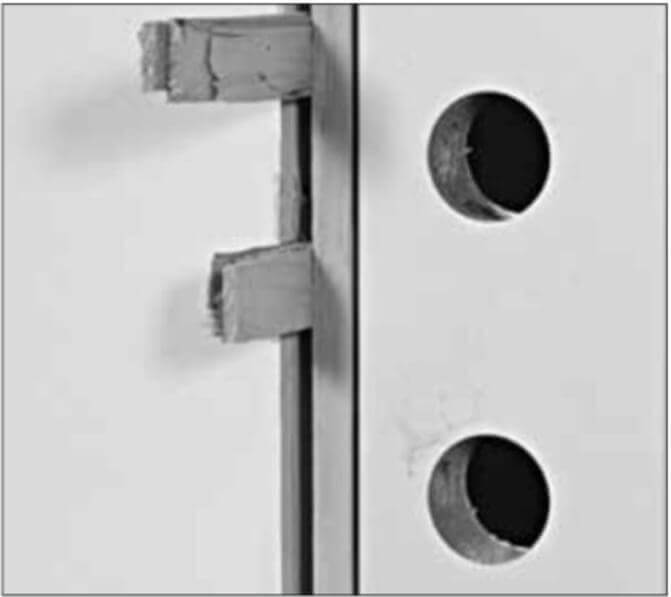
With the door closed and from the inside shim directly behind the vacant hinge screw hole in each hinge (Points D and E in photo below) until there is a consistent 1/8″ gap between the hinge-side jamb and the door slab edge along the entire height of the door.
Gap between the latch-side jamb and the door slab edge should be 1/8″ at the top and bottom of the door only.
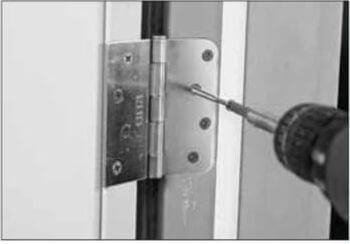
Drive one of the 2-1/2″ screws through the vacant hole in each hinge, through the jamb, shims and into the stud or rough buck.
TIP: When the shims are properly installed, the frame should not move or twist at all when the screws are tightened and counter-sunk thereby maintaining the 1/8″ gap. If there is any movement, loosen the screws and shim tighter to maintain the 1/8″ gap, then re-tighten the screws
Shim behind the latch-side jamb (Points F in photo below) approximately 8″ from the top and bottom of the frame.
Install shims until there is an even 1/8″ gap between the jamb and the edge of the door slab along the door.
Shim behind the latch-side jamb (Points G in photo above) just above and below the deadbolt hole, maintaining the 1/8″ gap.
Screw 2-1/2″ installation screws through each of the hinges and shims into the stud.

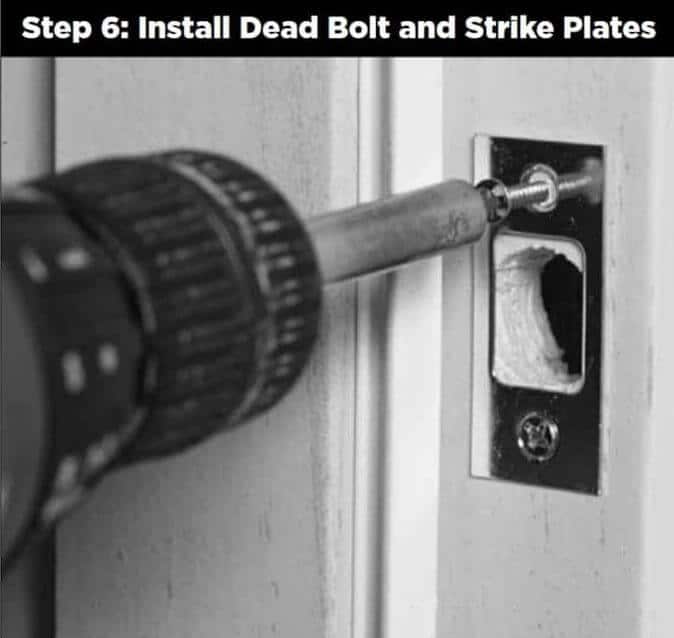
Step 6
Install the deadbolts and strike plates using the precut holes.
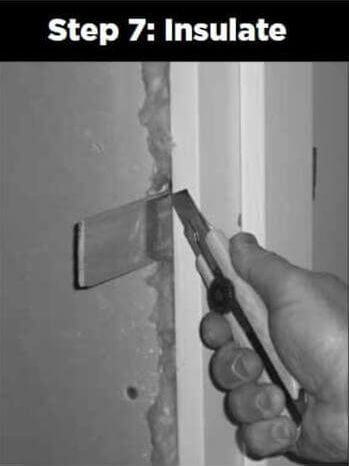
Step 7
Remove the excess wood shim material and insulate the gaps with either fiberglass insulation or Window & Door specific insulating foam sealant.
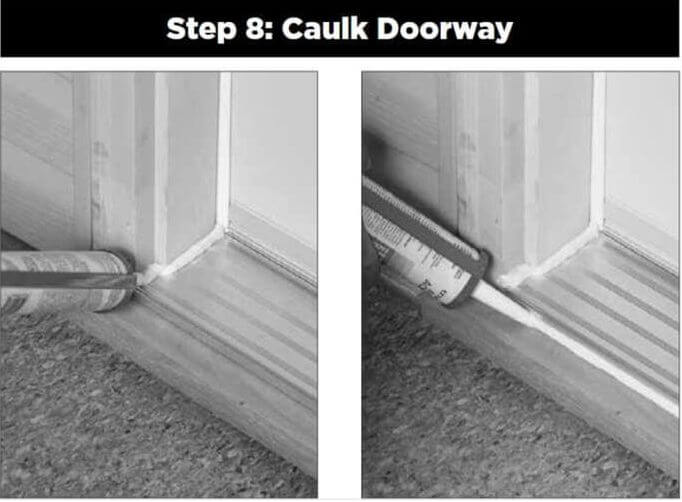
Step 8
Caulk the exterior corners of the frame, molding and sill.
Front Door Installation Conclusion
Remember to review our 11 essential factors for selecting appropriate doors and windows for your climate. You’ll not only save money on heating/cooling costs but create a more enjoyable living climate in your home. This is especially important for homes built off the grid.
The installation process for a front entry door can be quick and easy. The key to a successful installation is ensuring the rough opening is framed correctly. You can eliminate any guesswork when you frame your opening by knowing the required dimensions before you start framing.
Do it right the first time.
Your Turn
Consider yourself armed and ready to install your front entry door like a pro.
Do let us know in the comment section at the bottom if you feel ready to tackle the project.
If you’re not already following the build be sure to visit our How We Build The Cabin section so you can check out the build right from the start!
And for all our Pinterest pinners out there here’s a special pin just for you!


how to clean solar panels
How to Clean Solar Panels: A Step-by-Step DIY Guide As you already know, residential and off-grid solar systems are amazing sources of renewable energy that are quickly growing in popularity. The large flat [...]

earthship
What Is an Earthship and How It Can Help Save the Planet Imagine living in a home that is completely self-sufficient, eco-friendly, and comfortable. A home that grows its own food, collects its [...]

3-way-switch-wiring
3-Way Switch Wiring: A How to Comprehensive Guide Here at the off grid cabin we’ve done our fair share of electrical work including 3-way switch wiring. We’ve done all the internal and external [...]
solar generator
How To Find The Best Solar Generator When we first cleared the land to build our off grid home back in 2016, we started with one of those small 700 watt Moto Master [...]

Off Grid Heating
The Best Off Grid Heating Methods Introduction To Off Grid Heating If you're Living off the grid already or planning to in the future, you already know how important it is to have [...]

off grid appliances
The Best Off Grid Appliances for Off Grid Living Introduction To Off Grid Appliances Living off the grid can be a rewarding and fulfilling experience, but it also comes with some challenges. One [...]


great site! how can i get to the solar panels, toilet and water supply and gray water disposal
Hey Steve! All those posts are ones I am currently working on. While the components are all installed and completed I still need to write up a detailed post for several more subjects. Hopefully I can have those hammered out before too long.