


Framing Our Off Grid Cabin Walls In Just 3 Days!
Today is the third of three days that it took us to frame the off grid cabin walls.
Hopefully you’ve been following the build up to this point.
If not, you can head on over to day one of our three day framing blitz or go all the way back to when we first started the foundation.
To date we’ve had just over 1 million visitors visit our framing section!
It’s great to know that so many other folks are interested in following the build and perhaps building their own off grid home.
Be sure to share help us get the world out about how amazing it is to build your own off grid home!


Finishing Up Framing The Exterior Walls
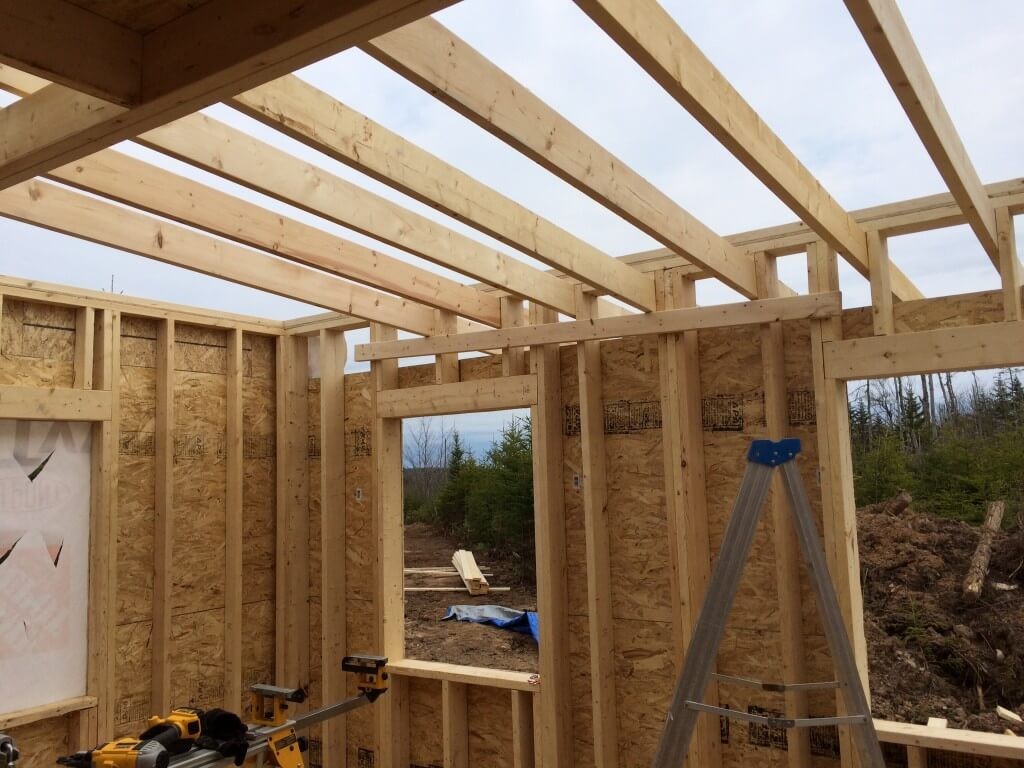
Today is day #8 of our overall build and we’ll be finishing up framing the main floor walls, frame the main interior load bearing wall and finish up the exterior sheathing.
All the remaining interior walls will be built after the bathroom amenities are brought in and installed.
Lastly we’ll incorporate some pocket doors for the bathroom and the master bedroom to save some precious space.
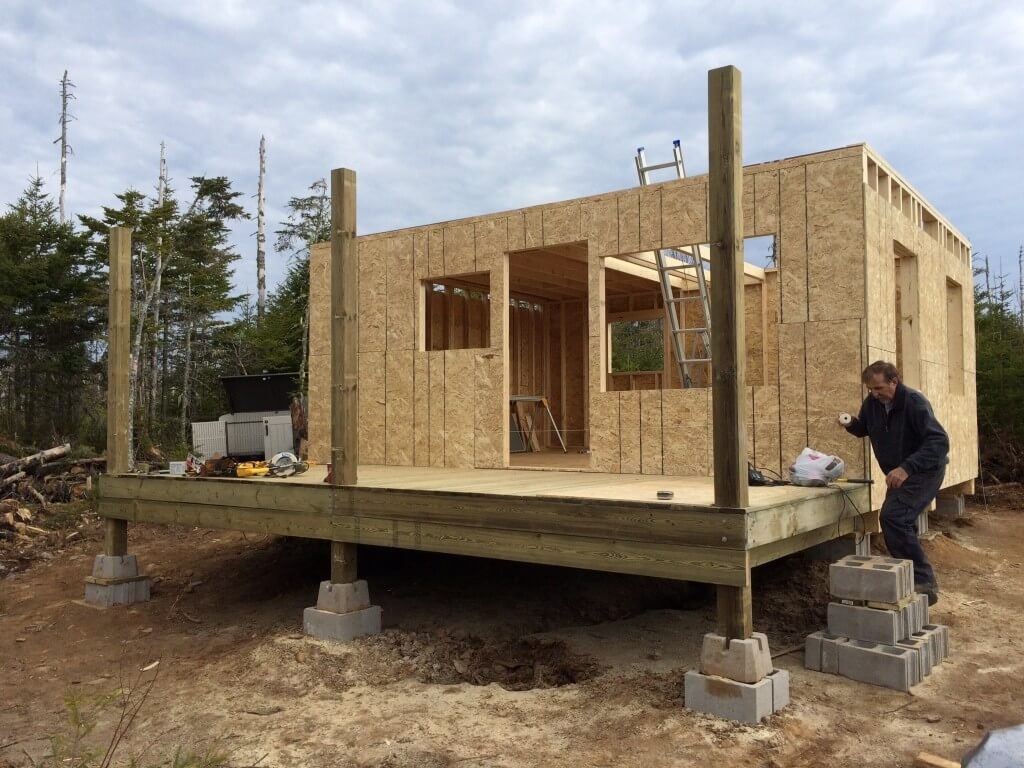
Here’s Where We Left Off Yesterday…
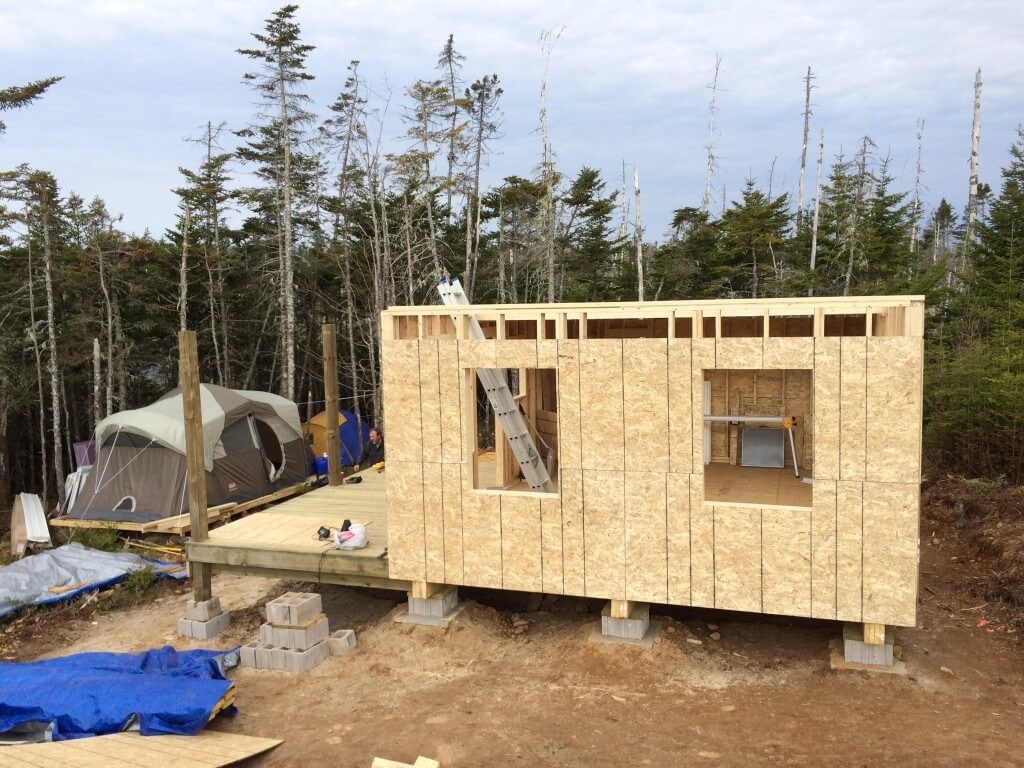
We have one end wall framed, the rear wall and half the front wall.
As well, the loft floor-joist is complete and the OSB sub-floor is glued and nailed down.
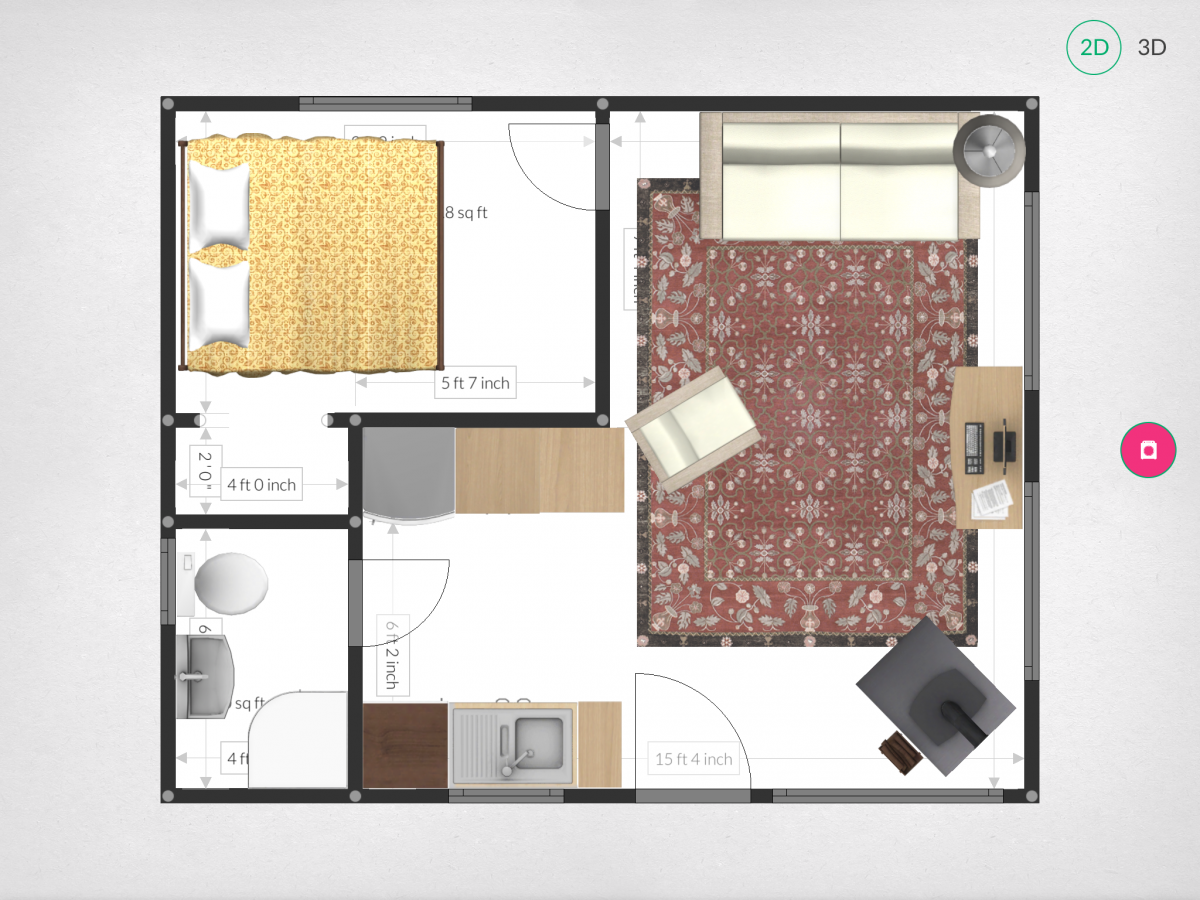
Here’s a floor plan refresher to get your bearings of where we’re headed.
We covered a complete floor plan overview in our Off Grid Cabin Floor Plan post.
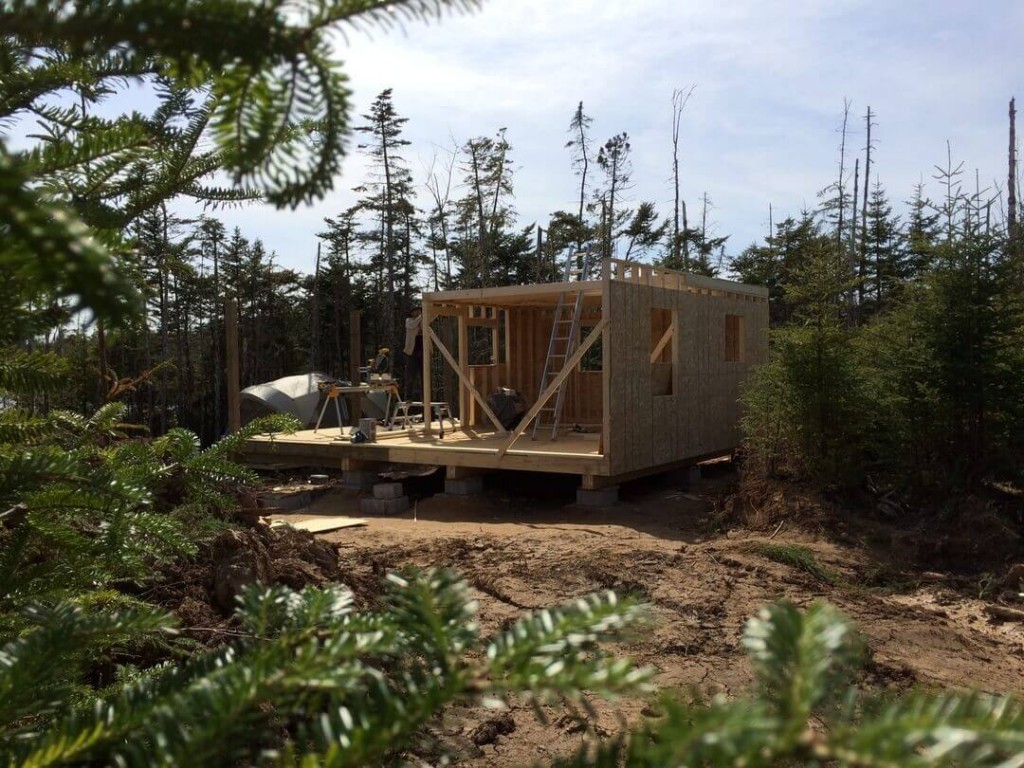
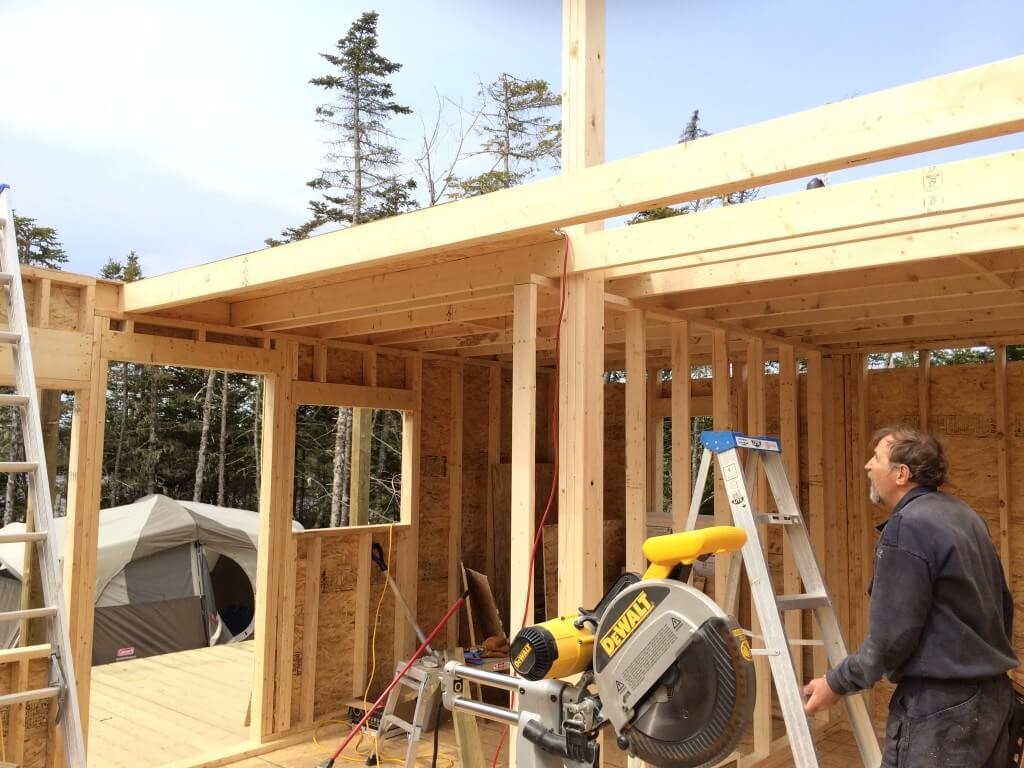
Today we started off by finishing the framing of the East facing end wall.
The sunrise through the two large windows will be incredible!
Don’t forget there’s a “How To: Framing 101” section we posted on our first day of framing.
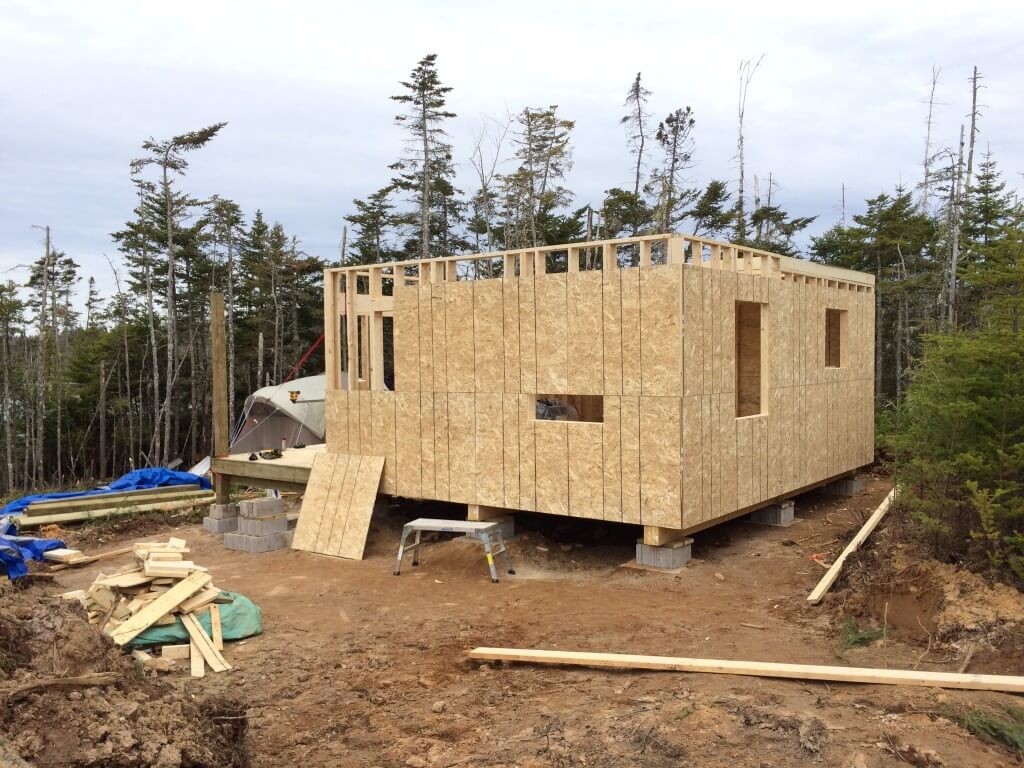
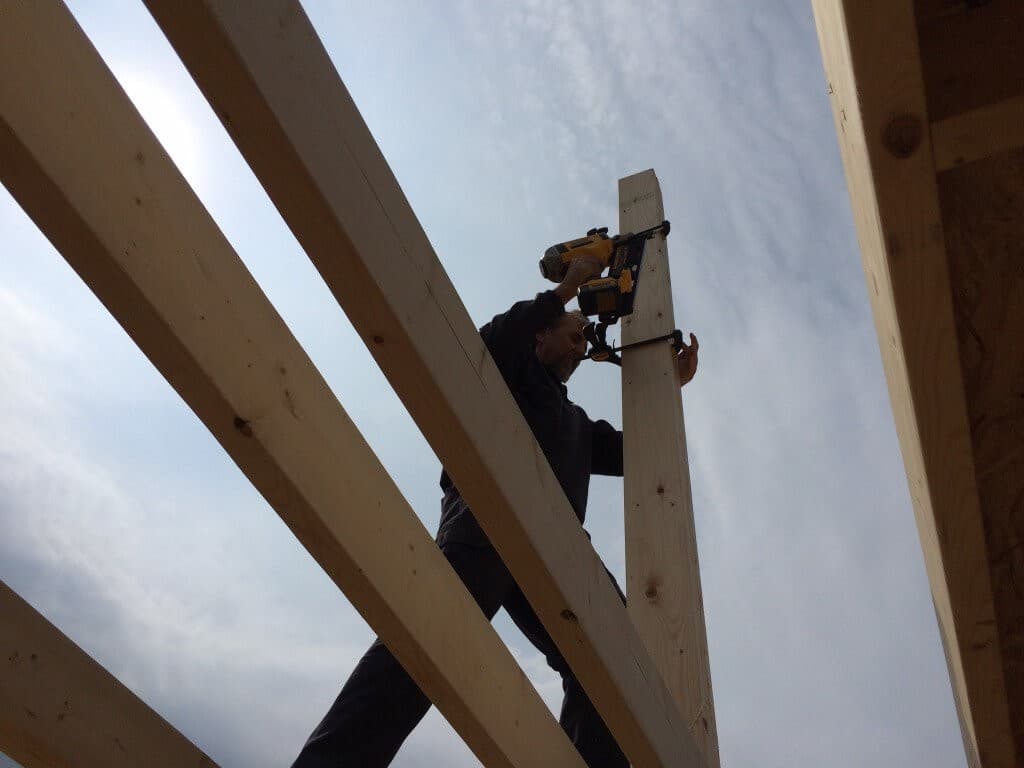
Finishing Up East Facing Side Wall
 The horizontal joists above are only a temporary work platform built in order to access the east facing wall.
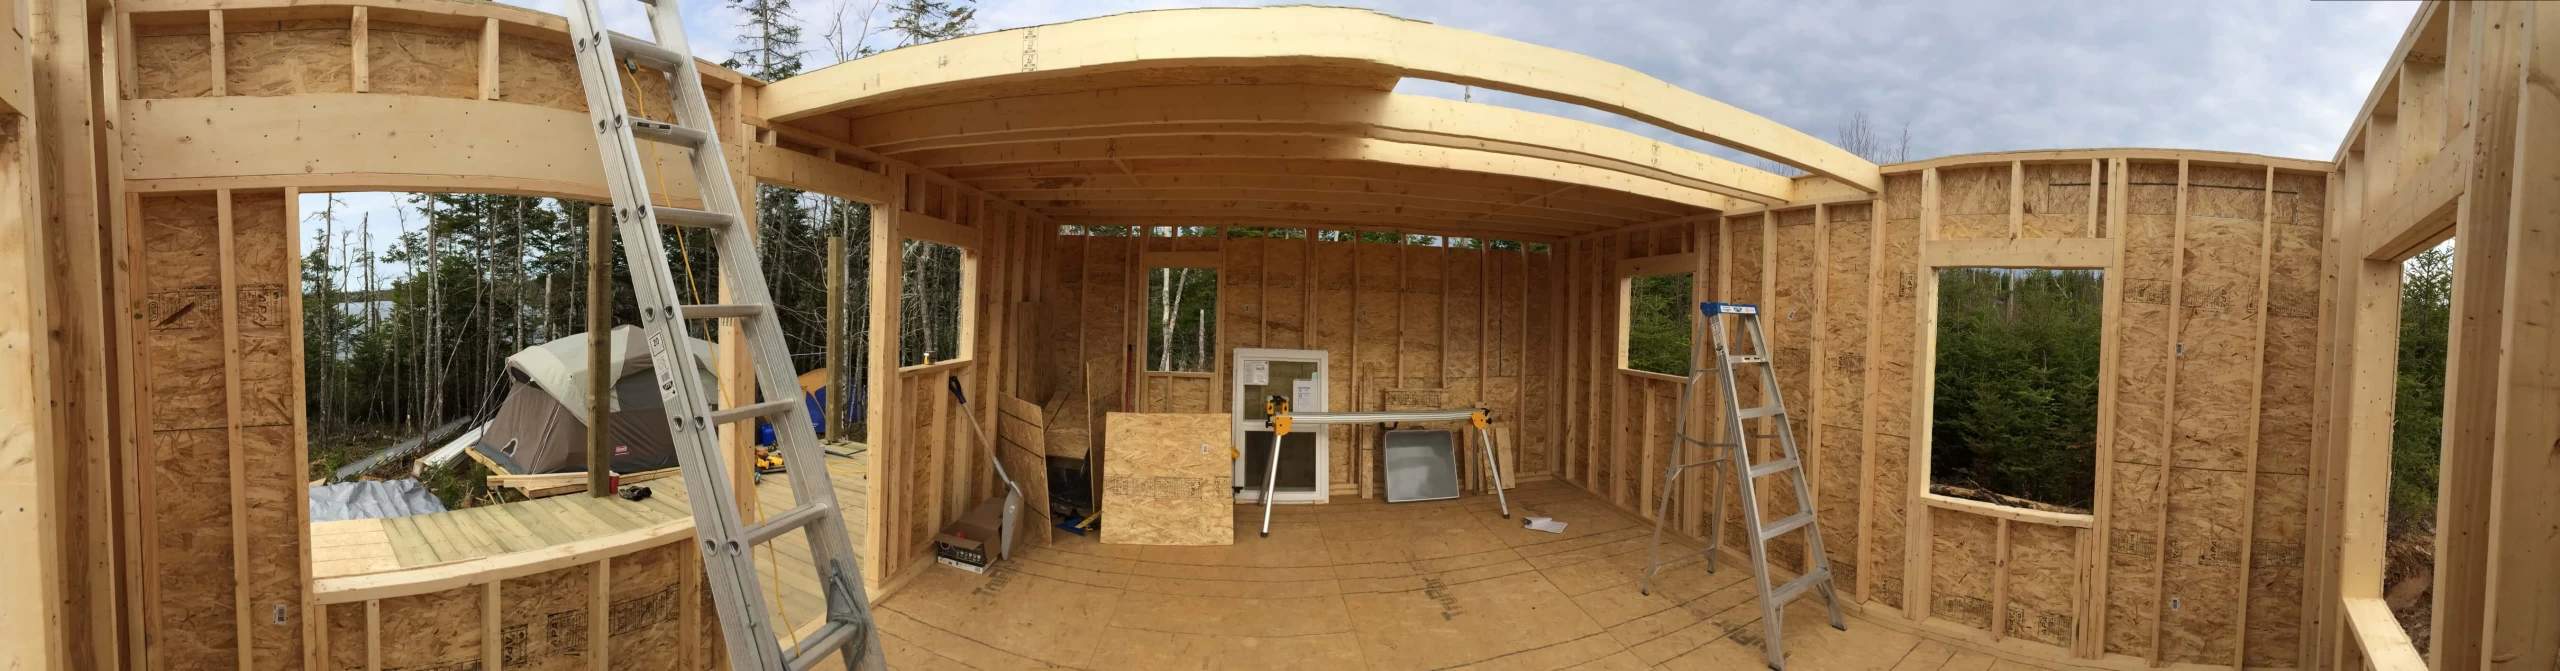
This wall is 20 feet tall and could not have been built and stood as one piece by the two of us.
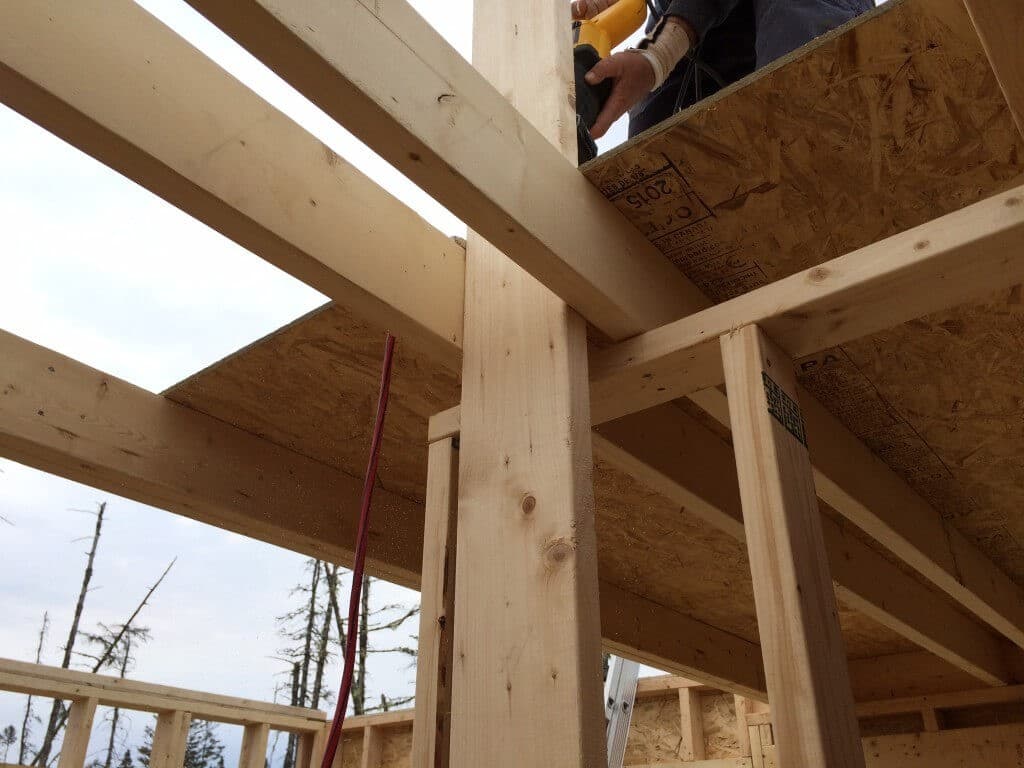
NOTE: This is the only exterior wall that was framed using 2 x 6’s – 16″ O.C. Also note the tripled-up 2 x 6 in the center. This will make up one of the three main support posts for the roof.
The rest of the exterior walls are all 2 x 4 – 16″oc. The reason this one end wall was framed using 2 x 6’s is because this main living room incorporated a cathedral ceiling and there will be no additional horizontal support beams as seen in other cabins.
These horizontal beams are called “collar ties” or “rafter tires” depending where they tie in.
We wanted a completely open design without any load bearing beams obstructing the open concept.
Not that this looks in anyway unappealing but we wanted to save on wood, work and test an new roof truss design that will NOT require these support beams. Stay tuned for that post!
The entire roof load will be carried vertically through the exterior walls and through the 3 main vertical support beams and directly into the foundation blocks.
This is unlike 99% of most roof trusses which actually push the exterior walls OUTWARDS and not actually straight down.

HANDY TOOL: One of the most handy items we had that any build site can’t be without is an aluminum folding work platform.
Once the end and the front walls were framed we sheathed them with 7/16″ 4′ X 8′ OSB.
Finishing Up Front Wall Framing
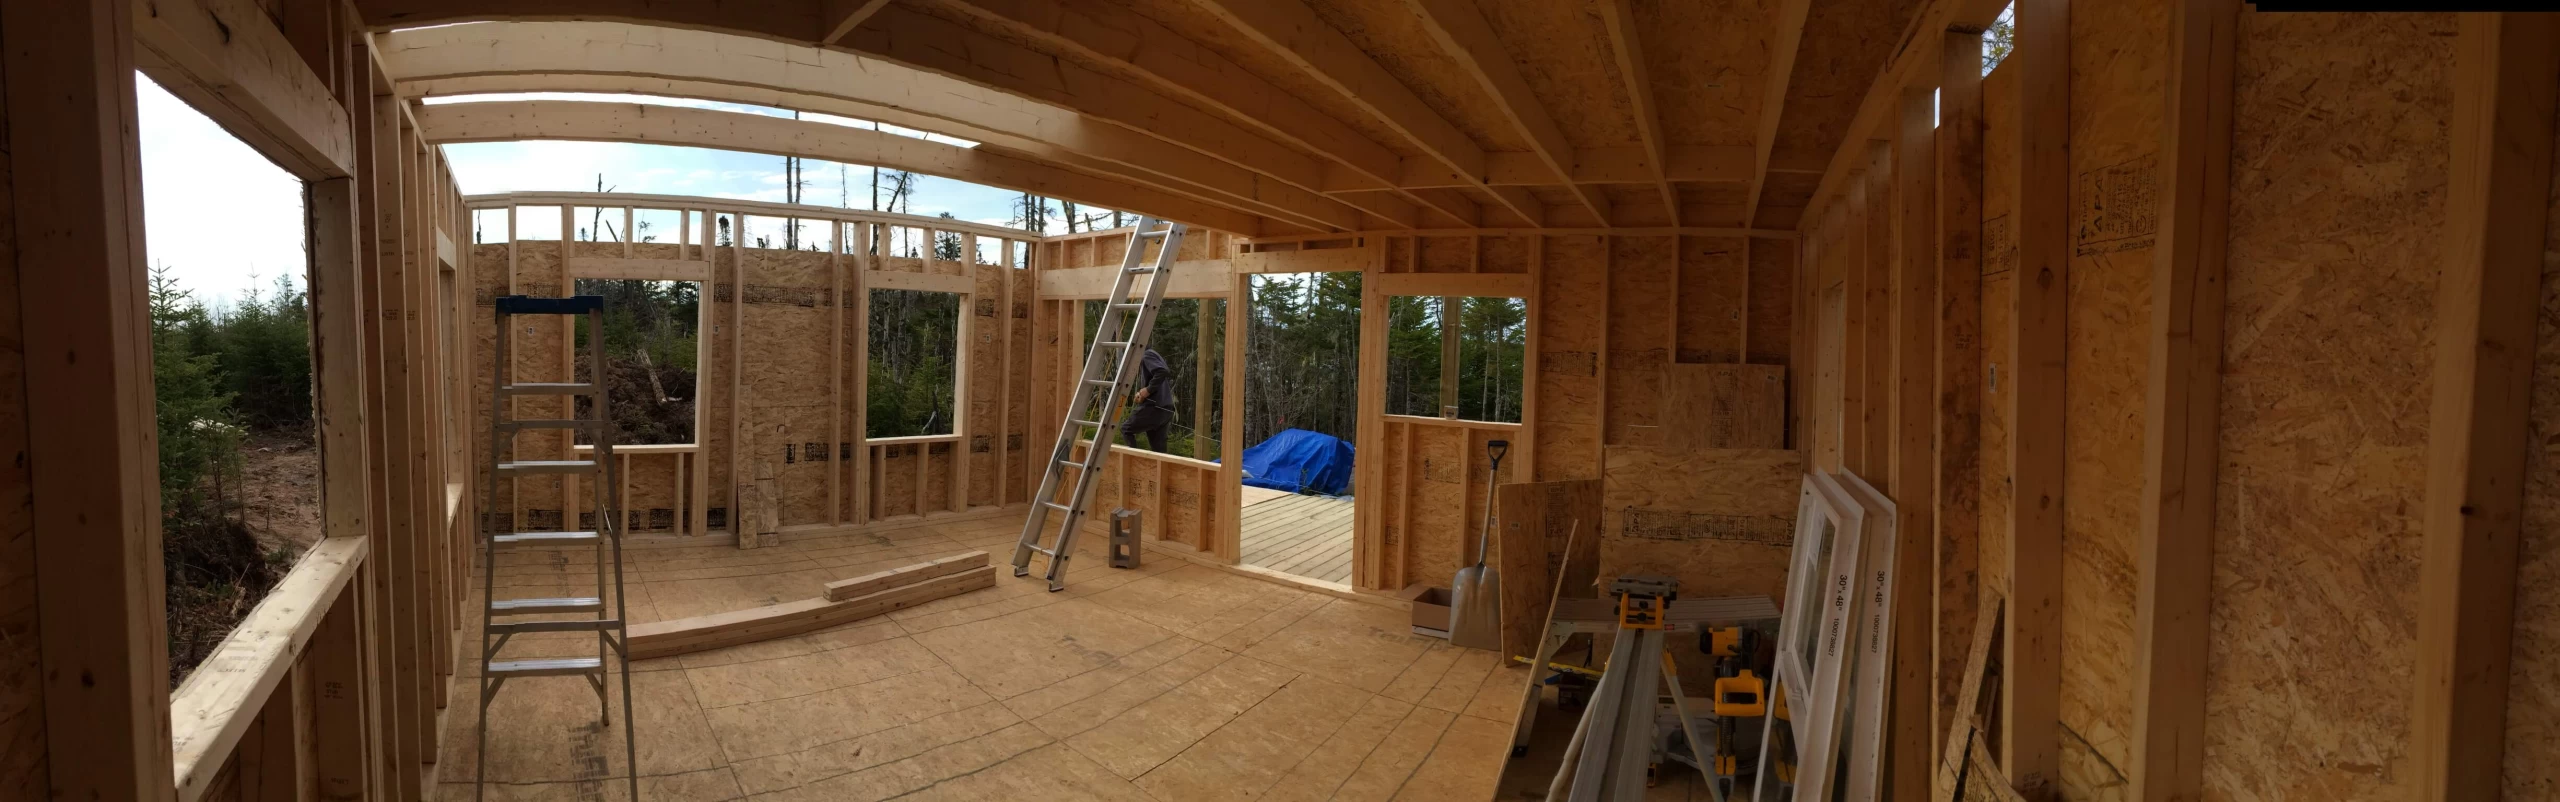
With both sides and rear wall of the main floor framed and sheathed we have only the front wall to complete.
Here we have three window openings. One in the kitchen and two for the living room which will face the lake.
There’s also the main entrance door opening where we’ll install a front door with a window for even more sun and beautiful views!
We have an upcoming post covering the 11 essential factors of choosing off grid windows and doors.
Plus we did a complete post detailing the How To Install Vinyl Windows and How To Install The Front Door.
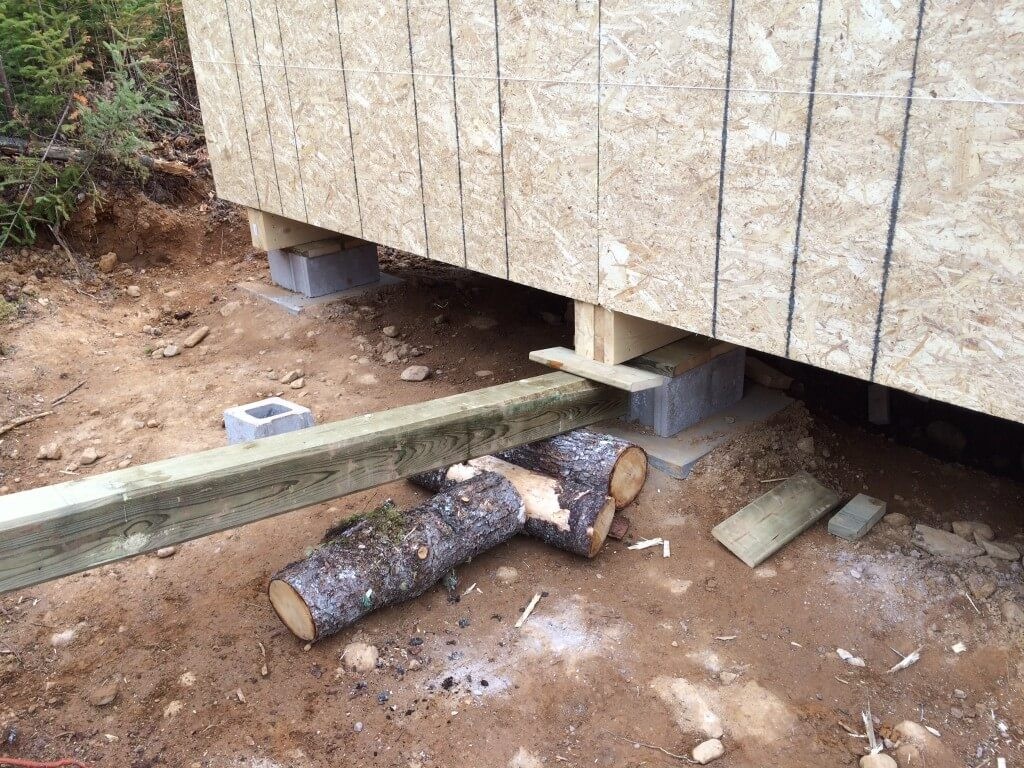
How To Level The Cabin
At this point with all exterior walls sheathed and secure, we wanted to ensure that the cabin is still level BEFORE we start installing the rafters.
It’s easy to check for level by using just a few nails, some string, and a level.
TIP: Measure from the bottom of the support beams to a point approx 2 feet up the wall and drive in a nail. Repeat on all 4 corners and connect the nails with your string. Align a 4′ level on the top (or bottom) edge the string to check for level.
The reason we don’t put the level directly on the bottom edge of the OSB is that it’s possible the OSB wasn’t cut perfectly straight, it could have swelled with moisture, or it just may not have been nailed on squarely.
If you ever do need to re-level the cabin at any point simply build a quick make-shift lever with a scrap piece of lumber and fulcrum using a few logs.
Here’s one way to do it…
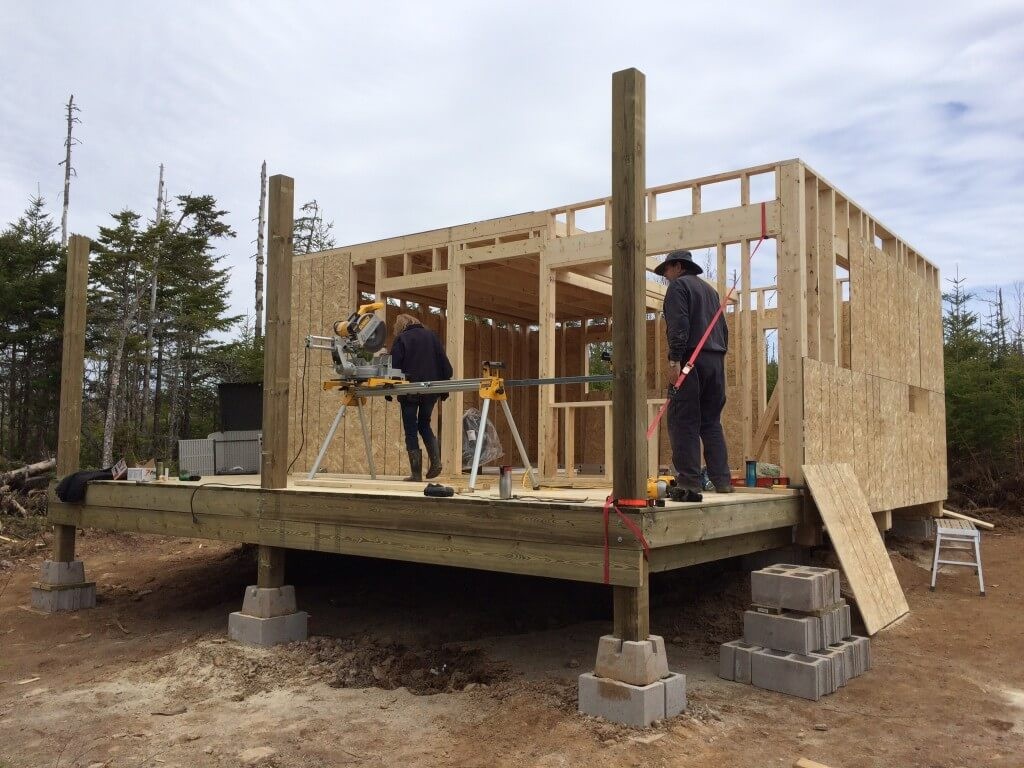
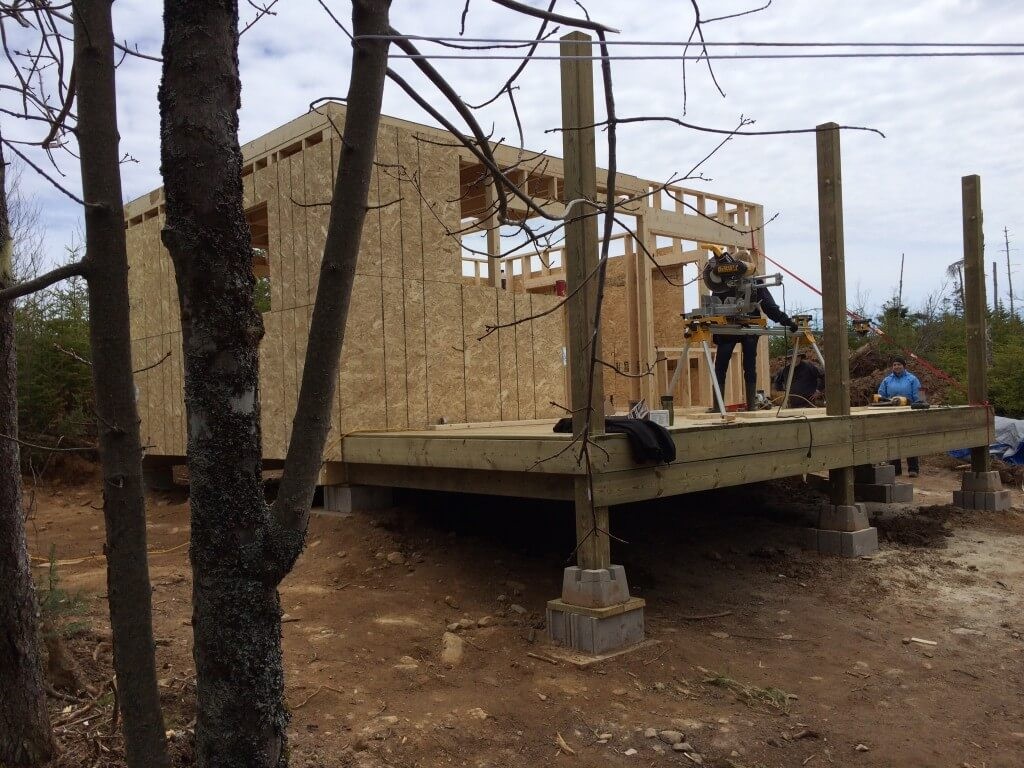
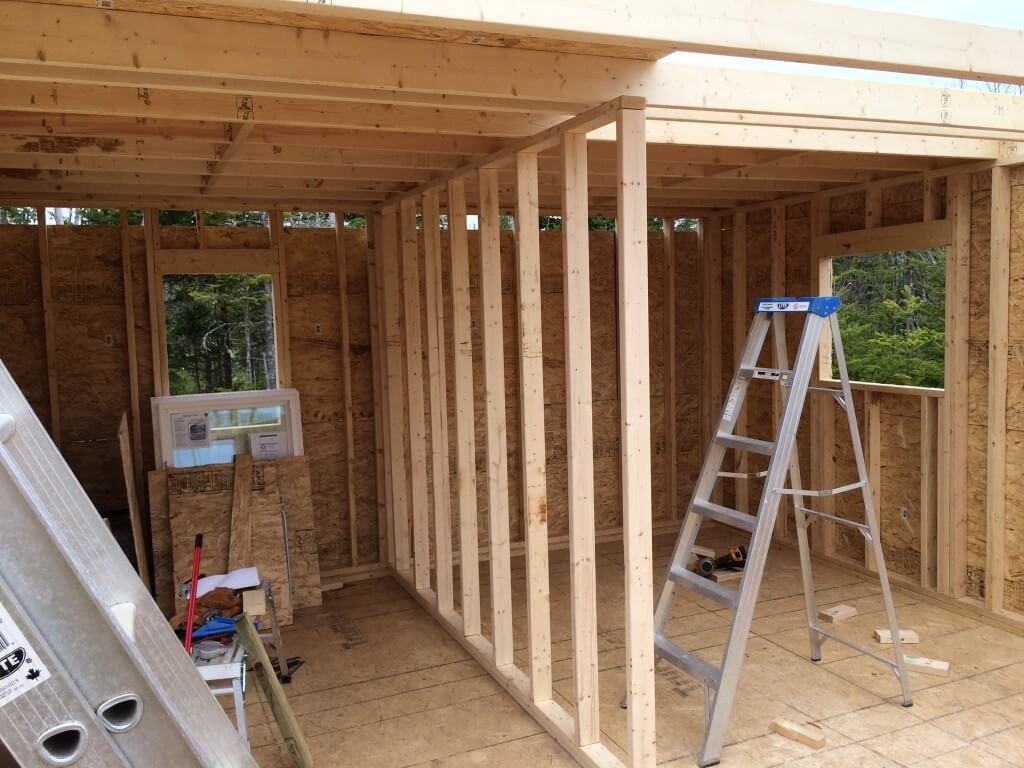
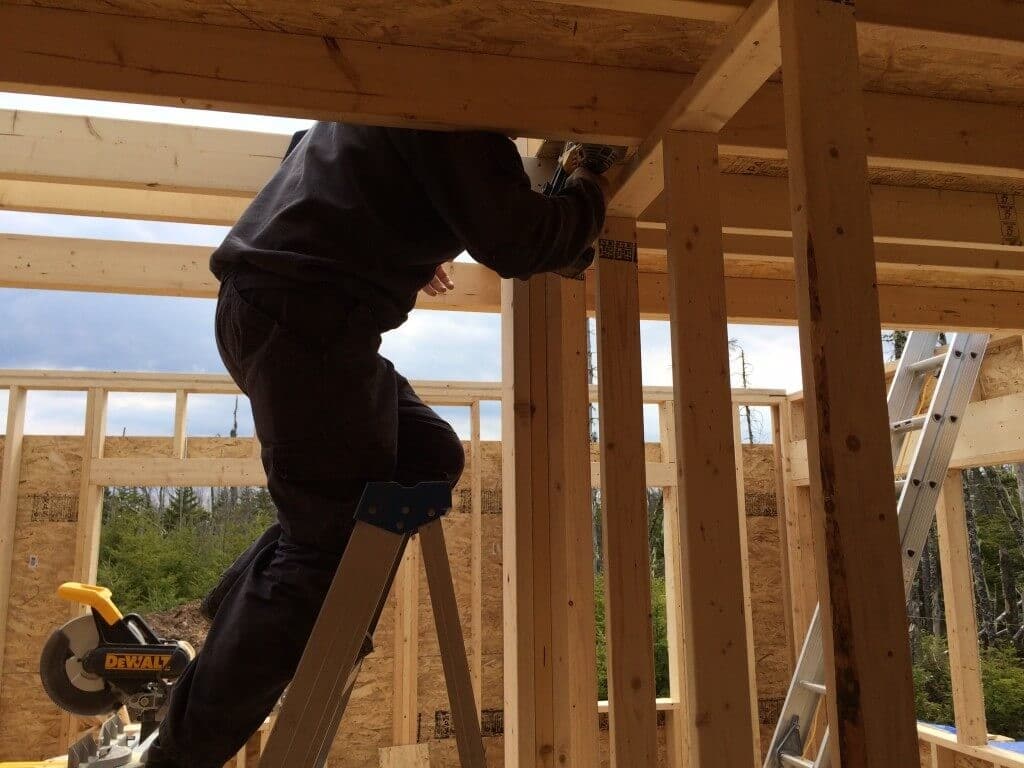
Framing The Interior Main Load Bearing Wall
The main interior wall is comprised of 2 x 4 placed 16″ O.C.
This is the main load bearing wall for the loft.
The wall is placed directly above the center main floor joist center beam.
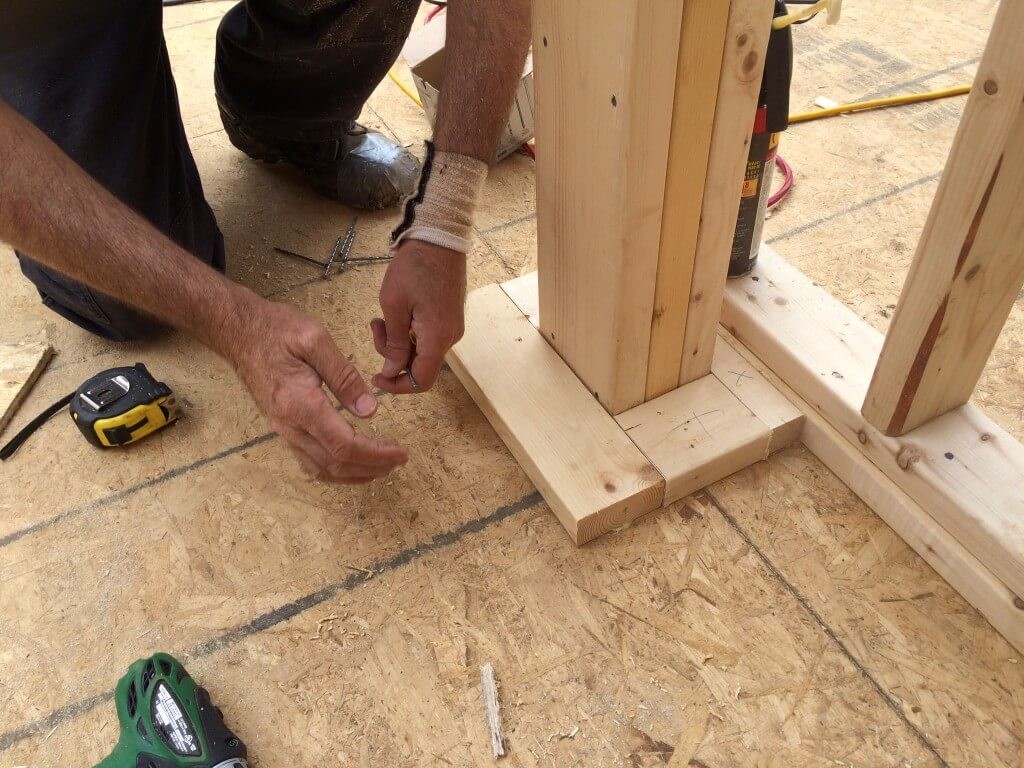
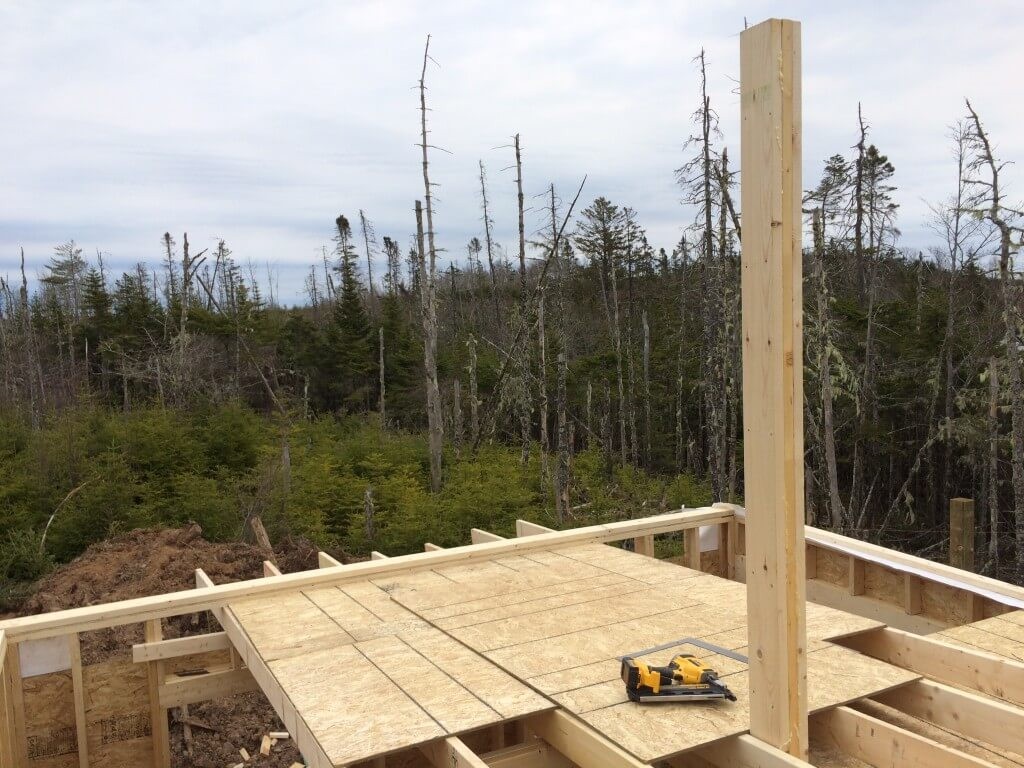
Building The Center Load Bearing Post
There will be three vertical posts helping support the roof.
This is the center post we’re building here.
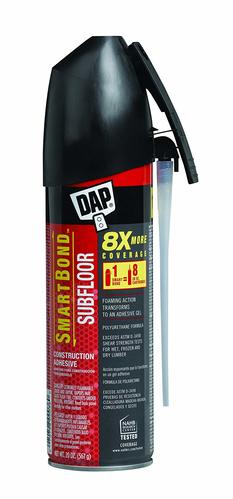
The center post we’ve built from tripling up 2 x 6’s with and DAP construction adhesive and nailing it together.
The other two end posts are incorporated into the design of the wall framing itself.
We continue to use 2 x 6’s to build up our vertical post.
We secured the post to the loft floor joist as well.
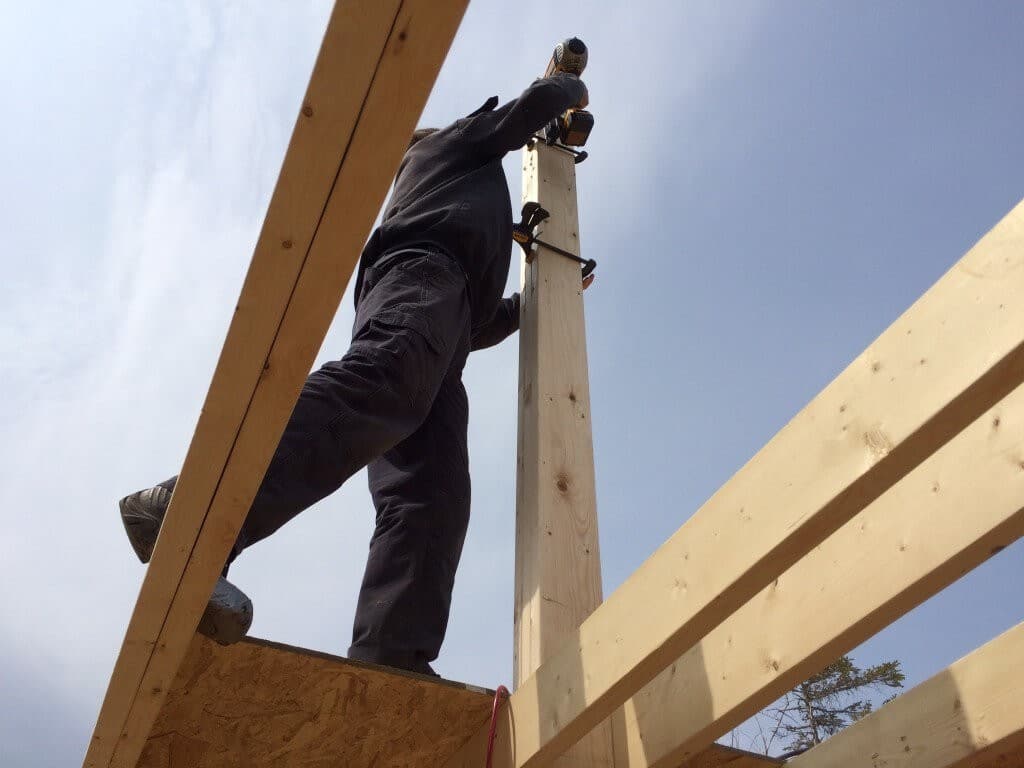
TOOLS: Another handy tool that we couldn’t be without were bar-clamps.
There were several times these happily took the place of a pair of hands.
![]()
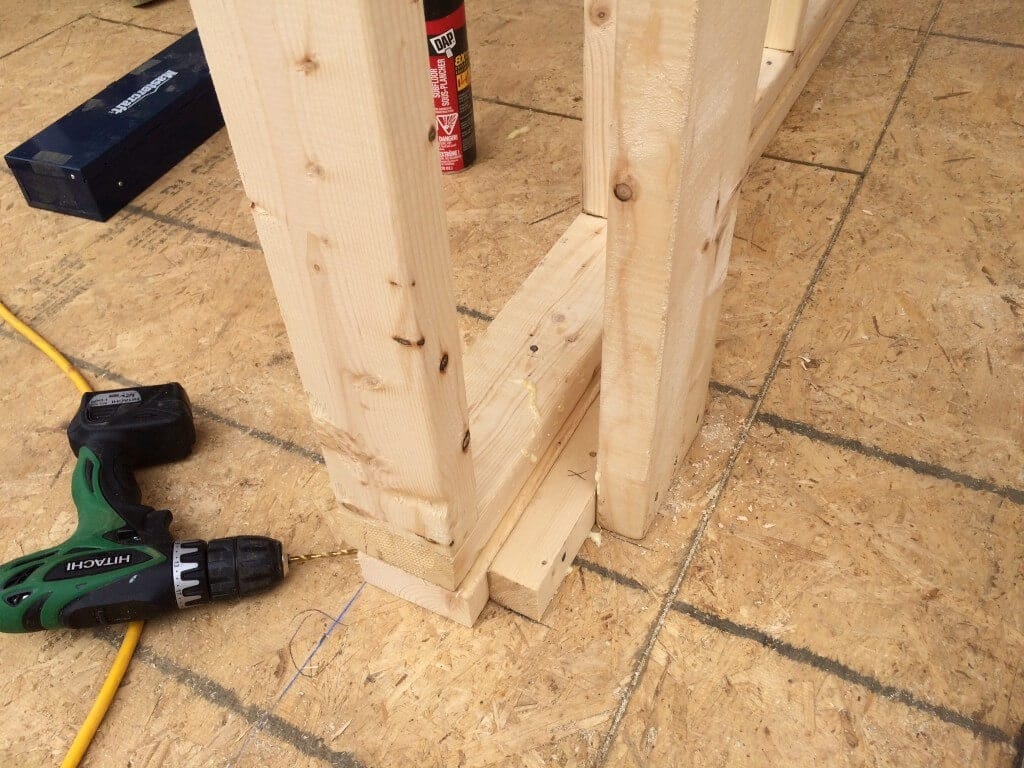
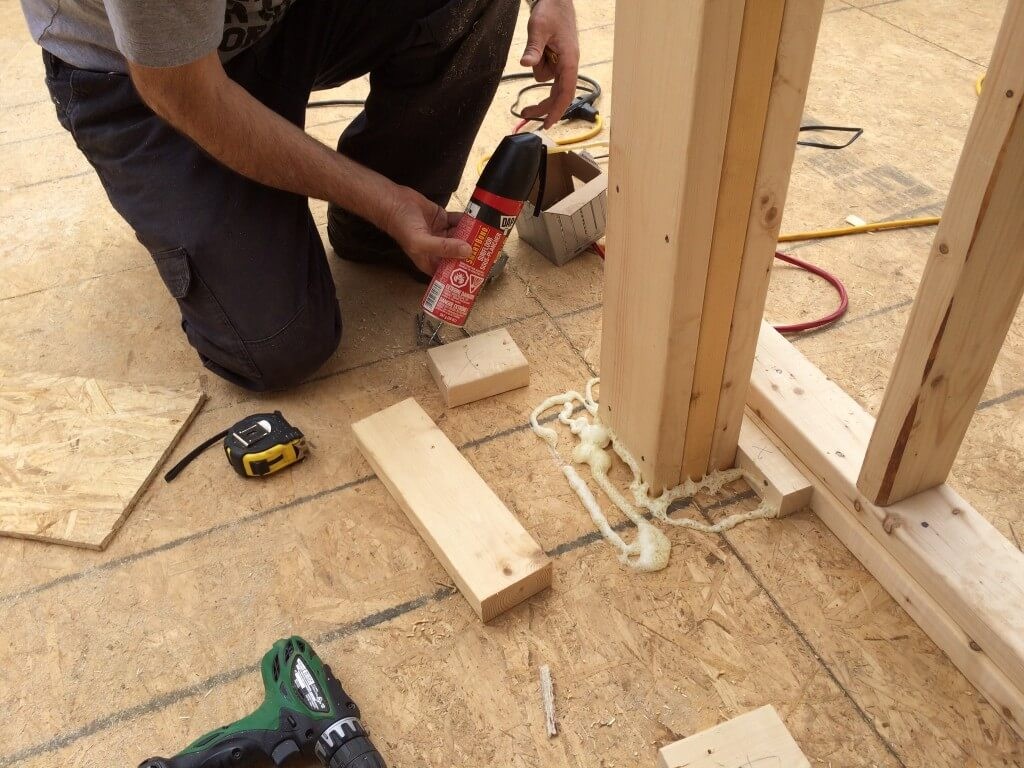
We created a wood surround to secure the bottom and prevent the post from shifting.
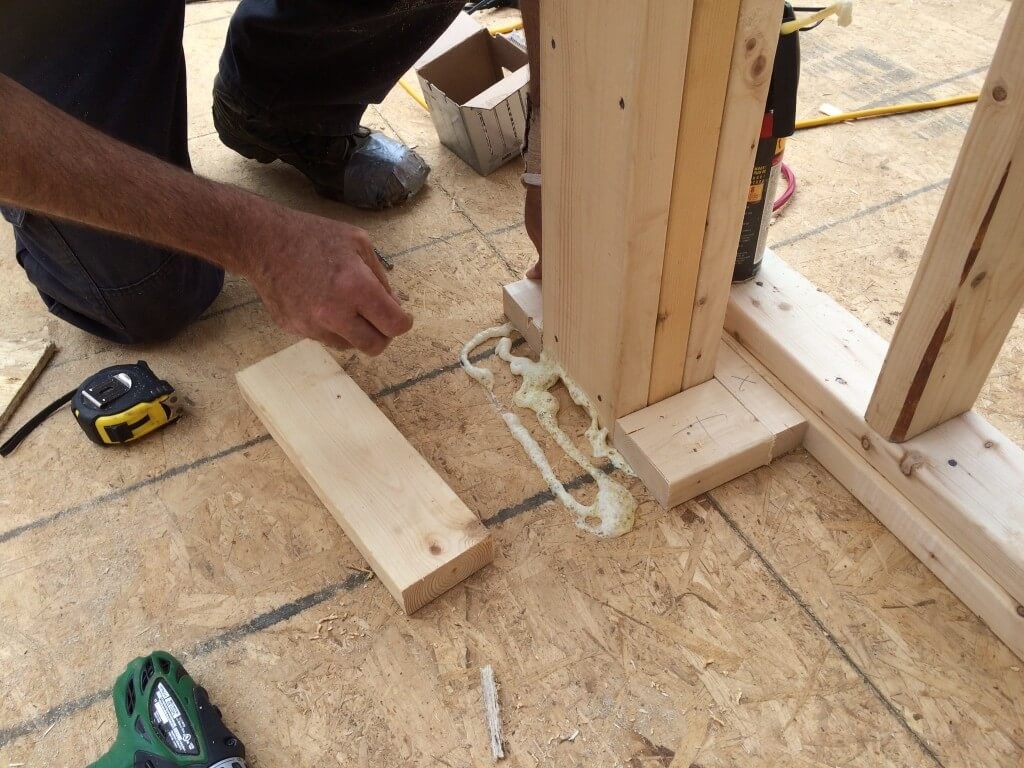
TIP: You don’t have long before the DAP expanding construction adhesive dries so pre-cut any pieces you may need ahead of time.
The completed vertical support beam.
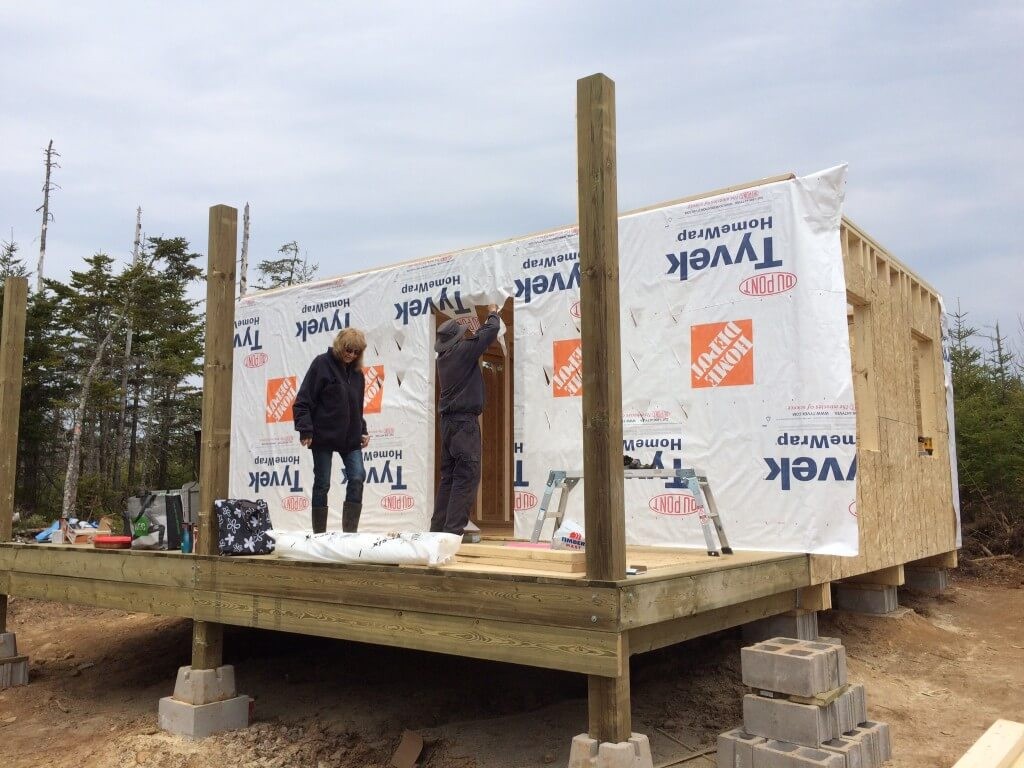
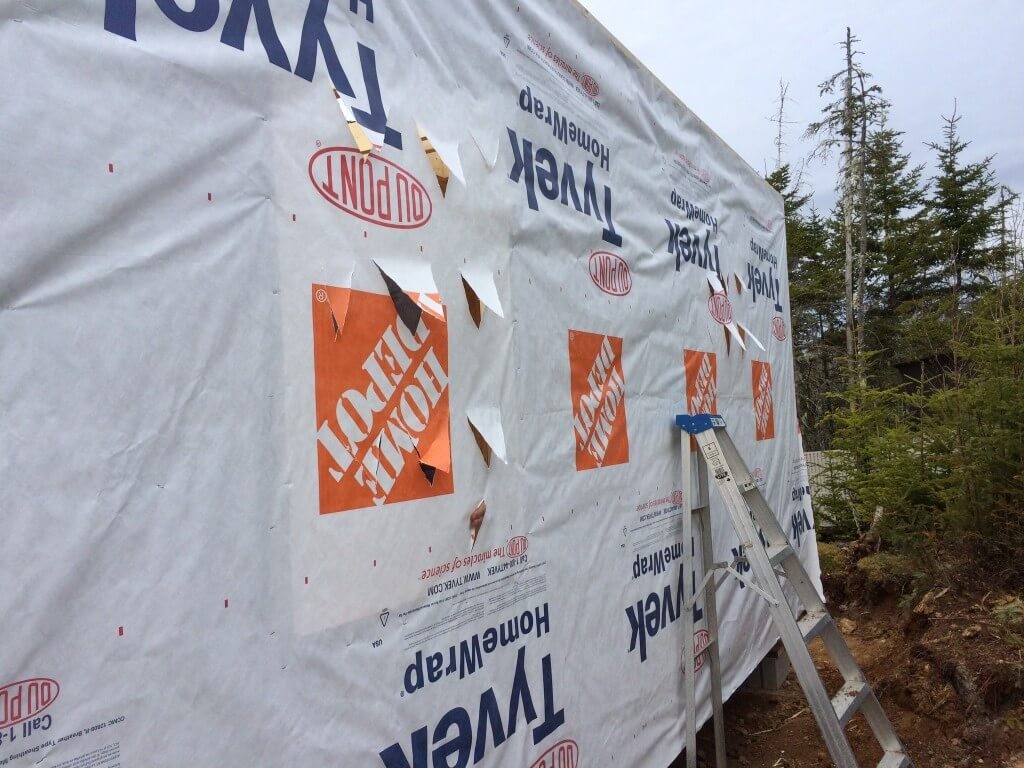
Wrapping The Cabin Exterior With Tyvek
With the main floor walls sheathed in 7/16′ OSB and the center vertical support beam completed we next needed to wrap the exterior in Tyvek.
We have an excellent house wrap (also called Typar) “How To Video” by one of our favorite handyman Shannon from HouseImprovments.
We got help from the family for this part.
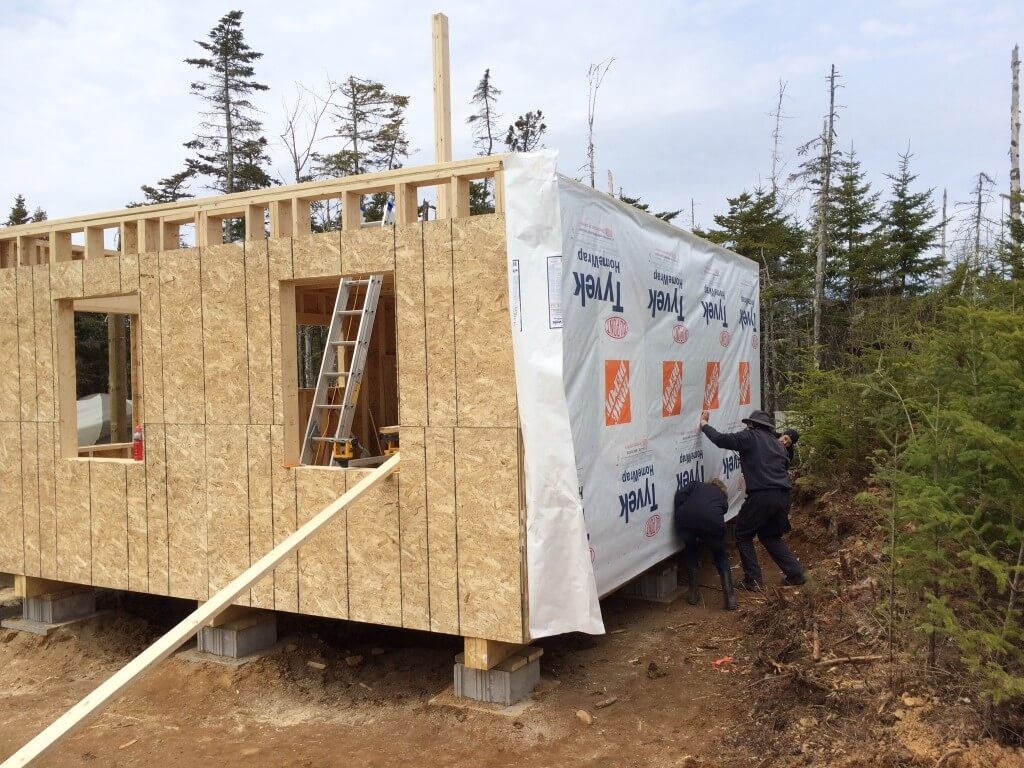
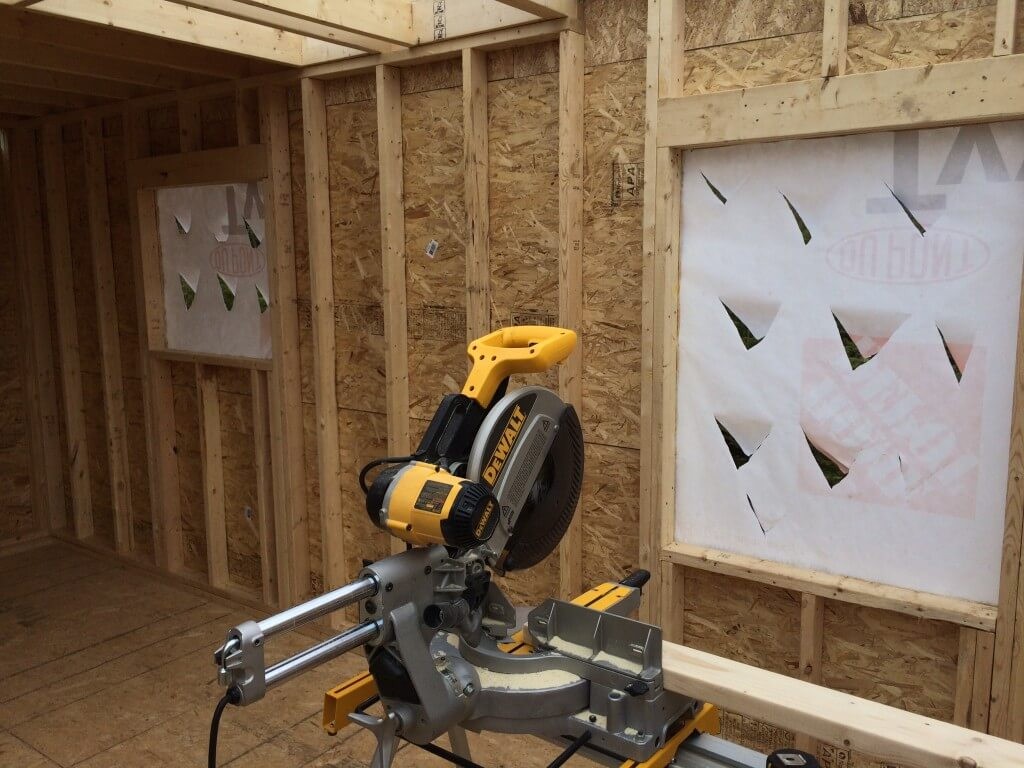
TIP: Before leaving the cabin for the night we made “V” shaped cuts in the Tyvek where the window cut outs are to help keep any potential rain out ( we did put a tarp over the top) but still allow the air to move through the cabin and dry it out. to
View facing East from the loft.
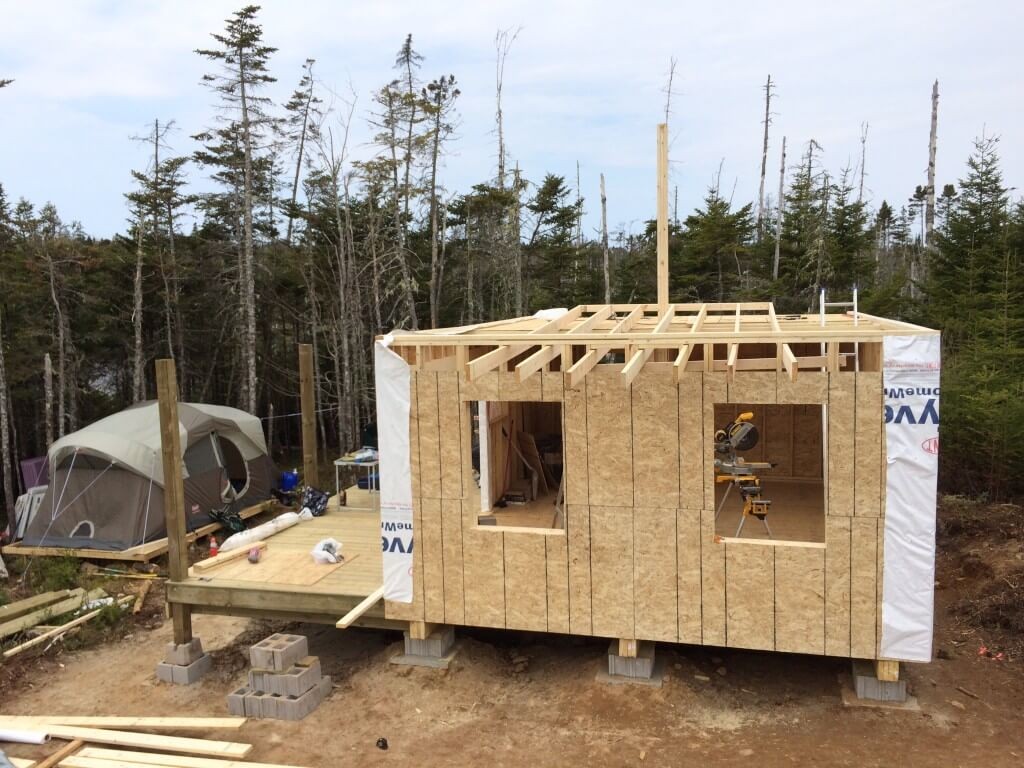
That “wraps up” the main floor framing!
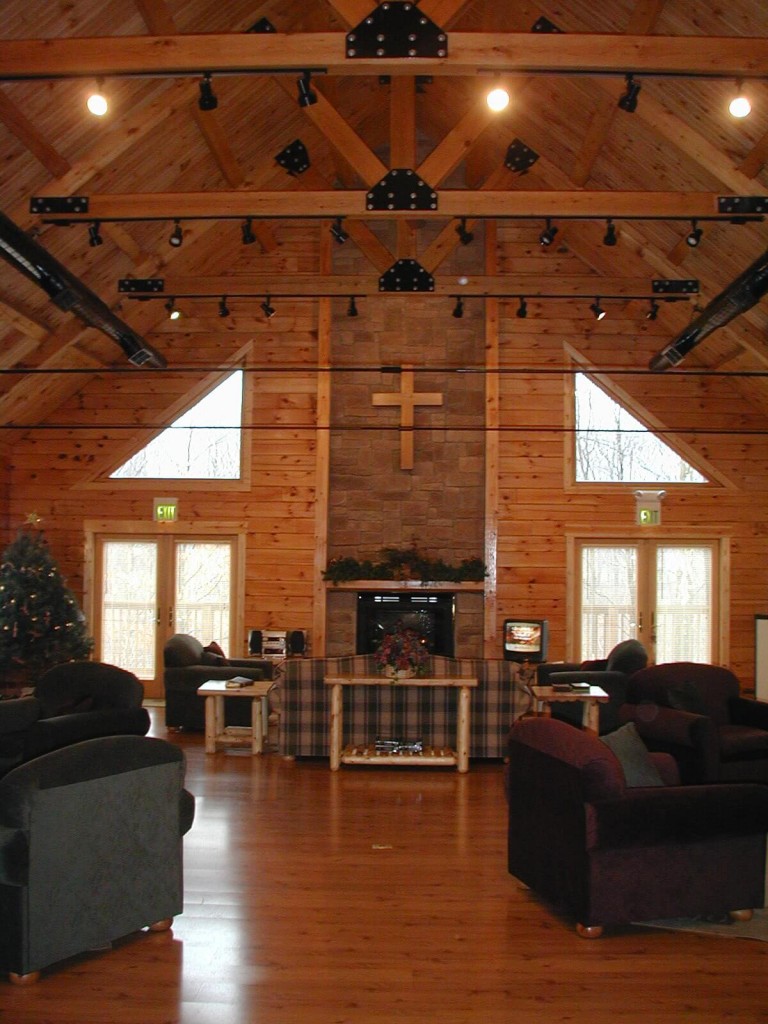
Here’s a panoramic view from the inside…

Tomorrow we begin the main roof rafters.
This will be an in-depth look at how we tackled what most people feel is the most complicated portion of the build.
With our roof rafter technique it’ll be painless but not quick.
We actually spent the majority of our time framing the roof and for good reason.
It’s the roof!
We also decided to install a steel roof on our cabin instead of the typical asphalt shingles used in local home construction here in Nova Scotia.
This will add longevity to the roof and for us improve the over all look of the cabin.
Ready To Check Out The Next Step Of The Build?
Your Turn...
If you’ve enjoyed this post and you deem it worthy then please share it.
Your sharing our blog on social media is the only way it gets out there.
We’ve also made our usual Pinterest pin for those avid pinners out there!


how to clean solar panels
How to Clean Solar Panels: A Step-by-Step DIY Guide As you already know, residential and off-grid solar systems are amazing sources of renewable energy that are quickly growing in popularity. The large flat [...]

earthship
What Is an Earthship and How It Can Help Save the Planet Imagine living in a home that is completely self-sufficient, eco-friendly, and comfortable. A home that grows its own food, collects its [...]

3-way-switch-wiring
3-Way Switch Wiring: A How to Comprehensive Guide Here at the off grid cabin we’ve done our fair share of electrical work including 3-way switch wiring. We’ve done all the internal and external [...]

solar generator
How To Find The Best Solar Generator Impact-Site-Verification: c336f89e-c692-4afd-99d9-0150f7329466 When we first cleared the land to build our off grid home back in 2016, we started with one of those small 700 watt [...]

Off Grid Heating
The Best Off Grid Heating Methods Introduction To Off Grid Heating If you're Living off the grid already or planning to in the future, you already know how important it is to have [...]

off grid appliances
The Best Off Grid Appliances for Off Grid Living Introduction To Off Grid Appliances Living off the grid can be a rewarding and fulfilling experience, but it also comes with some challenges. One [...]


You folks are truly an inspiration to us “city folks”. Not truly a city folk, there are plenty of mountains and forests here in, New Mexico, to find our own off grid cabin. I have been involved in similar projects in the past. You guys are amazing. This project is awesome.
Our off grid engines are back on fire.
Thank you and keep it up.
I am not sure about your foundations / footings. New way of doing them, I will research it to see how my local codes feel about them. You guys are amazing. This project is awesome.
Our off grid engines are back on fire.
Thank you and keep it up.
I am not sure about your foundations / footings. New way of doing them, I will research it to see how my local codes feel about them. You guys are amazing. This project is awesome.
Thank you and keep it up.
Steve, what would you do differently if you didn’t have any walls on your first floor? We’re planning two load-bearing pine timbers placed on top of the middle two piers of our build, and another two going from the loft subfloor to the roof in the same position.
Sounds like its going to be a beautiful build. Our load-bearing post is full height post so in effect the other walls don’t actually serve as support bearing and are simply structural. The reason we have a beam running the width of the cabin,, which is attached to the post, is because we have the loft floor to support. With no loft we would have only built the one center post to provide support to the 20′ length roof.
So, in your opinion, if we put up the posts to support the roof beam, we wouldn’t need the interior walls? I’m not an engineer, and not sure of this structurally.
Full disclosure, I’m no engineer either. I’m a retired military helicopter pilot and so I always tell folks I’m an off grid building “enthusiast” and NOT an “expert”. However, in our cabin design we have only two interior walls which are used to close in our main bedroom. The wall that runs between the kitchen and bedroom acts as a load bearing wall and it’s simply nailed to the center support post. It’s the support post in the center of our cabin floor plan, the exterior walls and the three desk posts that provide the major structural support. If we had no floor joist for the loft (i.e. no loft) then the center support post is all I would have used.
Do you have a picture of this beam supporting your loft?
There is no “beam” supporting the loft. We simply framed the loft floor joist, then framed the center wall (which acts as a load bearing wall), and lastly built the post running from the main floor (centered over a foundation footing pad) up to the main roof beam.
Steve, does the outer OSB sheeting run all the way up to the top of the top plate? If so, then don’t the rafters actually rest on the OSB instead of the top plate?
No. You’ll see in the following posts that there is a top plate attached and the rafter sits on that.
Hi again Steve! I see there’s a heading for “Wrapping The Cabin Exterior With Tyvek”, but no info on that. Did you wrap the house before you put on the top part of the OSB sheeting? Or was that just on the wall where the temporary flooring came through?
We wrapped only the exterior front and rear walls thus far because we still have the second story end walls to complete “after” we finish installing the rafters. You’ll see all that in the very next post. We also needed to Tyvek the front and rear walls “before” the rafters go tomorrow since they sit on top of the Tyvek.