

Building The Perfect Cabin Roof Part 5 of 5
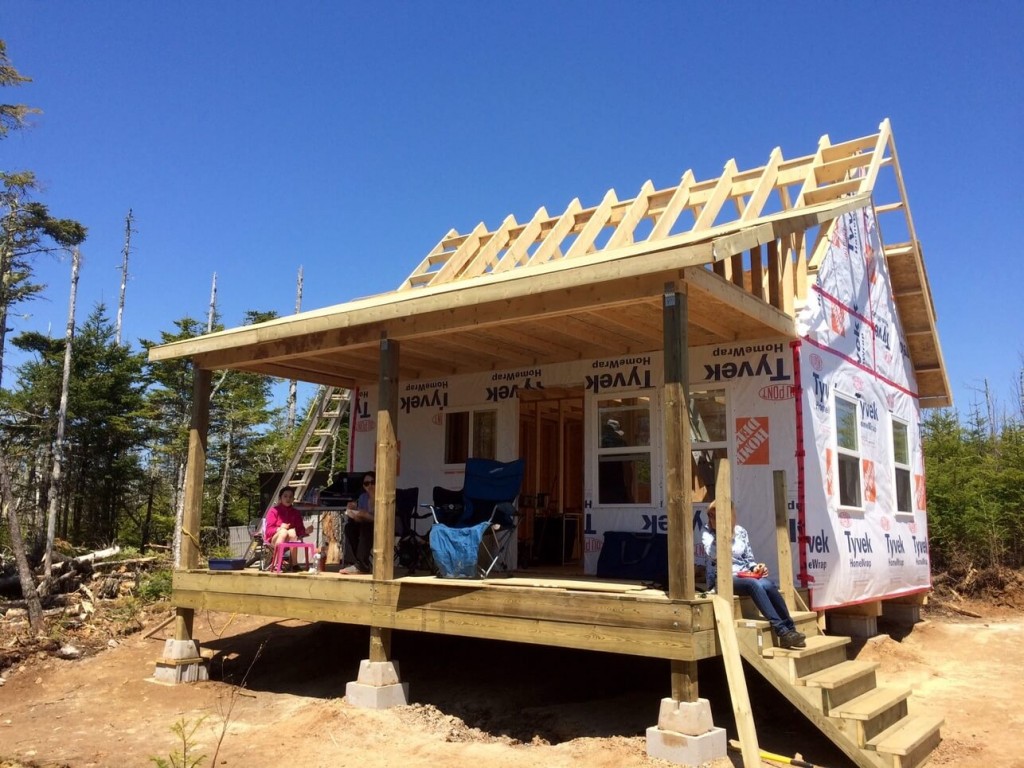
Well, it’s day #14 of the off grid cabin build and we’re about to complete the roof fraiming for our cabin.
Over the next two days we’ll build and attaching the roof rake ladder, close the roof up with OSB, and build a set of stairs for the front deck.
As you know your roof is a integral part of the build and requires extra attention. Be sure to review our Ultimate Roof and Rafter Guide prior to starting your roof build if you haven’t yet been through it. It will answer a lot of questions you may have about framing a roof and explain exactly why we did ours the way we did. You can also quickly go back and review the entire roof build for our cabin using the following links…
- Building the main support posts and ridge beam
- Building the main cabin rafters
- Building the front deck header and joists
- Building the front deck rafters
If you’re brand new to our site and just landed here, then you’re welcome to head back to the beginning of the cabin build here or better yet subscribe and we’ll send you a personal update every time we hit a building milestone. Plus, we’ll take you back to day #1 of our cabin project and walk you step-by-step through the entire building process.
Ok, get ready for an extra detailed and juicy post!
The Roof Rake Ladder
The roof rake ladder, named so for its resemblance, can be one of the more complex components when framing the cabin roof but stick with us and we’ll crack its quirky code to arm you with some excellent tips and tricks that’ll make you a ladder building expert in no time!
After we’ve attached roof ladders to the off grid cabin we’ll top off the roof with some OSB and call it a day. Actually, we’ll call it two days ;)
Here’s What You’ll Learn…
- The purpose of the roof rake ladder and its components.
- Why it is a critical roof structure and plays a role in the longevity of your home.
- Important tips and tricks during the design phase that can create a more livable environment inside of your home all year round.
- How to properly design roof ladders to last any environment and weather.
- Our own technique for installing them properly on site.

Before we dive into our cabin ladder design and installation, I want to offer you up a basic Roof Rake Ladder: 101
This way we’re all on the same page using similar jargon.
If you’re already comfortable with constructing roof ladders feel free to scroll down and see how we installed ours.
The Roof Rake Ladder Details
You’ll recall from our section on Building the Front Deck Rafters that the cabin’s front and rear overhang are created by extending the bottom portion of the rafters out past the wall top plate or deck header beam. This is the section of the roof where you typically find the eaves-trough used for catching and diverting rain.
The ladders create the required roof overhang on the remaining sides of the roof structure.
Purpose of the Overhang
The overhang of a roof might simply seem like a nice added touch, but its serves a very real and important function. Their size (how far they protrude) and construction are important and can make or break (literally) your roof.
The roof overhang serves six basic purposes that warrant their placement on all sides of the home.
- Reduce the amount of rain that hits the exterior of the home
- Protect the foundation from excess water runoff
- Help to regulate the temperature of the home
- Provide protection for doors and entryway
- Help to shade windows in hot weather
- Keep basements/crawlspaces dry
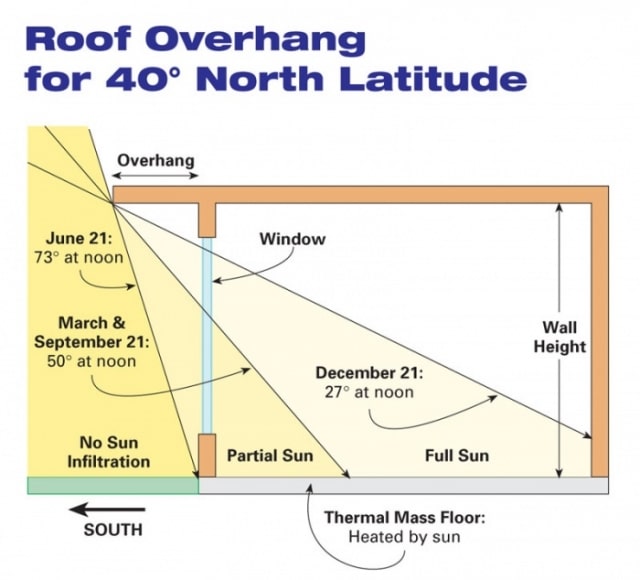
REMINDER: During the cabin planning phase you’ll recall that when we purchased our land we considered the following which also plays into our roof design.
- orientation of the roof to the sun’s path
- optimum solar panel pitch
- typical live loads our roof would experience based on seasonal weather (snow and wind)
- typical annual rainfall for the area
There are additional factors as well that can best be taken into account now that you’re actually there at the build site. When you’re up on the roof you can get a much better idea of how big you want to build your ladders to account for the local tree shading. Ask yourself… How’s the shading up there? Is there any? Is there any nearby threes that are likely to create the shading required?
NOTE: We have many fast growing red and black spruce trees around our cabin and while they may only provide partial shade now, in a few years that will change. Just something to think about when considering the balance between solar heat gain and the cooling shade you desire.
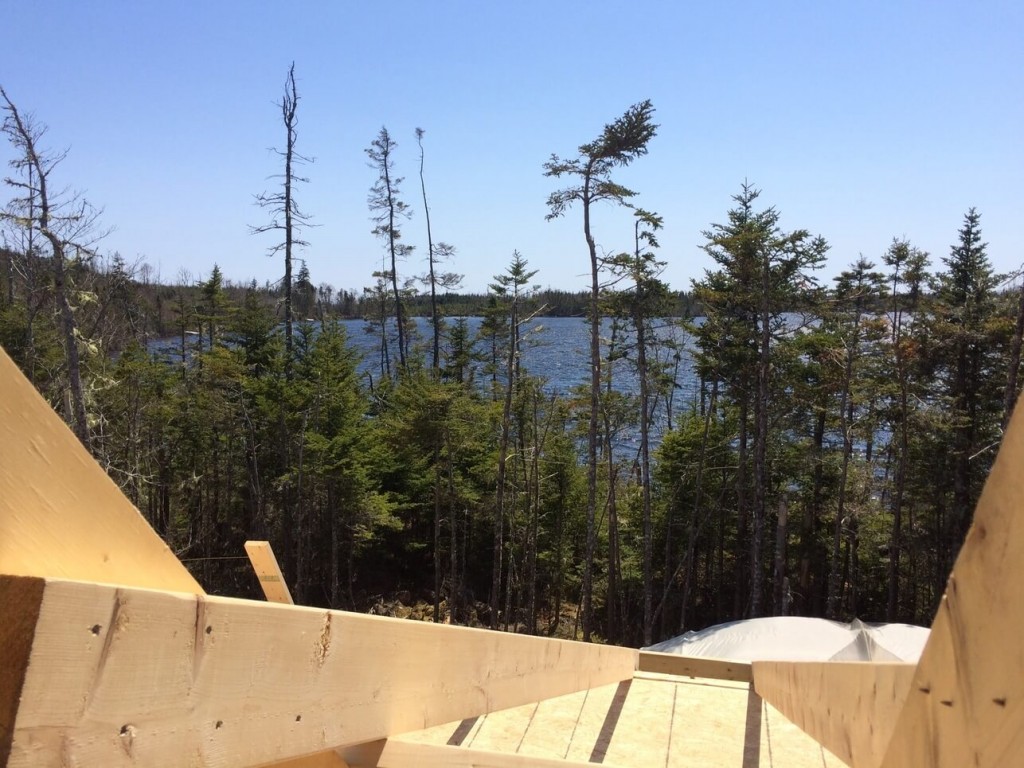
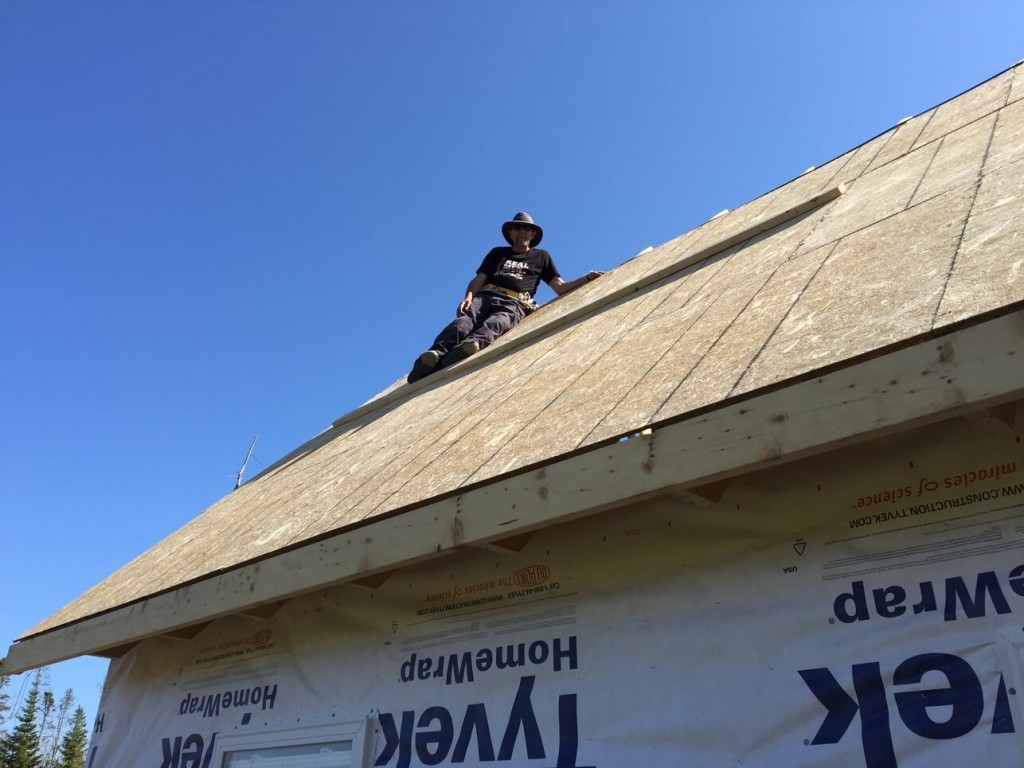
The view from our roof top.
Problems
The overhang plays a large role then it comes to your home’s internal temperatures and the exteriors preservation.
Overhangs that are too big: The interior of your home will be dark and gloomy. As well, your roof can become more susceptible to wind gusts causing roof lift. The amount of snow carried by your roof also increases.
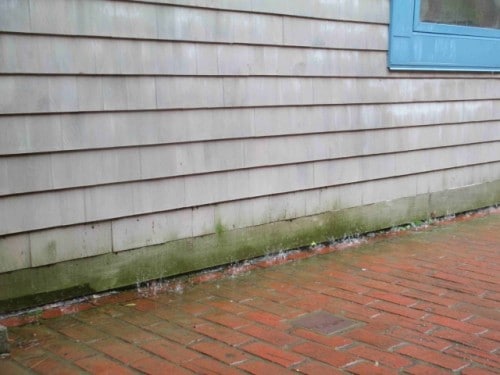
Overhangs that are too small: Does not provide enough protection for the exterior of the home. A house without adequate overhangs leave the siding unprotected and vulnerable. Unprotected walls suffer high rates of water entry, premature failure of paint or stain, and premature wood/vinyl siding failure.
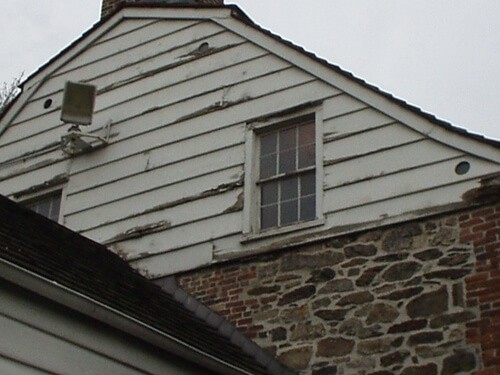
Below: Rain can drip straight down contacting your foundation which will result in deterioration under the footings and adjacent to a foundation. As well, increased splash-back is responsible for a lot of siding rot.
You may recall during our How to Build the Perfect Foundation phase our cabin is resting on six pads. Each consist of 16” x 12” x 8” cinder blocks on top of 24” x 24” concrete pad (patio stone) which rests on a bed of leveled crusher dust and finally the undisturbed soil.
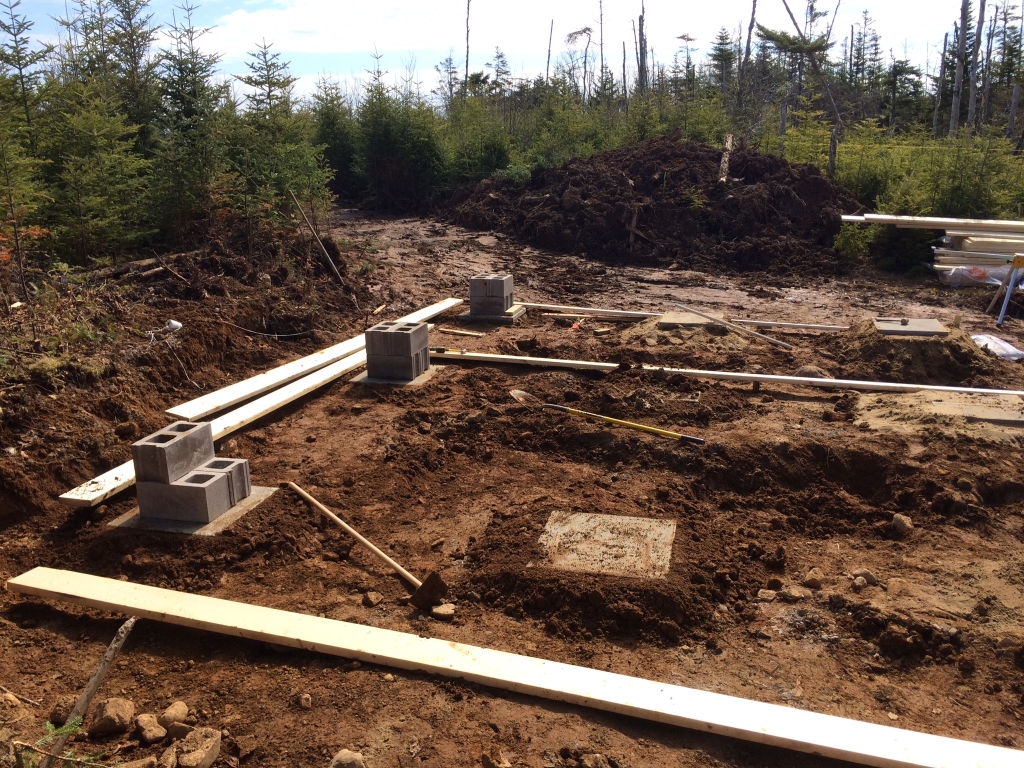
With an undersized overhang, water dripping near one of those pads (even for just one season) could easily cause the cabin to no longer be level. This stresses the wall framing, the interior wall finish (drywall), the trim’s fit & finish, and can even crack windows. That’s an expensive fix that can easily be prevented with proper roof ladder planning and installation.
An ounce of prevention is worth a pound of cure at this point.
It’s easy to think that the overhang is just… an overhang. But they serve a real purpose. A proper design, size and build will ensure you never run into these problems.
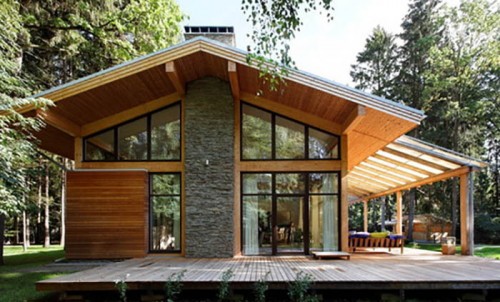
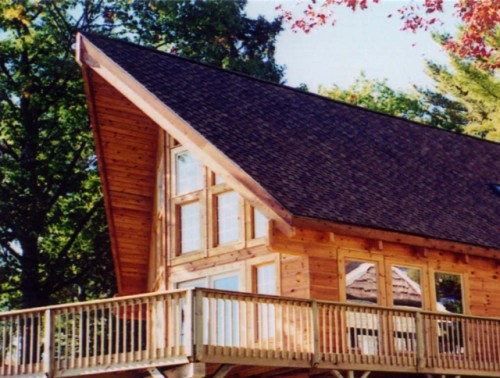
Notice in the photo below that the overhang is correctly being used to shade the windows and provide shelter over the patio doors.
There are “mathematical rules” and “architectural guidelines” that can aid you in determining the optimal roof dimensions. These guidelines are useful for any gable, cantilevered or flat roof design. Sustainable By Design has a page of free design tools which include an overhang recommendations tool.
As mentioned previously, you need to consider the balance between solar heat gain and the cooling shade you desire.
Roof Rake Ladder Construction
Components of the Roof Rake Ladder
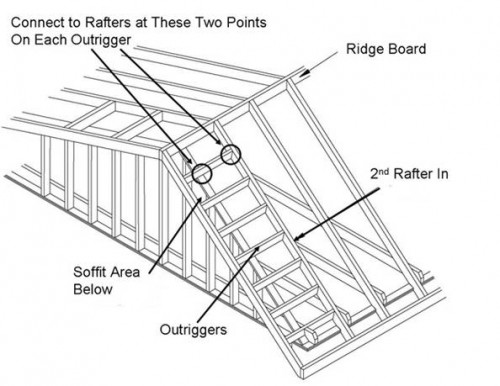
- Lookouts
- Fly Rafter or Barge Rafter
- Ridge board/beam
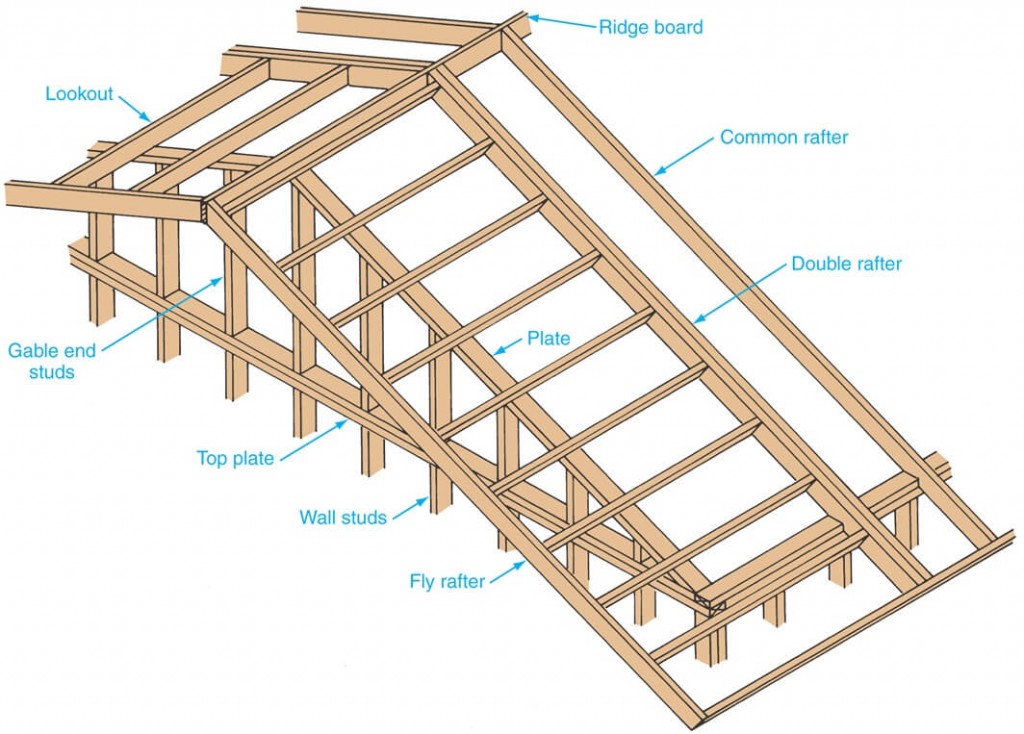
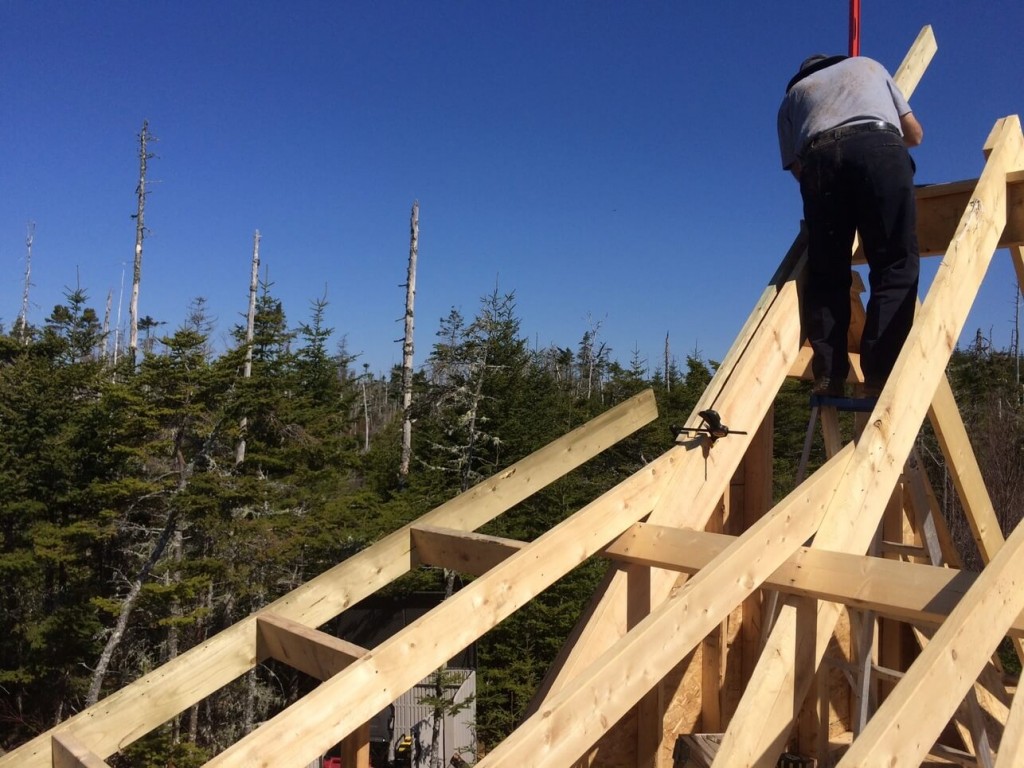
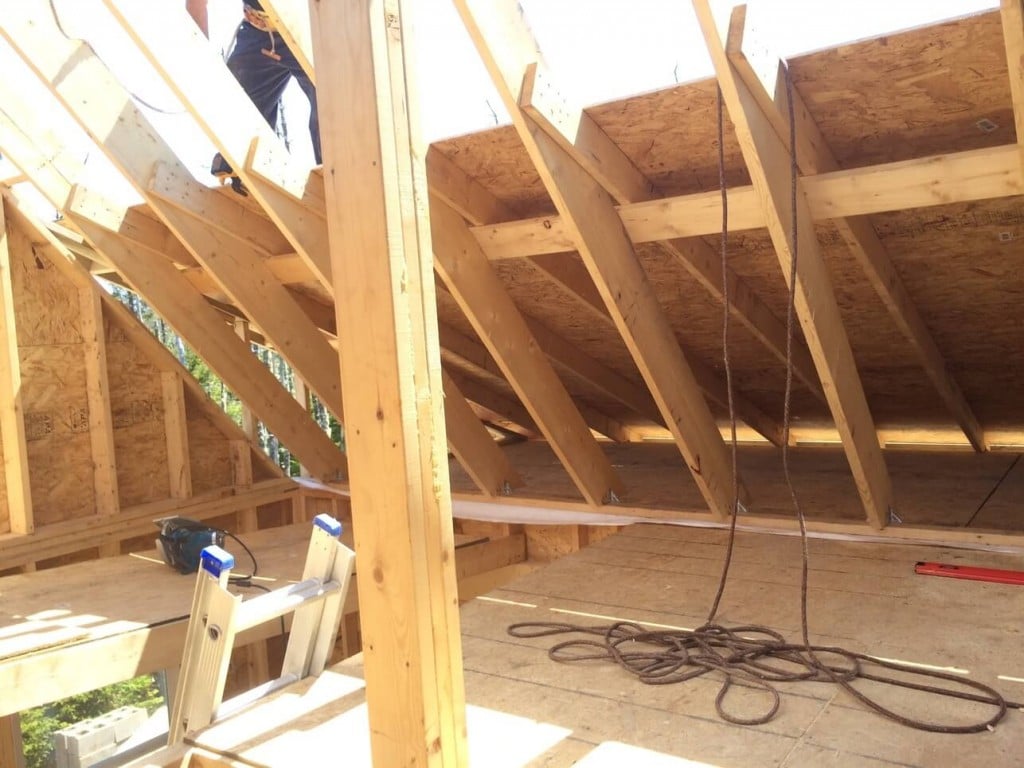
You can see the ladders are composed of several pieces. These are the lookouts which run perpendicular to the rafters and form the “rungs” of the ladder. The lookouts rest on top of the gable end plate.
Next is the fly rafter or barge rafter. At the front of our cabin we used a 2″ x 6″ to connect all the ends of the rafters together forming the fascia. Here the fly rafter is used to connect the ends of all the lookouts together.
NOTE: The double rafter shown above is optional. This style is often used when building your ladders on the ground and then bringing them up to attach. Our ladders are being built one lookout at a time. We simply attached each lookout directly to the last common rafter and therefore did not require a double rafter. You’ll recall in our How To Build The Perfect Rafter section we have a rather unique rafter design and one that is incredibly strong and resistant to twisting.
A roof ladder can also be built without resting the lookouts on-top of the top plate as seen below. However, this is usually reserved for smaller builds such as a shed or a small addition.
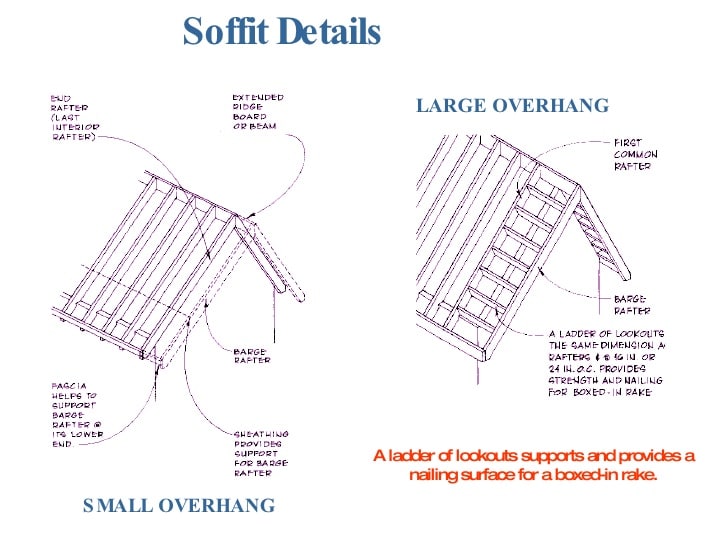
We’ve included a video from Henry of Country Life Projects & Living. He’s building a simple backyard shed but it demonstrates the small overhang build principles using the extended ridge beam method.
Our Ladder Design
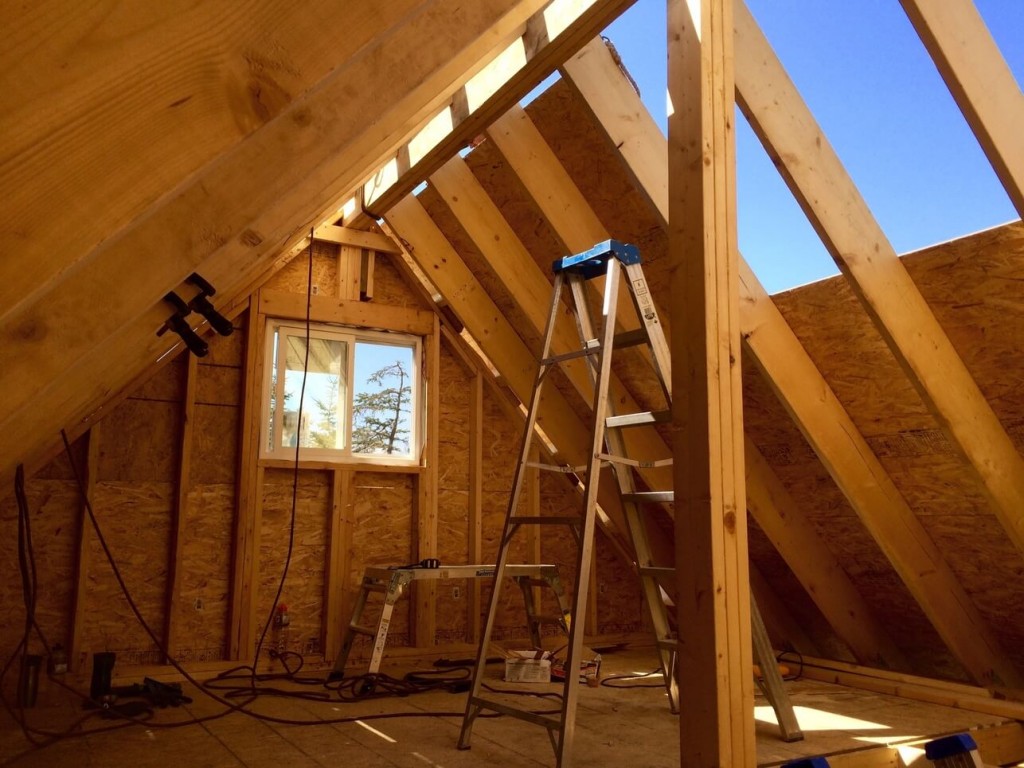
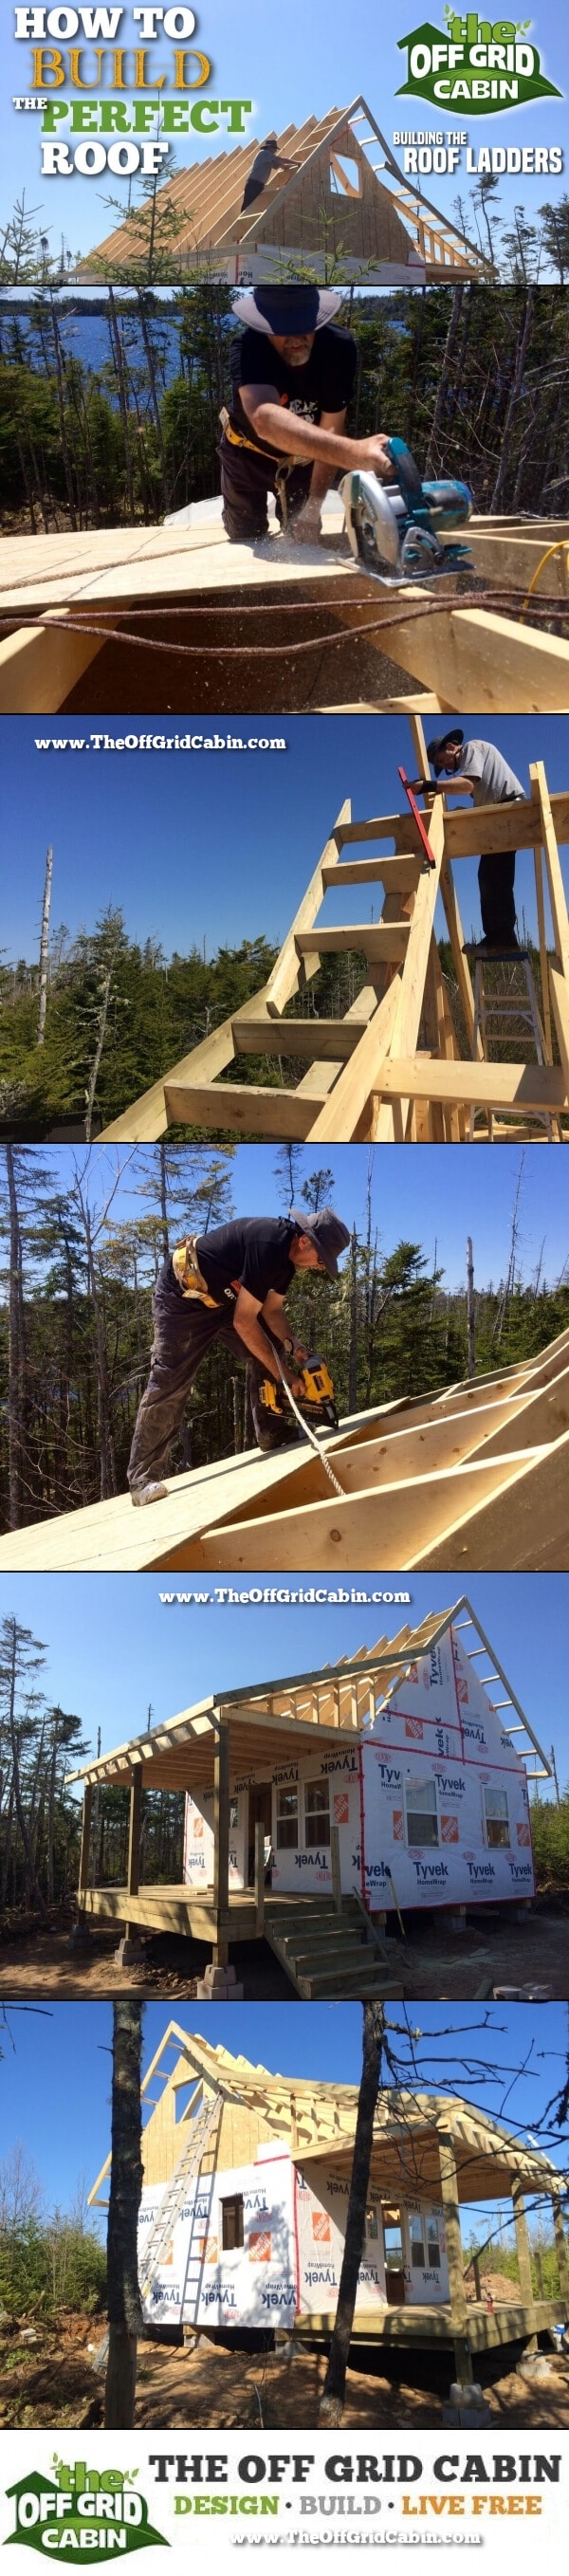
The first step of our roof ladder design is to ensure that the 2” x 6” front fascia board, which as mentioned connects all the rafter ends together to form the eaves, is at the proper height. We do this by using a scrap piece of wood to act as a gauge and attach the fascia. The end of the fascia will serve as the starting point to build the ladder(s) off of.

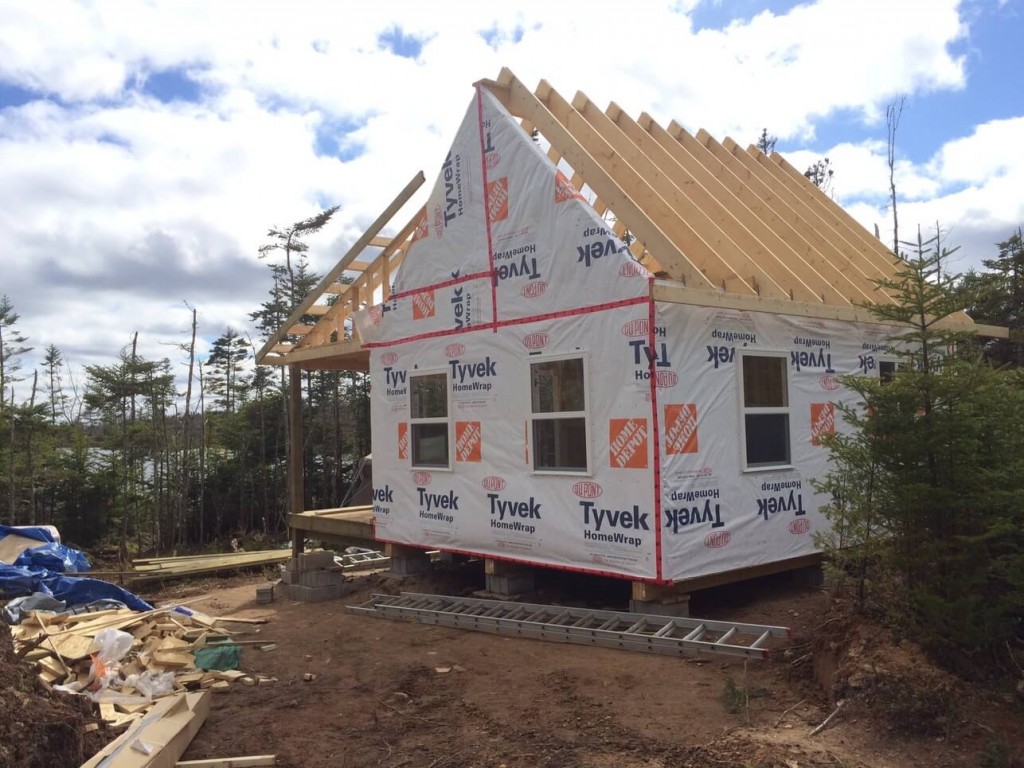
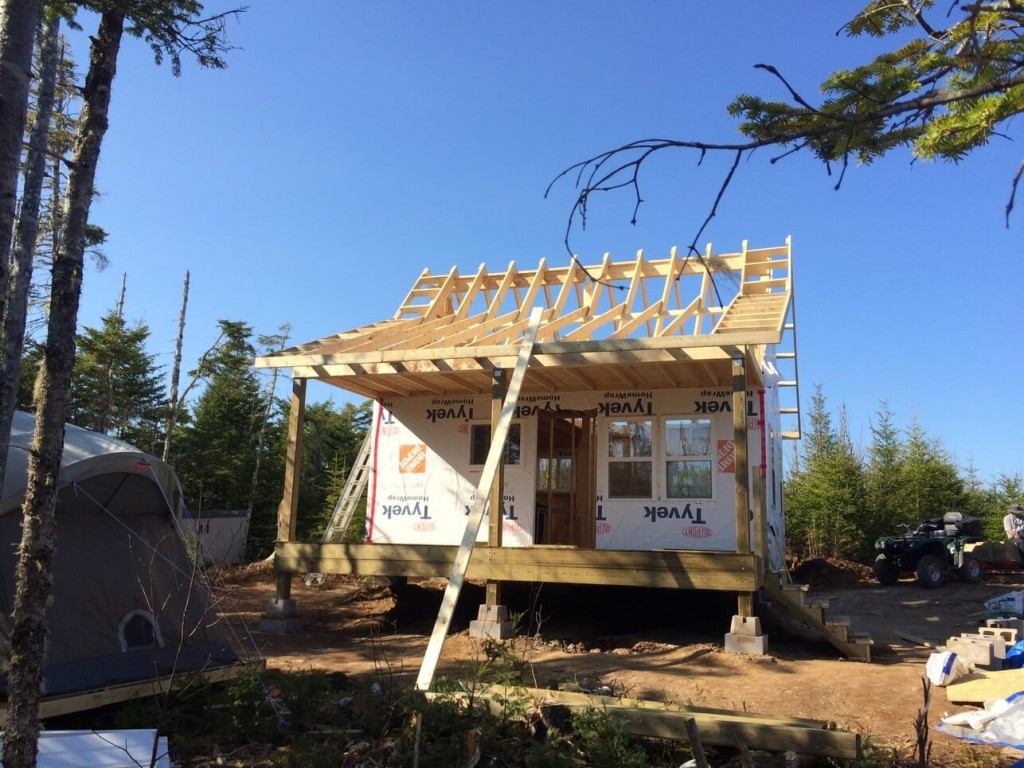
Next, we completed the gable end studs over the deck.
This area above the deck will serve as a storage/crawl space when the cabin is complete and accessed through a weather sealed door in the loft. The main cabin gable ends were complete in the last post when we finished installing the rafters.
NOTE: We not only installed the gable end wall studs, but also the top plate as well (remember this is what the lookouts rest upon).
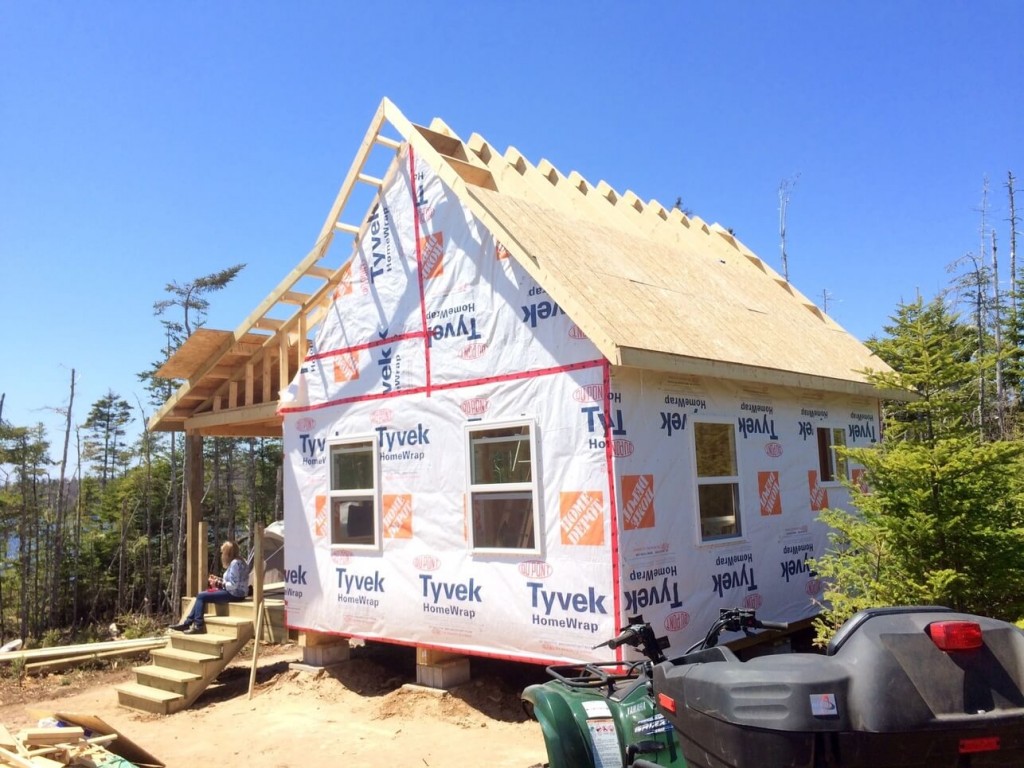
Below you’ll see that the deck gable end wall is built directly in-line with the main cabin gable wall so that the exterior OSB will sit flush across the main cabin wall framing and the deck wall framing.
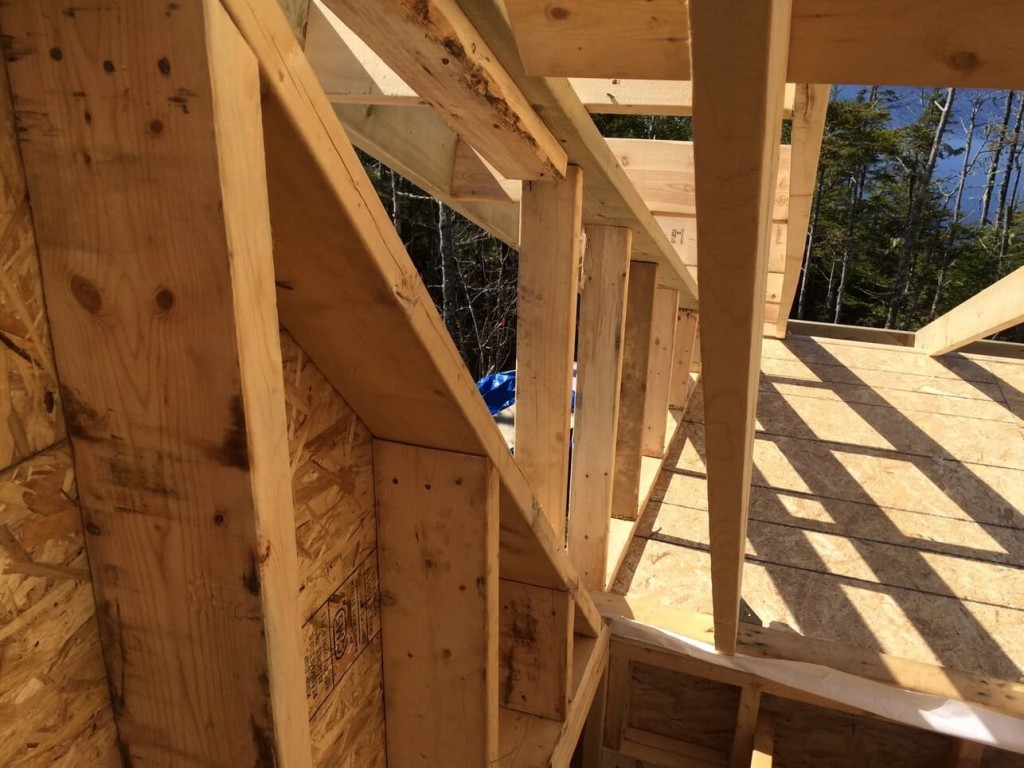
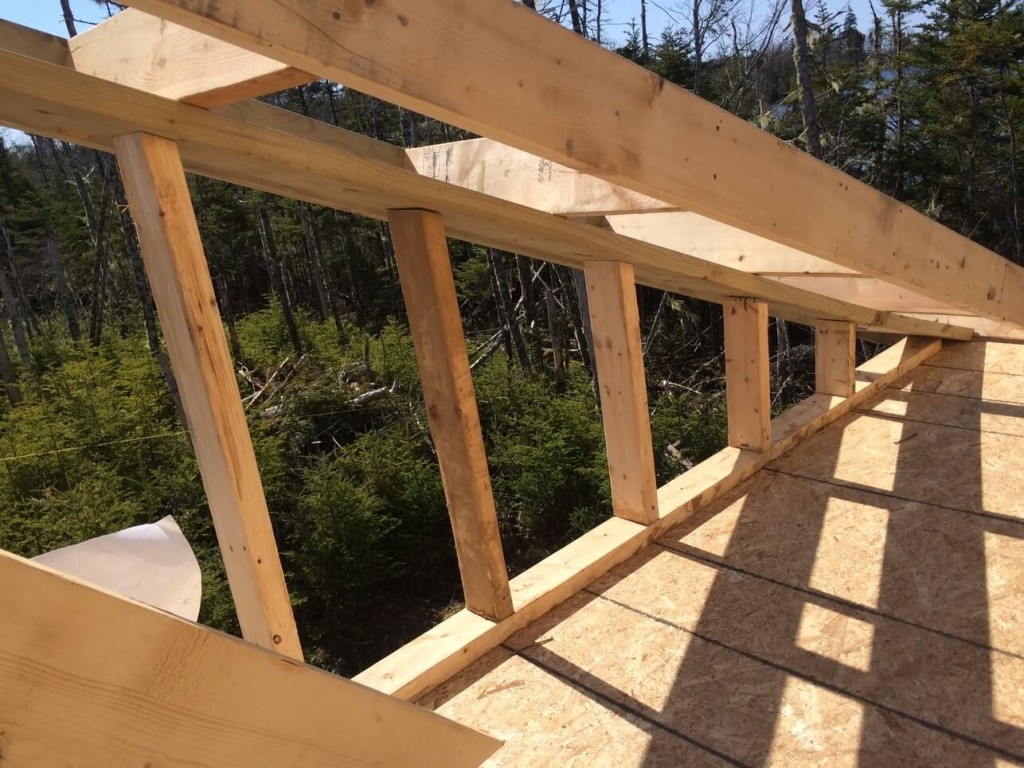
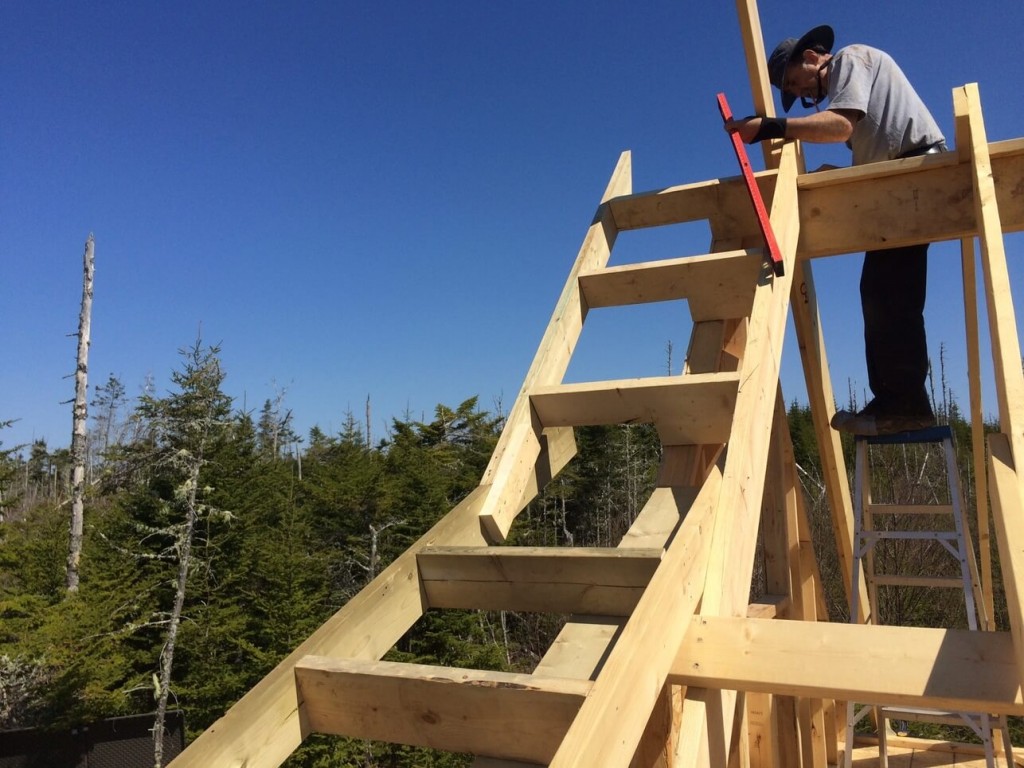
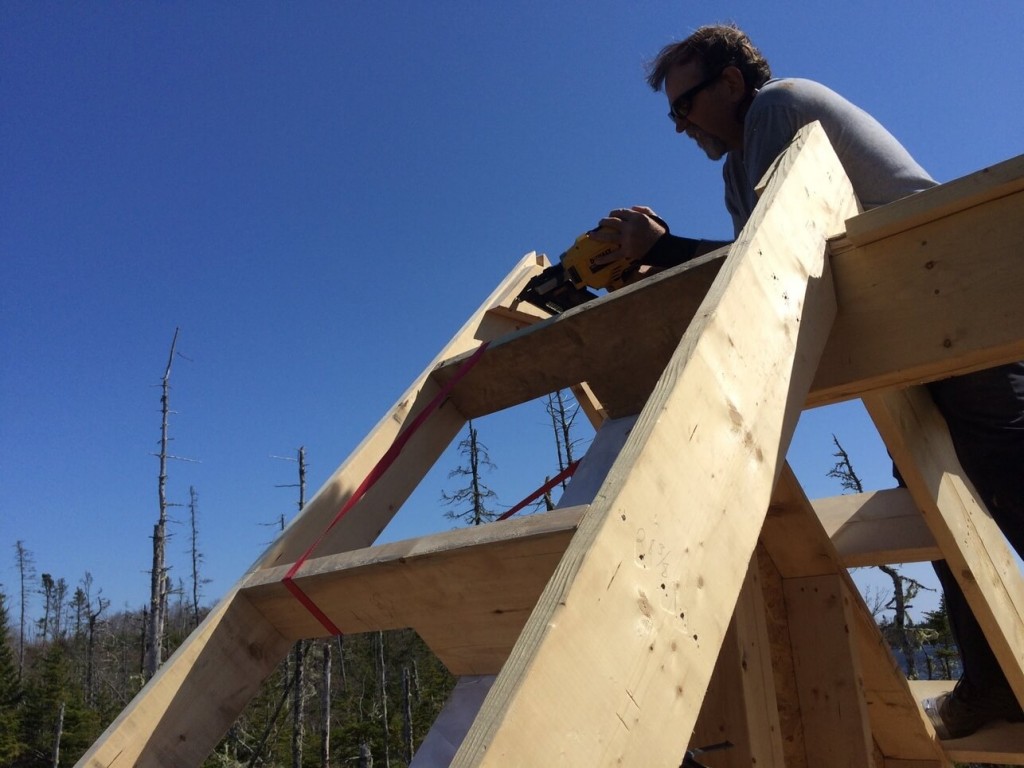
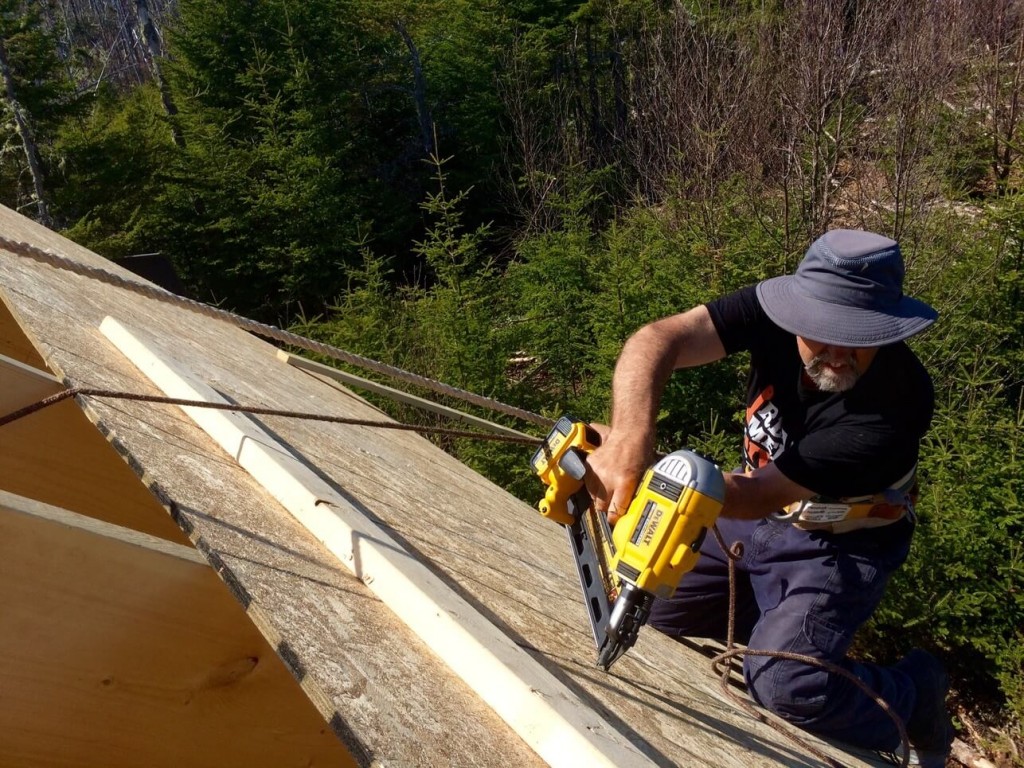
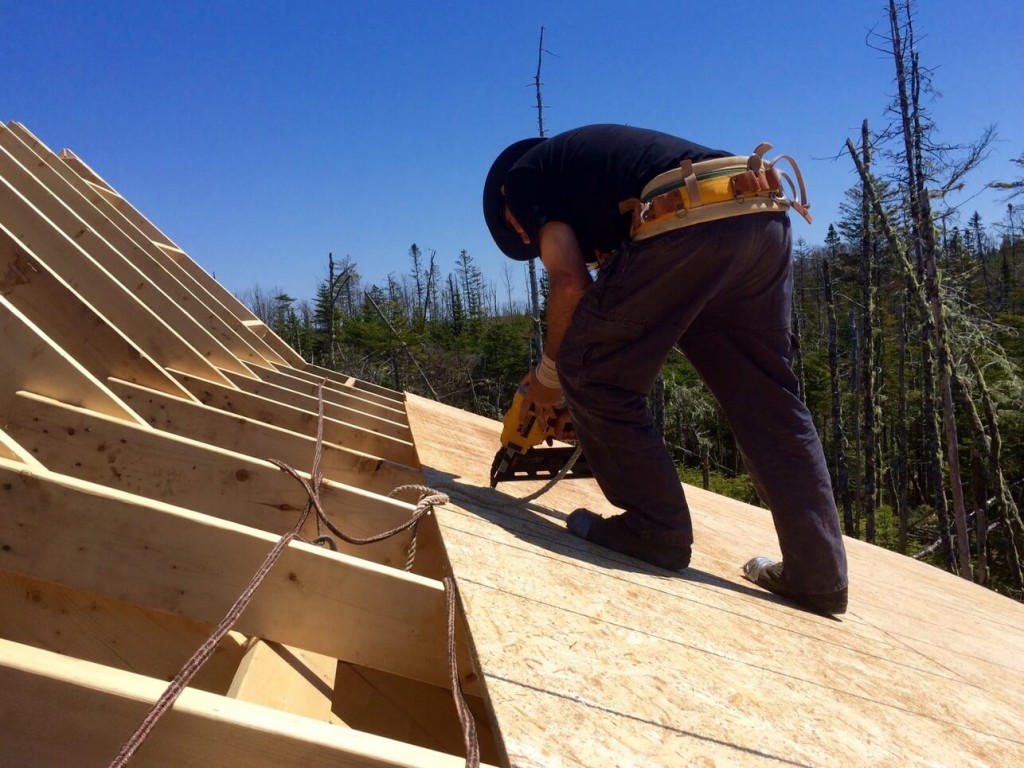
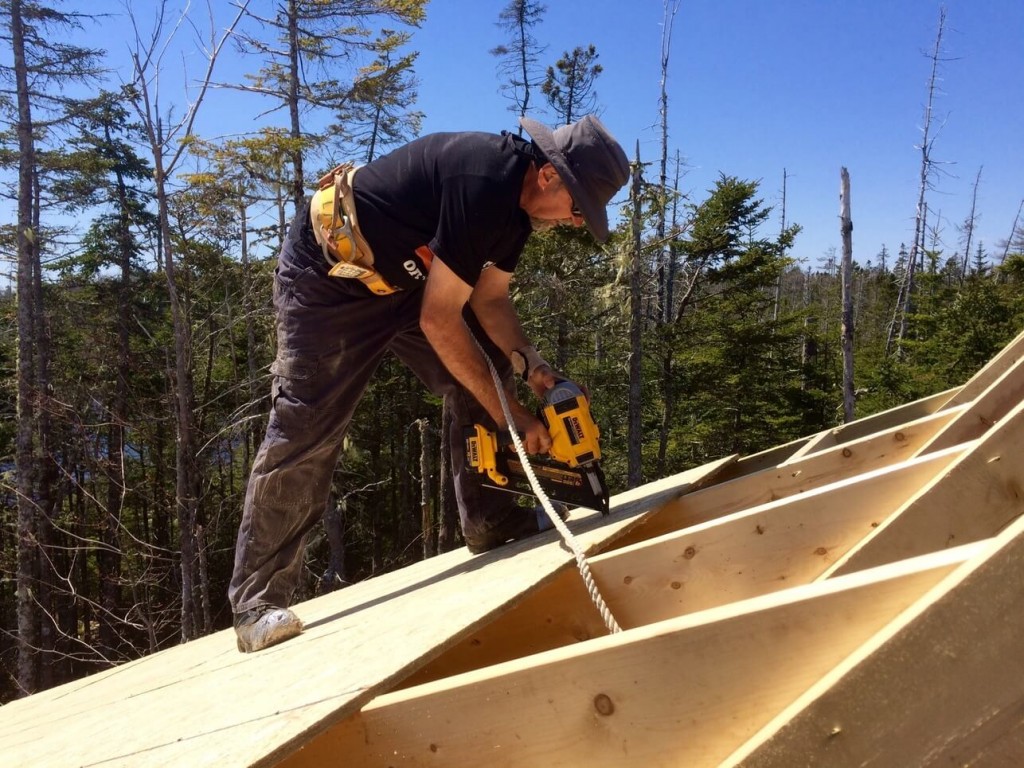
We constructed the roof ladder in sections for ease. We first cut the lookouts to the predetermined length which meet our overhang requirements. Then, with the lookouts placed on top of the top of the gable end plate and nailed them into place with our trusty DeWalt cordless nail gun.

To complete the deck ladder section we attach a 2” x 6” fly rafter to the ends of the lookouts. Keep in mind we have a transition angle at the top of the deck ladder to the main cabin ladder. Our roof pitch changes from 22.5 degrees to 45 degrees. Therefore, for now now we’ll leave the 22.5 degree fly rafter extra long so that we can overlap the 45 degree fly rafter of the main cabin ladder to ensure the proper angle is cut.
Again, notice below that we left the fly rafter extra long so that we can marry it to the main cabin fly rafter later and cut it to length then for ease.
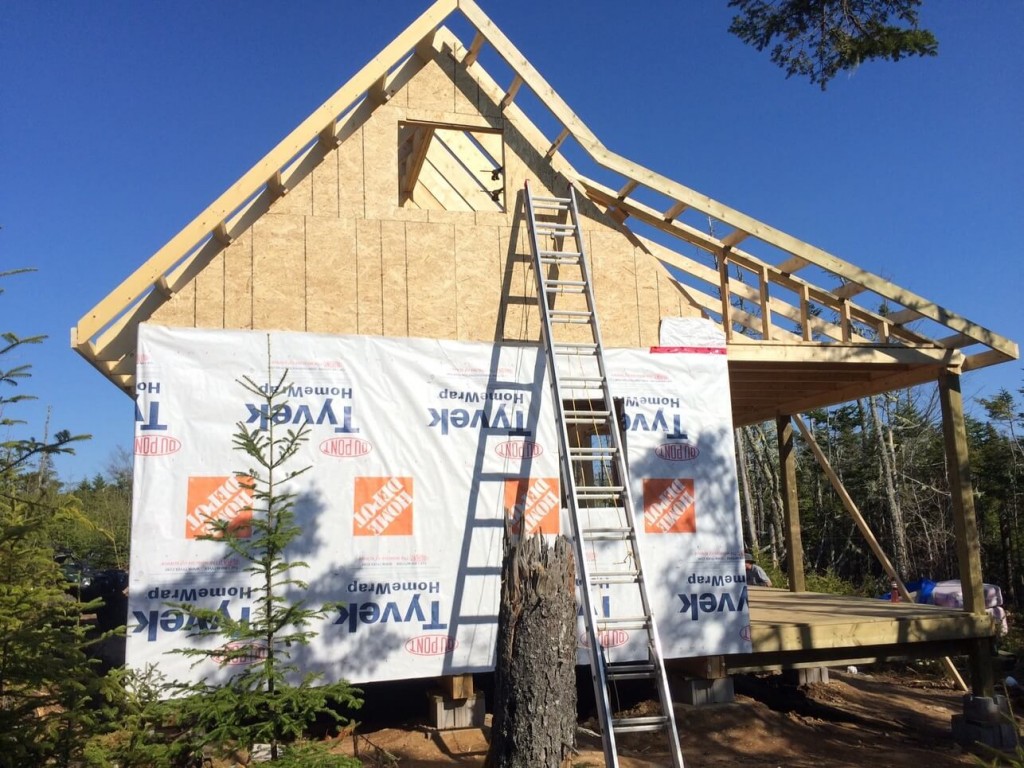
Next, we transition from building the ladders over the deck to building the ladders over the main cabin.
NOTE: The pitch change from the the deck roof (22.5 degrees) to the main cabin roof (45 degrees) requires special attention.
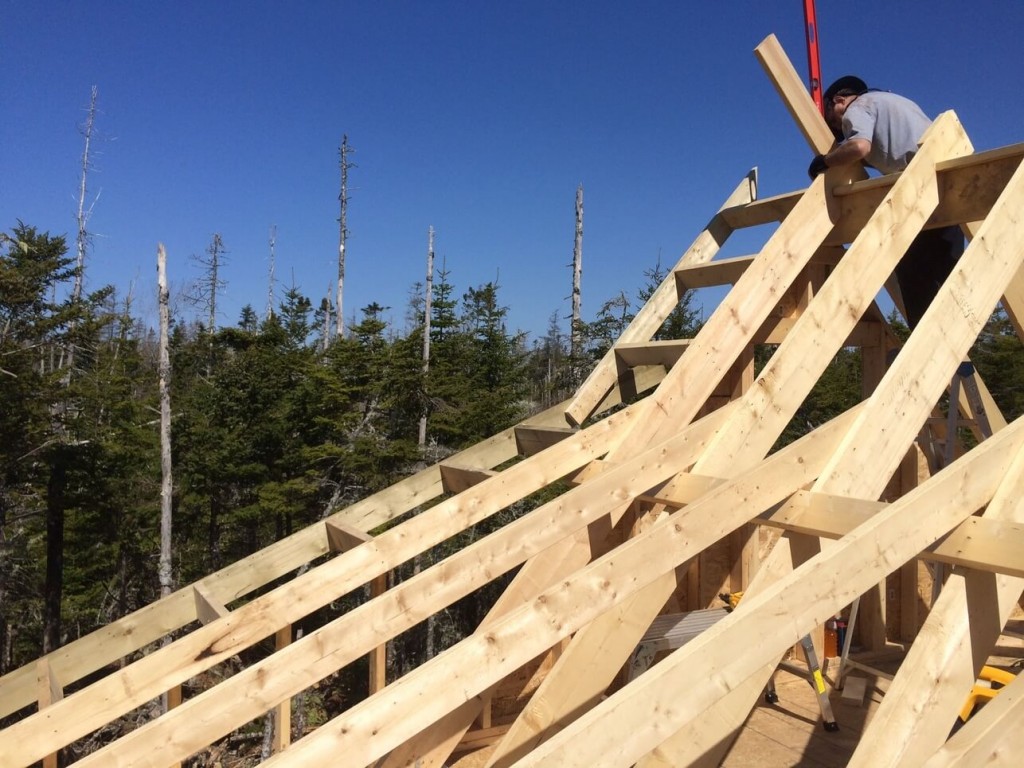
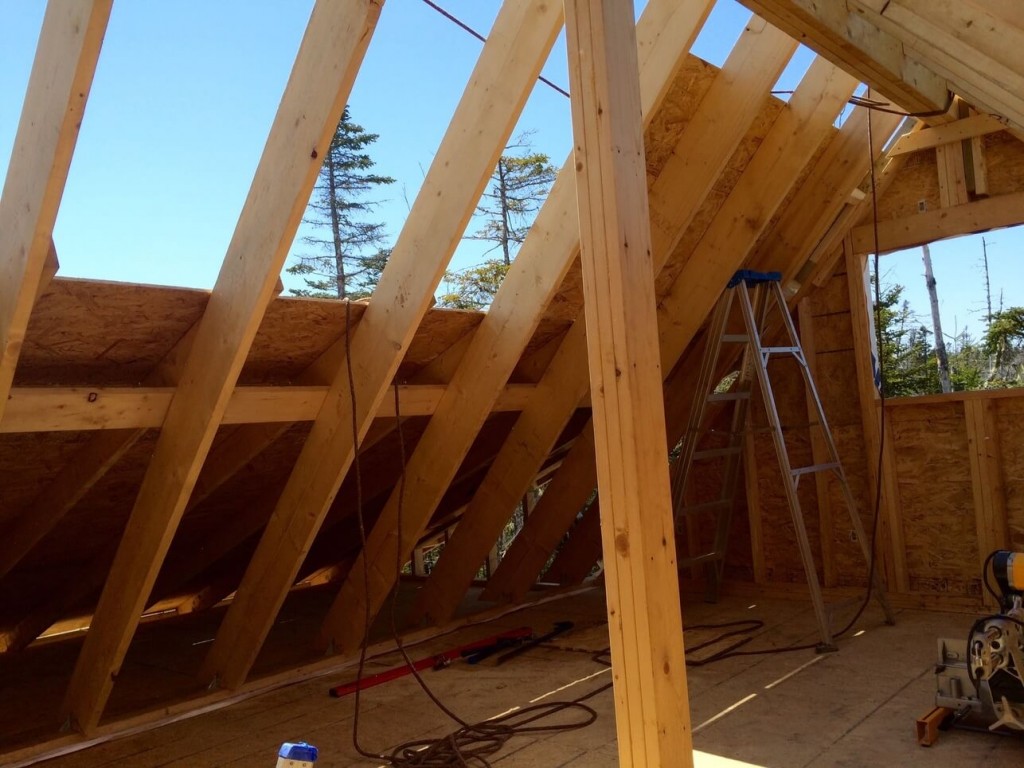
You’ll see below that we used 2″ x 10″s to create the main cabin ladder lookouts.
IMPORTANT: Remember the main cabin rafters are 2” x 10”s while the deck rafters are 2” x 6”s.
This means that at the soffit area at the transition point between the deck roof and the main cabin roof are at different heights. We accommodate for this by cutting the desired amount off of the main cabin ladder lookouts that extend from the main cabin rafters.This is so that we can cut a segment out of them ensuring we maintain a consistent width of the eves and soffit.
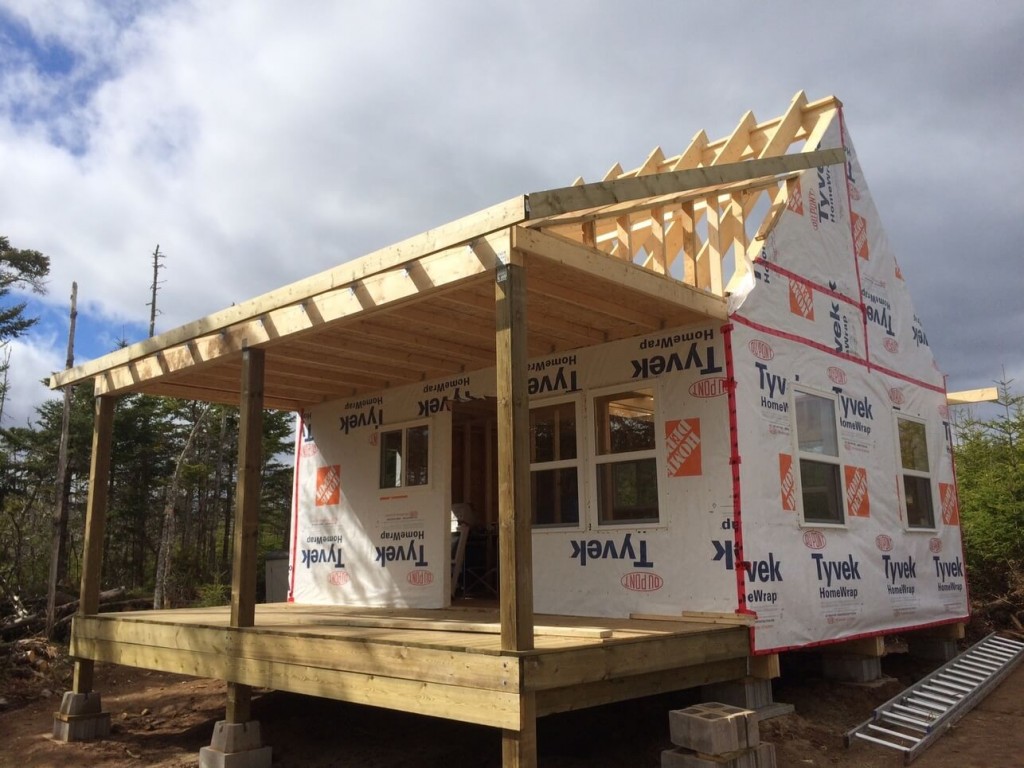
With the front side ladders complete we move onto the rear ladders.
To join the front and rear ladders we use a triangular shaped piece and nail it in place. As well you can see we needed to “finesse” the peak together using a small ratchet strap. The remaining gap is a result of the rear 2″ x 6″ coming up just a hair short but not worth ripping off and possibly damaging all the rear lookouts.
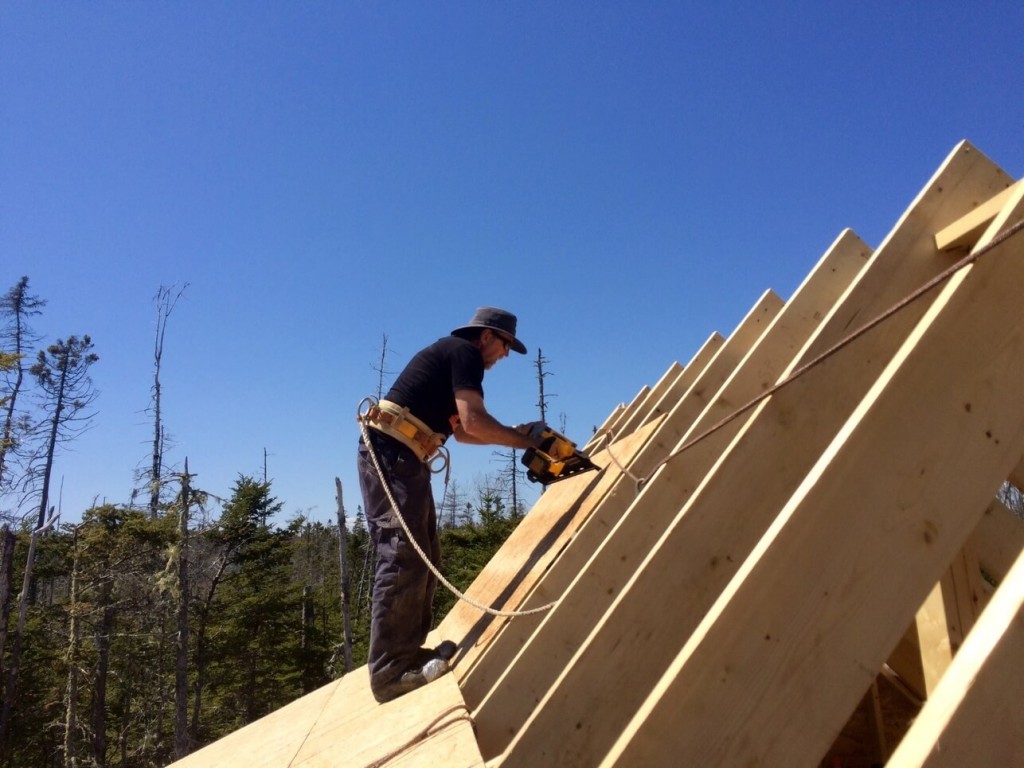
Don’t skip your safety or anyone else’s!
And finally we have the ladders finished on both sides, front and back.

But, we’re not done… quite yet!
This ladder build actually took place over the two days. The second day we also constructed the front deck stairs and installed all the OSB on the roof.
The Front Deck Stairs
When your ordering up your lumber you can also ask pre-cut stringers which make building the stairs that much quicker. We used 5 steps, for an elevation of 35-1/4″ and installed length of 46″.
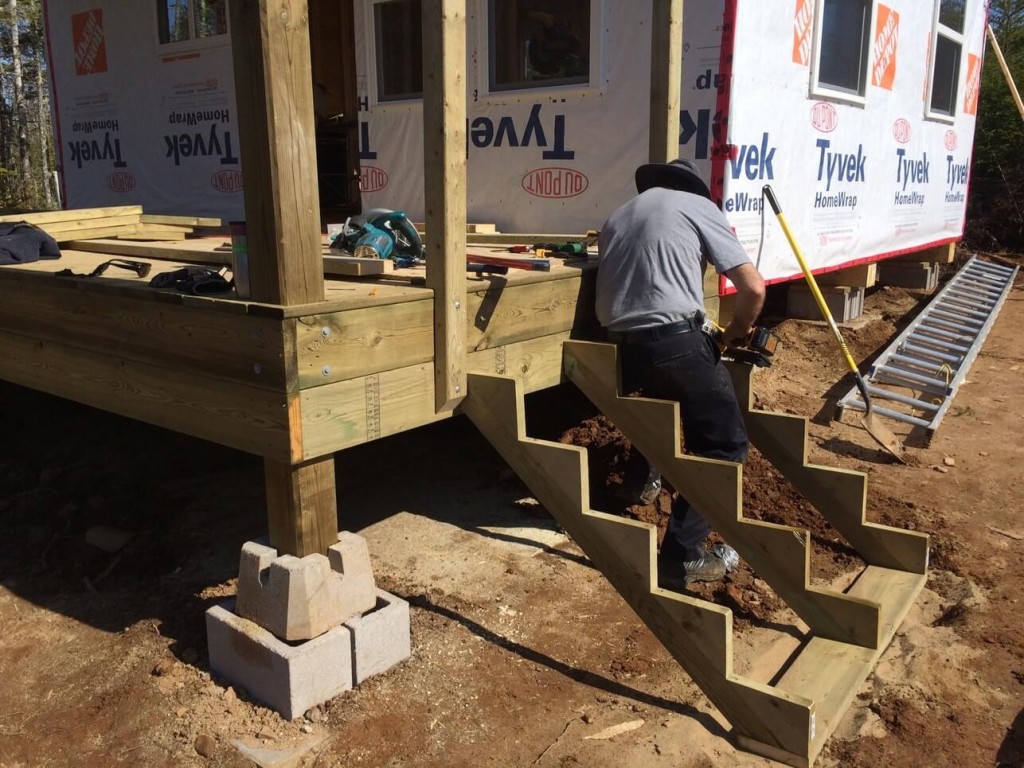
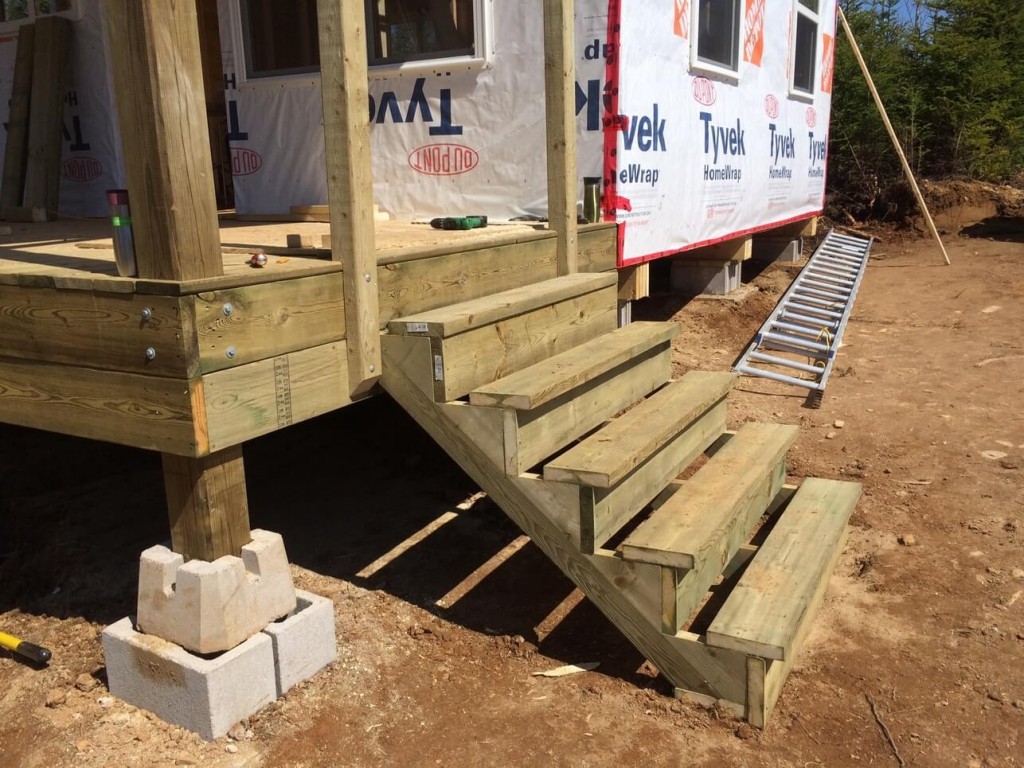
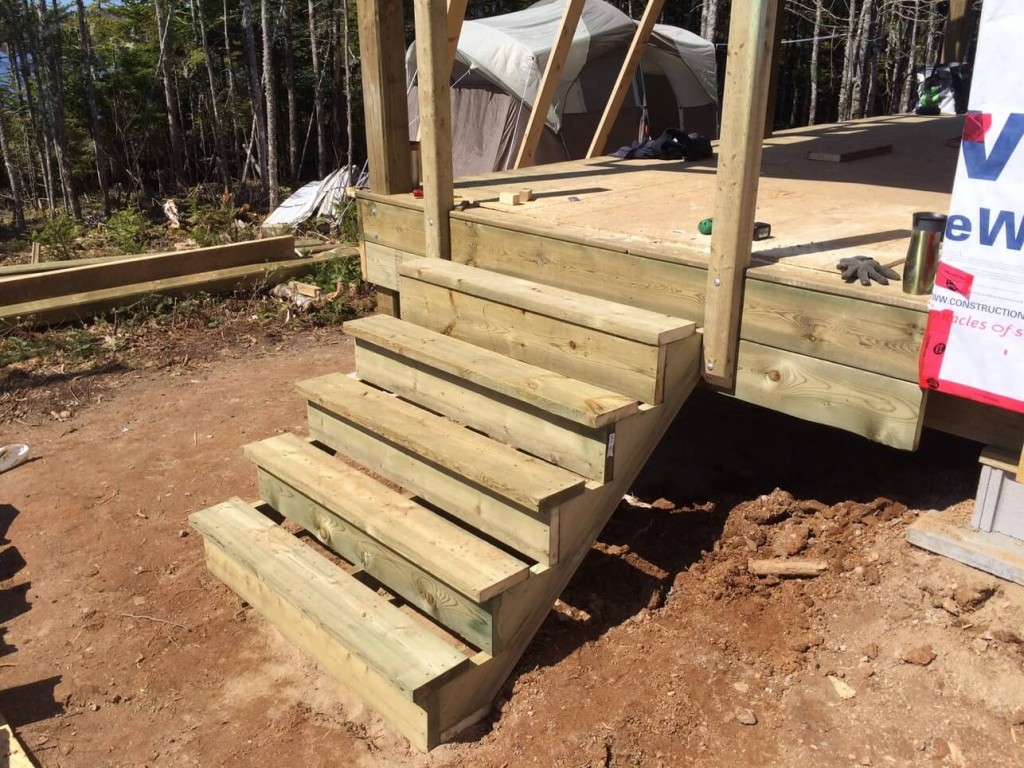
This steps are not complete yet. We still need to cut a strip for the back of each step but for now… it’s better than jumping up on the deck!
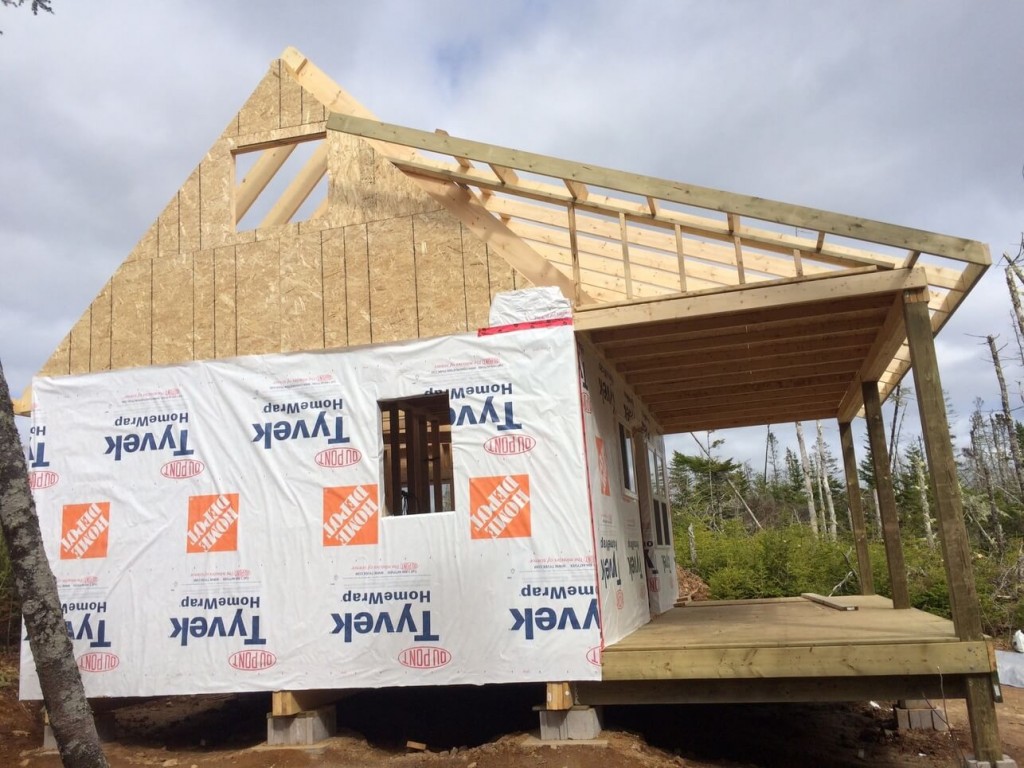
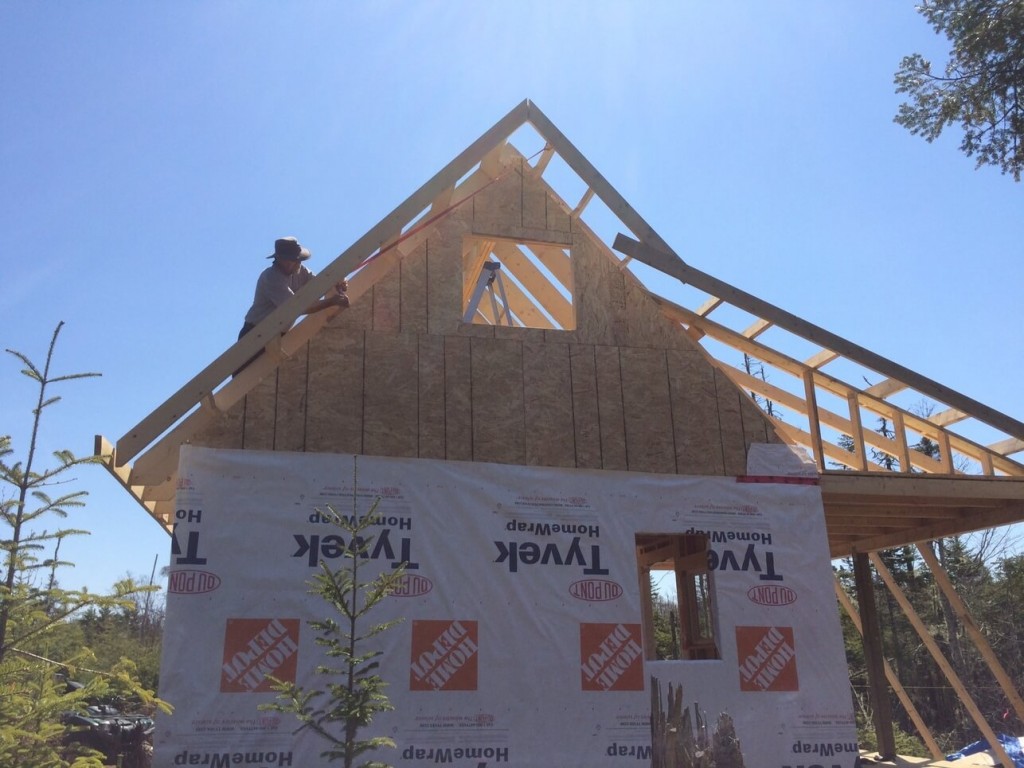
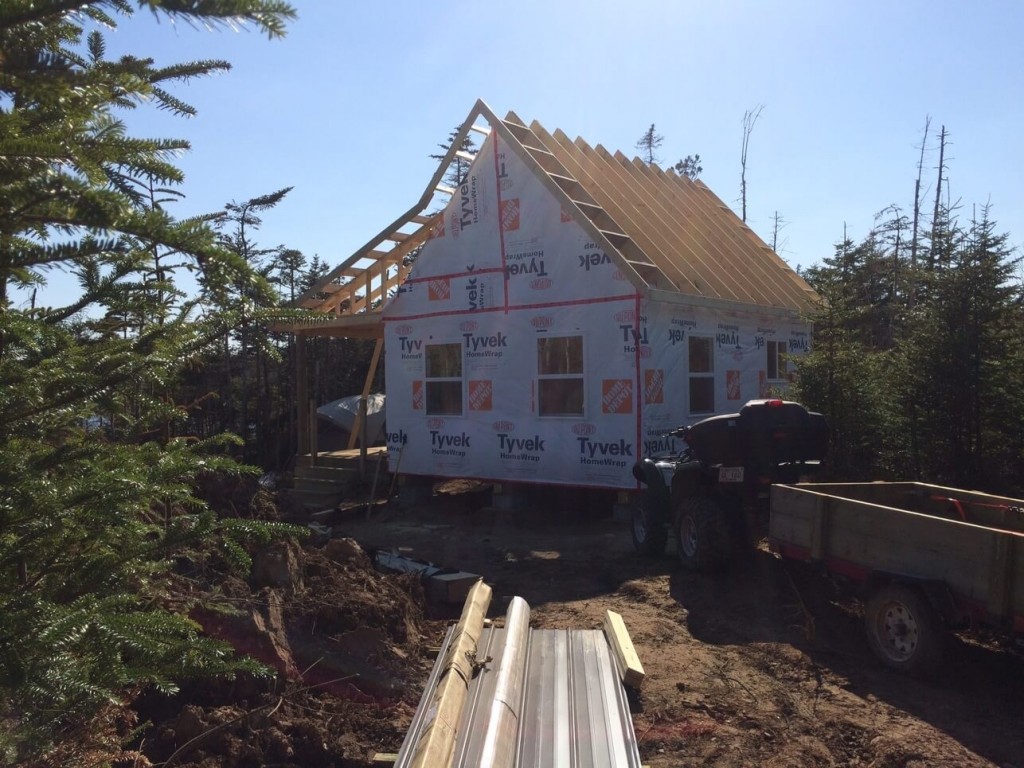
Finishing the roof with OSB
We used 7/16 4′ x 8′ Oriented Strand Board to cover the roof. It was beyond satisfying to finally close in the cabin roof. We’ll put on a layer or tar paper and heavy duty tarps to keep it dry until I get started installing the steel roof.
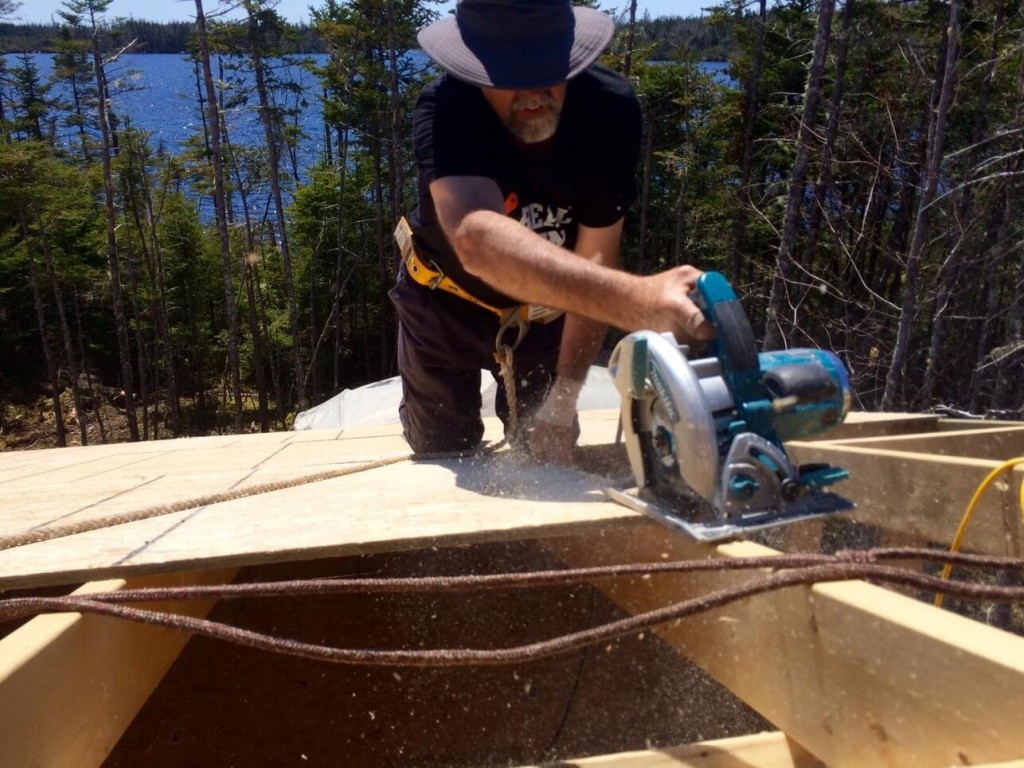
Below notice the scrap 2″ x 4″ nailed to the OSB as a foot hold. A few extra holes in the OSB are not going to matter but falling off the roof does. As well, we wore a safety harness with safety ropes attached at all times.
Can you guess what our #1 favorite tool was during the entire build? We’d still be there today framing if it wasn’t for this tool!
The front deck finally has some OSB on top of the rafters and some proper shade.
Below, one of the few pics you’ve seen of me so far as I’m often (always) the one taking the photos.

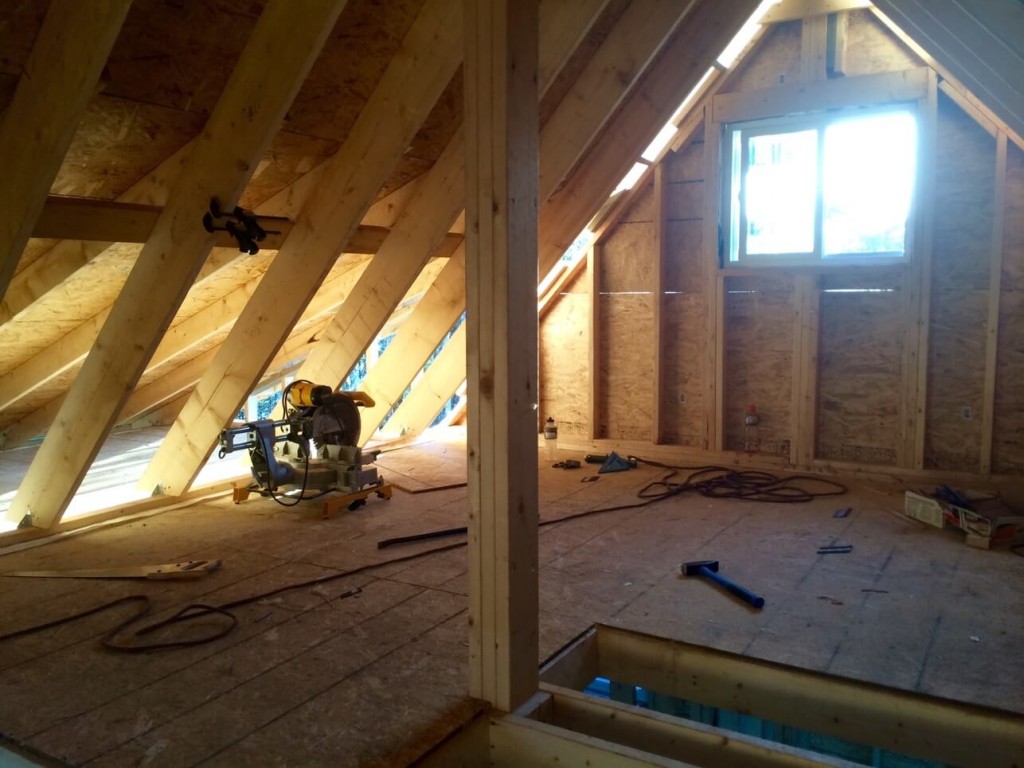
Below, the loft see’s it’s last few minutes of sunlight.
On the left of the photo below you’ll see our temporary work platform. This will be taken down and the main living room will have the cathedral ceiling.
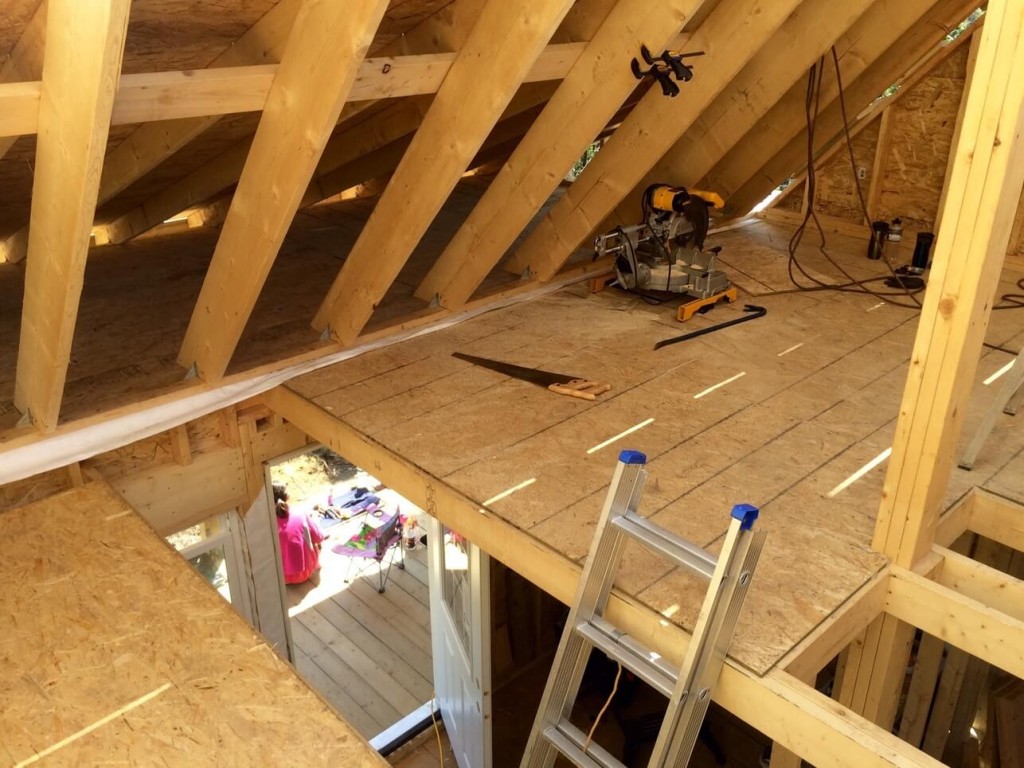
At last my daughter has her loft!

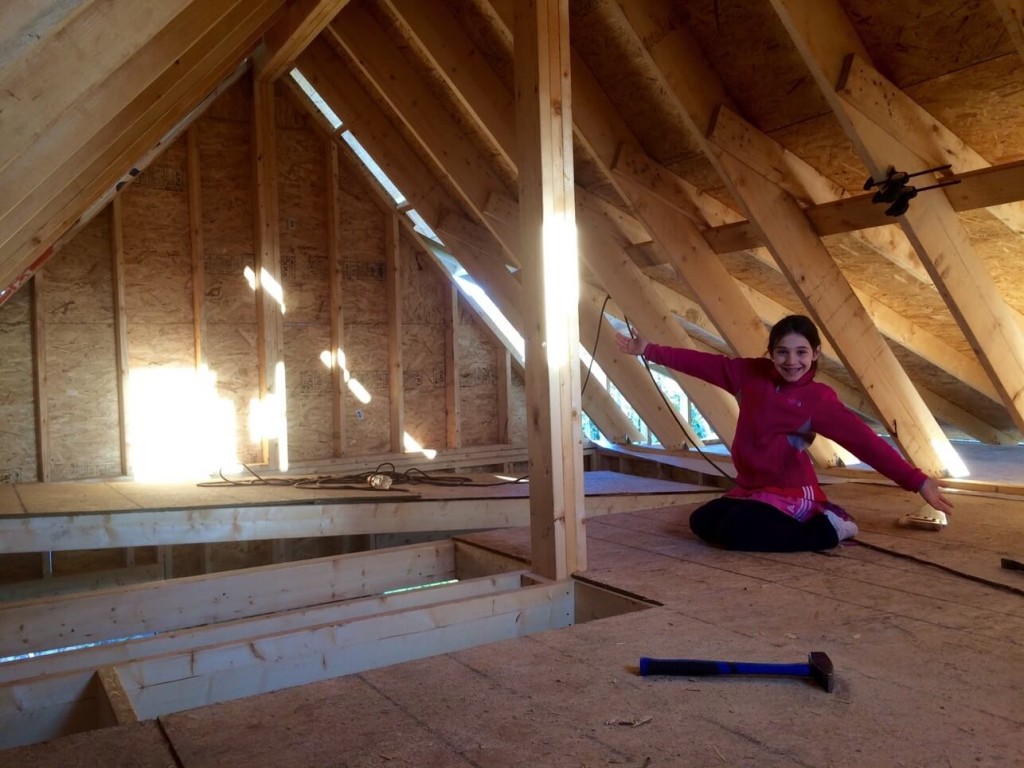
That wraps up the OSB for the roof and we finally have a “relatively” weather proof interior.
The last step is to just staple on some Vaporex Standard Sheathing. A craft paper which has been saturated with asphalt. This product sheds water and prevents moisture from penetrating. However, it will allow the passage of water vapor, thus permitting wood to breathe.
Finally we’ll temporarily protect it all with a few heavy duty tarps. At least until I can get started on the steel roof… SOLO!
Conclusion
That brings us to the end of the Roof Rake Ladder construction as well as the framing of the roof.
While the overhang might look quite routine when it’s all said and done, they are essential for shading our windows, reducing splash back and allowing the rain to fall far enough away from the foundation that it has little to no effect. Ultimately they help to keep our cabin cool in the summer and warm in the winter. Best of all… no siding rot.
If you found our post helpful or insightful in any way then please share it.
We appreciate all the support you’ve given us during our build so far and look forward to the next phase!
Ready To Check Out The Next Step Of The Build?
Your Content Goes Here
Your Turn...
Your Content Goes Here
Is this a design you feel confident in attempting yourself?
Let us know in the comment section at the bottom!
Don’t forget to subscribe so we can stay connected and I’ll send you ALL our off grid goodies!
Oh, and yup…. you guessed it! We have a special Pinterest pic for all our devoted Pinterest pinners out there.


how to clean solar panels
How to Clean Solar Panels: A Step-by-Step DIY Guide As you already know, residential and off-grid solar systems are amazing sources of renewable energy that are quickly growing in popularity. The large flat [...]

earthship
What Is an Earthship and How It Can Help Save the Planet Imagine living in a home that is completely self-sufficient, eco-friendly, and comfortable. A home that grows its own food, collects its [...]

3-way-switch-wiring
3-Way Switch Wiring: A How to Comprehensive Guide Here at the off grid cabin we’ve done our fair share of electrical work including 3-way switch wiring. We’ve done all the internal and external [...]

solar generator
How To Find The Best Solar Generator When we first cleared the land to build our off grid home back in 2016, we started with one of those small 700 watt Moto Master [...]

Off Grid Heating
The Best Off Grid Heating Methods Introduction To Off Grid Heating If you're Living off the grid already or planning to in the future, you already know how important it is to have [...]

off grid appliances
The Best Off Grid Appliances for Off Grid Living Introduction To Off Grid Appliances Living off the grid can be a rewarding and fulfilling experience, but it also comes with some challenges. One [...]


How can I get blue prints for the great cabin you built?
Hey Darren!
Well, to be quite honest I’ve never made any. But, if it’s something people might be interested in then perhaps I should consider drafting some up.
Here’s all the designing and planing we did for the cabin. http://theoffgridcabin.com/the-off-grid-cabin-floor-plan/
It’s pretty thin but when we first began this whole “off grid thing” we had no idea we’d make a website out of it. Frankly I wasn’t certain if anyone would even be interested in my little off grid home.
I’m quickly learning that after 135K+ people joining our weekly newsletter… they are!
Thanks for the interest Darren and… I guess I better learn how to make blueprints!
Hey guys looking great. It appears that you supervisor in pink is pleased with your work as well.
That is some serious geometry going up there.
I could not help but notice that your tyvek wrap running 2 different directions, or at least the camera may have been upside down ?? Does it really make a difference how the wrap is applied ??
With summer moving in it looks like you will be closer to moving in as well ??
A great tutorial, with pictures for each key step, so people can make sense at a glance.
Steve, how did you insulate your roof rake ladders?
The roof rake ladders aren’t insulated. In fact, they should never be insulated as they allow the free flow or air in and out of the space above all living areas. This prevents the build-up of moisture/mold. All homes (including ours) are usually finished with a 16 inch perforated vinyl soffit under the eaves/ladders.