
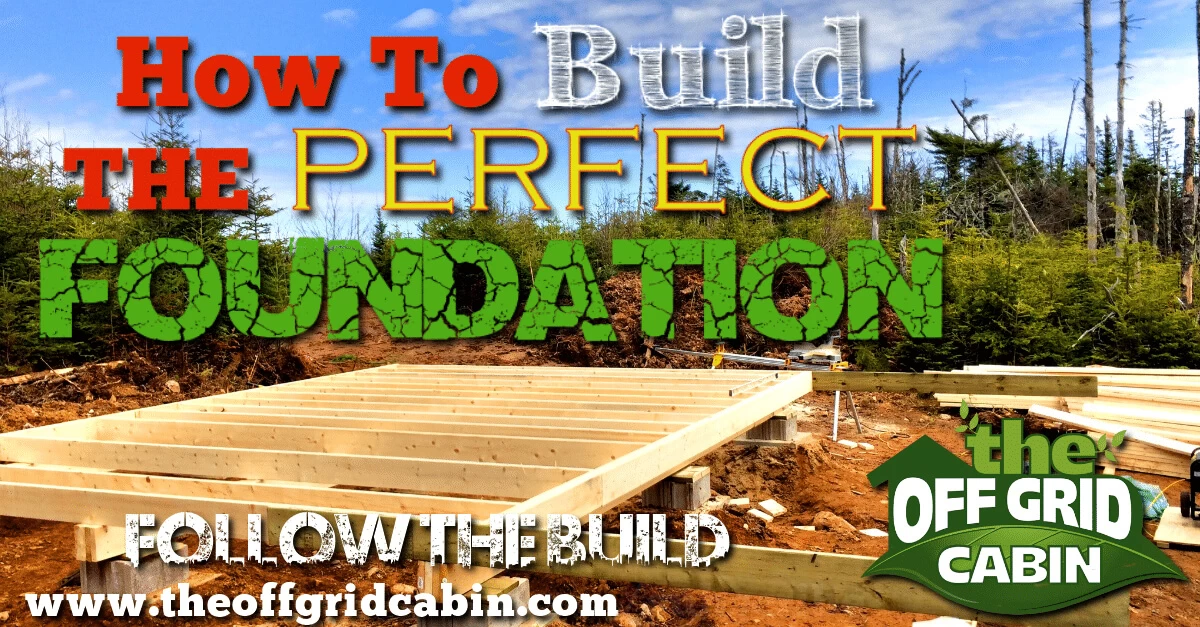
How to Build The Perfect Off-Grid Cabin Foundation
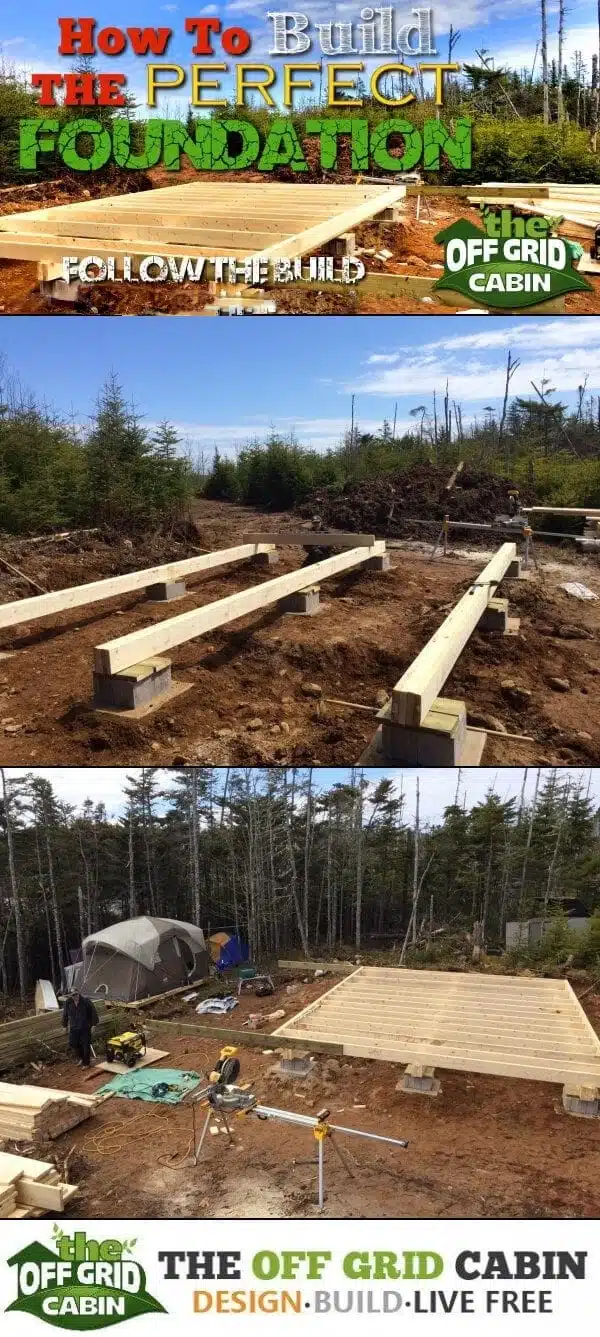
How to Build The Perfect Foundation for Your Off-Grid Cabin
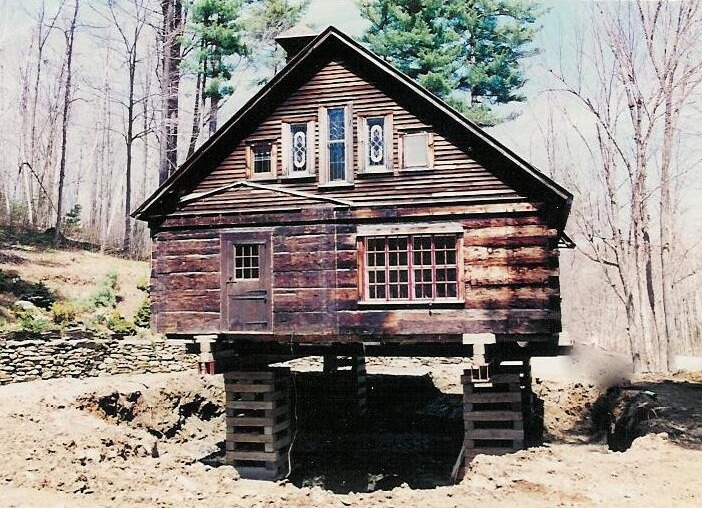
HINT: It’s NOT like this!
If you’re dreaming of living off the grid, you might be wondering how to build a foundation for your cabin that is eco-friendly, sustainable, and durable. A foundation is the base of your cabin, and it affects the comfort, safety, and efficiency of your off-grid living.
But not all foundations are created equal. Some foundations are more suitable for off-grid cabins than others, depending on the location, climate, and budget of your project. Some foundations are also more eco-friendly and sustainable than others, depending on the materials, methods, and maintenance involved.
In this blog post, we’ll help you choose and build the best eco-friendly off-grid foundation for your cabin. We’ll compare and contrast the four main types of foundations for off-grid cabins: concrete, pier and beam, skid, and screw pile. We’ll also give you some tips and tricks on how to prepare your site, insulate your foundation, and maintain your foundation. By the end of this blog post, you’ll be able to build an eco-friendly off-grid foundation for your cabin that will last for years, and that will enhance your off-grid living experience.
Table of Contents
- Concrete Foundation
- Pros and cons of a concrete foundation
- How to build a concrete foundation
- Pier and Beam Foundation
- Pros and cons of a pier and beam foundation
- How to build a pier and beam foundation
- Skid Foundation
- Pros and cons of a skid foundation
- How to build a skid foundation
- Screw Pile Foundation
- Pros and cons of a screw pile foundation
- How to build a screw pile foundation
- Our Cabin Foundation
- How we build our foundation
- FAQs
- 5 questions often asked about cabin foundations
- Conclusion
- How to choose the best type of foundation for your cabin
- How to build a good foundation for your cabin
- How to enjoy your off-grid living
We’ve broken this cabin foundation article into two parts. Part One: Let’s discuss the different types of foundations you may want to consider for your cabin, cottage, or tiny home. We’ll quickly summarize the pros and cons of a particular foundation and then a brief over view of how that type of foundation is built
Part Two: We’ll walk you step by step of how we build the foundation for ouir off grid cabin.
Let’s dive in!
Part One: Foundation Types
Concrete Foundation
A concrete foundation is the most common and traditional type of foundation for a cabin. It involves pouring concrete into a wooden frame, creating a slab or a crawl space under your cabin.
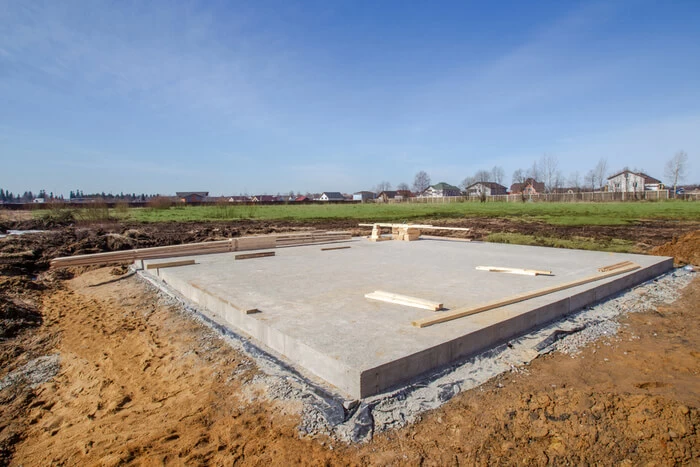
A concrete foundation has some benefits for off-grid cabins, such as:
- It provides a strong and stable base for your cabin, preventing it from shifting or sinking.
- It protects your cabin from moisture, frost, and pests, as it creates a barrier between the ground and the cabin floor.
- It allows you to install plumbing, electrical, and heating systems under your cabin, making it more comfortable and convenient.
However, a concrete foundation also has some drawbacks for off-grid cabins, such as:
- It requires a lot of materials, tools, and labor, making it expensive and time-consuming to build.
- It needs a level and well-drained site, which might not be available or accessible in remote or rugged locations.
- It might not be suitable for areas with high seismic activity, as it can crack or crumble under pressure.
- It might not be very eco-friendly or sustainable, as it uses a lot of cement, which has a high carbon footprint and environmental impact.
If you want to build a concrete foundation for your off-grid cabin, you’ll need to follow these steps:
- Clear and level the site where you want to build your cabin. Remove any rocks, roots, or debris that might interfere with the foundation.
- Dig a trench around the perimeter of the site, about 12 inches deep and 12 inches wide. This will create a footing for the foundation, which will support the weight of the cabin.
- Build a wooden frame or formwork around the trench, using 2×4 or 2×6 boards. This will create the shape and size of the foundation, and it will hold the concrete in place.
- Pour concrete into the trench, filling it up to the top of the formwork. Use a shovel or a trowel to spread and level the concrete, and a tamper or a vibrator to compact and remove any air bubbles.
- Let the concrete cure for at least 24 hours, or until it’s hard and dry. Then, remove the formwork and smooth the edges of the foundation with a trowel or a grinder.
- Build another wooden frame on top of the foundation, using 2×4 or 2×6 boards. This will create the floor joists, which will support the cabin floor.
- Attach plywood or OSB sheets to the floor joists, using nails or screws. This will create the subfloor, which will be the base of your cabin floor.
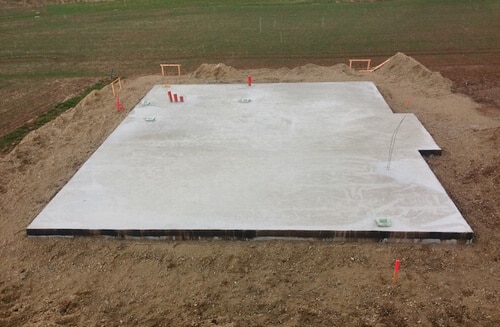
To make your concrete foundation more eco-friendly and sustainable, you can use some of these tips:
- Use recycled or natural materials, such as crushed glass, gravel, or sand, instead of cement, to reduce the environmental impact and cost of your foundation.
- Add insulation, such as foam boards, straw bales, or wool, under and around your foundation, to improve the thermal efficiency and comfort of your cabin.
- Apply a waterproof sealant, such as epoxy, polyurethane, or rubber, over your foundation, to prevent moisture and mold problems, and to extend the lifespan of your foundation.
Pier and Beam Foundation
A pier and beam foundation is a popular and versatile type of foundation for a cabin. There are two type of pier and beam foundations. One is utilizing a cement pad on top of the soil acting as the base and either a cinder block or pressure treated wood on top acting as the pier.
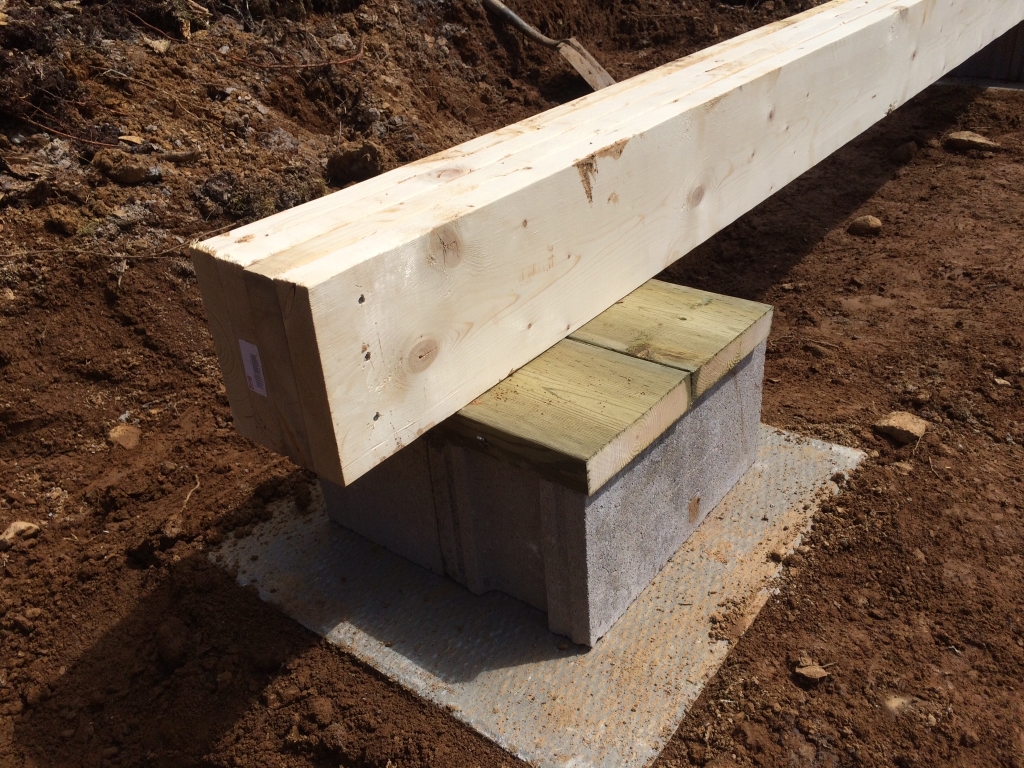
The second type involves installing vertical posts or piers into the ground, and connecting them with horizontal beams or girders. The beams support the floor joists, which support the cabin floor.
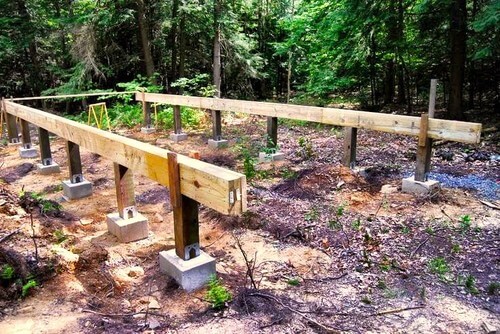
A pier and beam foundation has some benefits for off-grid cabins, such as:
- It’s easy and cheap to build, as it requires fewer materials, tools, and labor than a concrete foundation.
- It’s adaptable and flexible, as it can be built on uneven or sloped terrain, and it can be adjusted or modified as needed.
- It allows air circulation and ventilation under your cabin, preventing moisture and mold problems.
- It creates a crawl space under your cabin, which can be used for storage or access to plumbing, electrical, and heating systems.
However, a pier and beam foundation also has some drawbacks for off-grid cabins, such as:
- It’s less stable and durable than a concrete foundation, as it can shift or settle over time, causing cracks or gaps in the cabin floor.
- It’s more vulnerable to frost, pests, and animals, as it exposes the cabin floor to the ground and the elements.
- It requires regular maintenance and inspection, as it can deteriorate or decay due to weather or wear and tear.
- It might not comply with local building codes or regulations, depending on the type and size of the cabin and the location.
If you want to build a pier and beam foundation for your off-grid cabin, you’ll need to follow these steps:
- Clear and level the site where you want to build your cabin. Remove any rocks, roots, or debris that might interfere with the foundation.
- Mark the locations of the piers, using stakes or spray paint. The piers should be spaced evenly and symmetrically, about 6 to 8 feet apart, depending on the size and weight of the cabin.
- Dig holes for the piers, about 3 to 4 feet deep and 12 to 18 inches wide, depending on the soil type and frost depth. The holes should be deeper and wider than the piers, to allow for drainage and stability.
- Install the piers, using concrete blocks, bricks, stones, or metal posts. The piers should be level and aligned, and they should extend above the ground level by at least 12 inches.
- Connect the piers with beams, using 4×4 or 4×6 boards. The beams should be attached to the piers with metal brackets, bolts, or nails, and they should be level and parallel.
- Attach the floor joists to the beams, using 2×4 or 2×6 boards. The floor joists should be spaced 16 to 24 inches apart, and they should be perpendicular to the beams.
- Attach plywood or OSB sheets to the floor joists, using nails or screws. This will create the subfloor, which will be the base of your cabin floor.
To make your pier and beam foundation more eco-friendly and sustainable, you can use some of these tips:
- Use recycled or natural materials, such as reclaimed wood, bamboo, or metal, instead of new or treated lumber, to reduce the environmental impact and cost of your foundation.
- Add insulation, such as foam boards, straw bales, or wool, under and around your foundation, to improve the thermal efficiency and comfort of your cabin.
- Apply a waterproof sealant, such as epoxy, polyurethane, or rubber, over your foundation, to prevent moisture and mold problems, and to extend the lifespan of your foundation.
Skid Foundation
A skid foundation is a simple and quick type of foundation for a cabin. It involves laying wooden skids or beams on the ground, and placing the cabin floor on top of them.
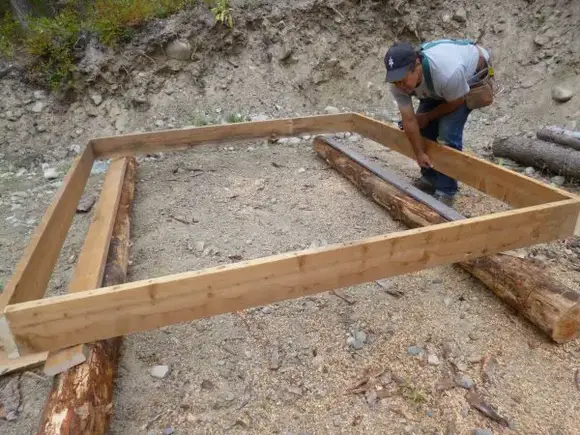
A skid foundation has some benefits for off-grid cabins, such as:
- It’s the easiest and cheapest type of foundation to build, as it requires minimal materials, tools, and labor.
- It’s portable and movable, as it can be dragged or lifted to a different location, if needed or desired.
- It doesn’t require any digging or excavation, which might damage the natural environment or disturb the wildlife.
- It doesn’t need any permits or approvals, as it’s considered a temporary or non-permanent structure.
However, a skid foundation also has some drawbacks for off-grid cabins, such as:
- It’s not very stable or secure, as it can slide or tip over due to wind, rain, or snow.
- It’s not very durable or long-lasting, as it can rot or decay due to moisture, insects, or fungi.
- It’s not very insulated or comfortable, as it exposes the cabin floor to the ground and the temperature fluctuations.
- It might not be legal or allowed, depending on the local zoning or land use laws.
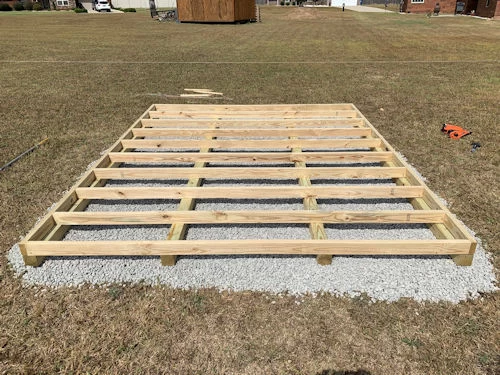
If you want to build a skid foundation for your off-grid cabin, you’ll need to follow these steps:
- Clear and level the site where you want to build your cabin. Remove any rocks, roots, or debris that might interfere with the foundation.
- Lay the skids on the ground, parallel and evenly spaced, about 4 to 6 feet apart, depending on the size and weight of the cabin. The skids can be made of treated lumber, logs, or metal beams.
- Attach the floor joists to the skids, using nails or screws. The floor joists should be spaced 16 to 24 inches apart, and they should be perpendicular to the skids.
- Attach plywood or OSB sheets to the floor joists, using nails or screws. This will create the subfloor, which will be the base of your cabin floor.
To make your skid foundation more eco-friendly and sustainable, you can use some of these tips:
- Use recycled or natural materials, such as reclaimed wood, bamboo, or metal, instead of new or treated lumber, to reduce the environmental impact and cost of your foundation.
- Add insulation, such as foam boards, straw bales, or wool, under and around your foundation, to improve the thermal efficiency and comfort of your cabin.
- Apply a waterproof sealant, such as epoxy, polyurethane, or rubber, over your foundation, to prevent moisture and mold problems, and to extend the lifespan of your foundation.
Screw Pile Foundation
A screw pile foundation is a modern and innovative type of foundation for a cabin. It consists of installing metal posts or piles with helical blades into the ground, and attaching them to a metal frame or platform. The platform supports the cabin floor.
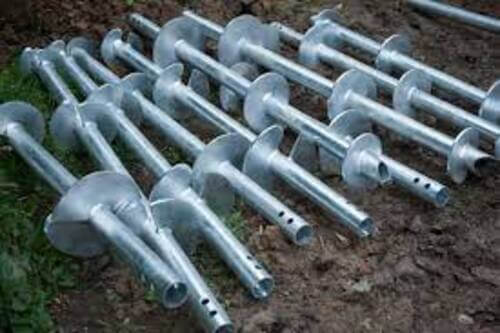
A screw pile foundation has many advantages, such as:
- It’s fast and easy to install, as it requires a specialized machine or tool to screw the piles into the ground, without any digging or excavation.
- It’s stable and strong, as it can withstand high loads and pressures, and it can resist frost, wind, and earthquakes.
- It’s adjustable and reversible, as it can be raised or lowered, and it can be removed or relocated, if needed or desired.
- It’s eco-friendly and sustainable, as it uses recycled materials, and it minimizes the environmental impact and disturbance.
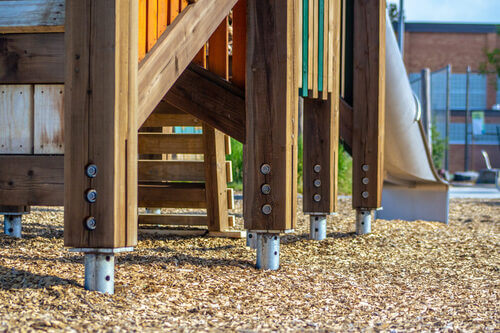
However, a screw pile foundation also has some drawbacks, such as:
- It’s expensive and specialized, as it requires a professional contractor or service to install and maintain the foundation.
- It’s not widely available or accessible, as it might not be offered or supported in some areas or regions.
- It’s not very aesthetic or natural, as it creates a visible and metallic structure under the cabin, which might clash with the surroundings or the cabin design.
- It might not comply with local building codes or regulations, depending on the type and size of the cabin and the location.
To build a screw pile foundation, you’ll need to follow these steps:
- Clear and level the site where you want to build your cabin. Remove any rocks, roots, or debris that might interfere with the foundation.
- Mark the locations of the piles, using stakes or spray paint. The piles should be spaced evenly and symmetrically, about 6 to 8 feet apart, depending on the size and weight of the cabin.
- Install the piles, using a screw pile driver or a hydraulic auger. The piles should be screwed into the ground, until they reach a stable and solid layer, usually about 3 to 6 feet deep.
- Attach the platform to the piles, using metal brackets, bolts, or welds. The platform should be level and aligned, and it should extend above the ground level by at least 12 inches.
- Attach the floor joists to the platform, using nails or screws. The floor joists should be spaced 16 to 24 inches apart, and they should be perpendicular to the platform.
- Attach plywood or OSB sheets to the floor joists, using nails or screws. This will create the subfloor, which will be the base of your cabin floor.
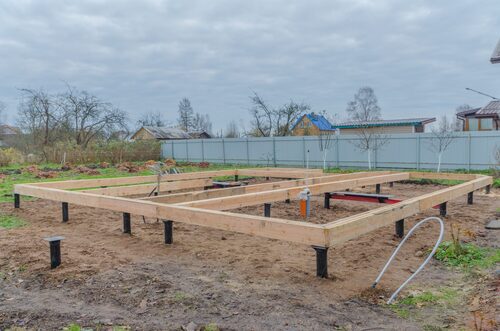
Part Two: How We Built Our Cabin Foundation
We choose our specific type of cabin foundation which is a pier and beam type foundation based on a few simple factors.
- Overall cost of the build ($20K)
- Limited time to build the cabin (we had 15 days total)
- Ease of build for just two people
- Limited access to the remote build site. (we only had an excavator for one day)
Our foundation design is both incredibly economical and effective at providing a solid building platform. It’s also specifically adapted to soil type based on our geographic location. TIP: It isn’t always easy to build in an off grid location or with a limited crew so always factor in your location and accessibility when choosing your foundation type. The design considerations for our cabin foundation were…
- Inexpensive design
- Can be built in a singe day with just two people
- Requires no heavy equipment
- No digging post holes
- No pouring cement
- Only requires a level and some basic hand-tools
- Provides the ability to level the cabin easily during the build and in the future
- Affords an excellent thermal break for colder climates like ours
Our off grid cabin was built with with just myself and my father within a two week period.
Inside those two weeks we managed to complete to following…
- clearing the land
- carrying all the building materials to the build site by hand
- building the foundation
- framing the cabin and the roof
- installing all the doors and windows
- putting up all the exterior/roof sheathing
The entire solar install was done in only 2 days. We have a complete beginners guide to off grid solar systems. Heavy machinery is expensive to bring in and the soil type may not always conducive to you building a fully dug out basement. A poured foundation, or even a cement pad, can cost thousands and take weeks to build. Again, a cement truck may not even be able to access your build site. They certainly couldn’t on ours.
Our foundation was simple to design and quick to build.
TIP: Our floor design might seem unique but it is a proven building technique for cold environment s like ours. We will sandwich 1″ think rigid formula extruded polystyrene insulation between 3/4″ OSB. This provides an excellent thermal break from the cold harsh winters of Nova Scotia and creates a strong and rigid building platform. When built properly, your cabins foundation should easily last the life of the cabin and most importantly provide a plumb, level and solid building foundation.
What We Completed Yesterday
Yesterday we began to lay out the footings to prepare for todays work.
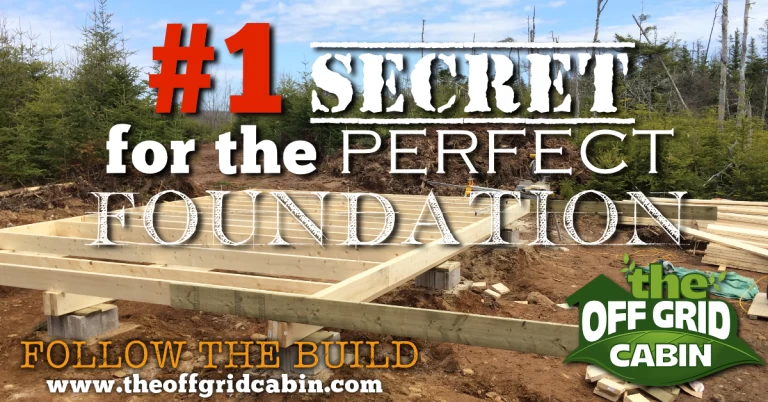
Be sure to check out our #1 Secret For The Perfect Foundation post which covers how we cleared the land and prepped the build site for the foundation.
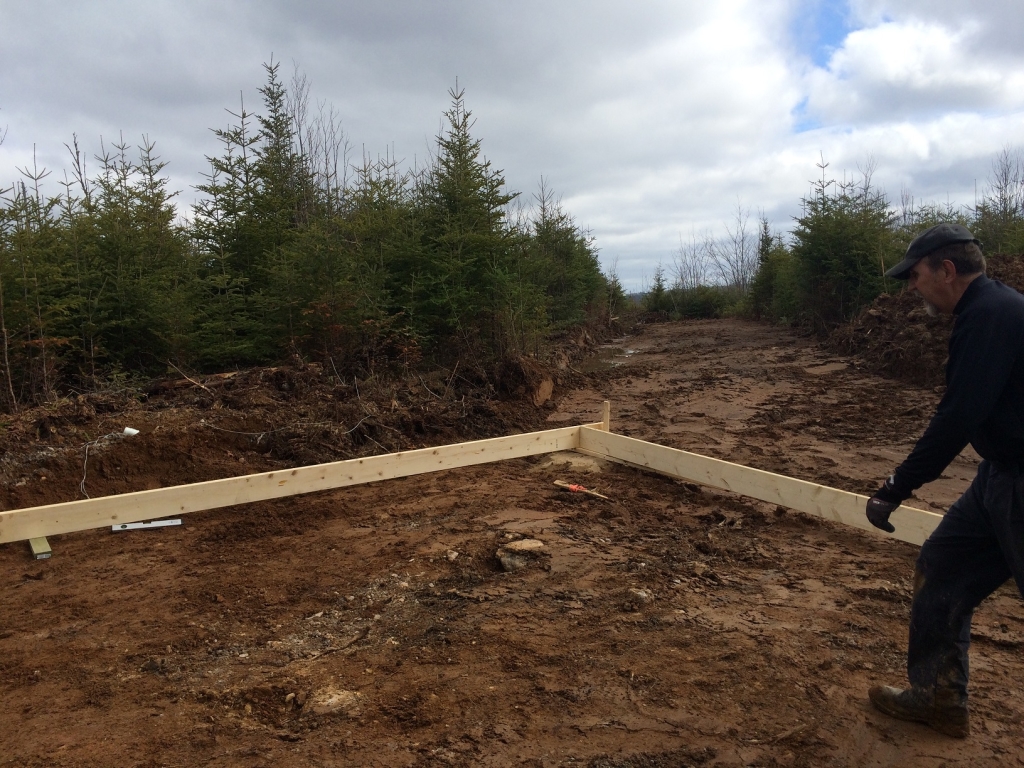
Today we’ll finish installing the footings, build the main support beams, and begin framing the floor joists. This will give us a good idea of the cabin dimensions and allow us to imagine the walls, placement of the utilities, and consider any changes that we may need to make.
Planning Out The Footing Design
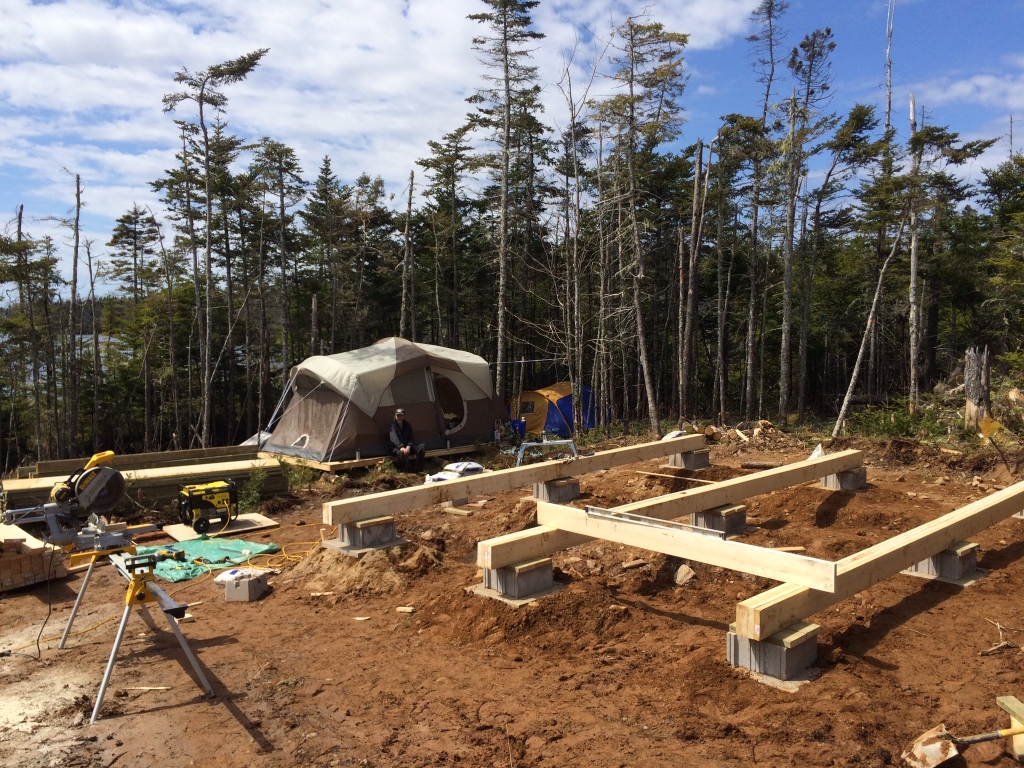
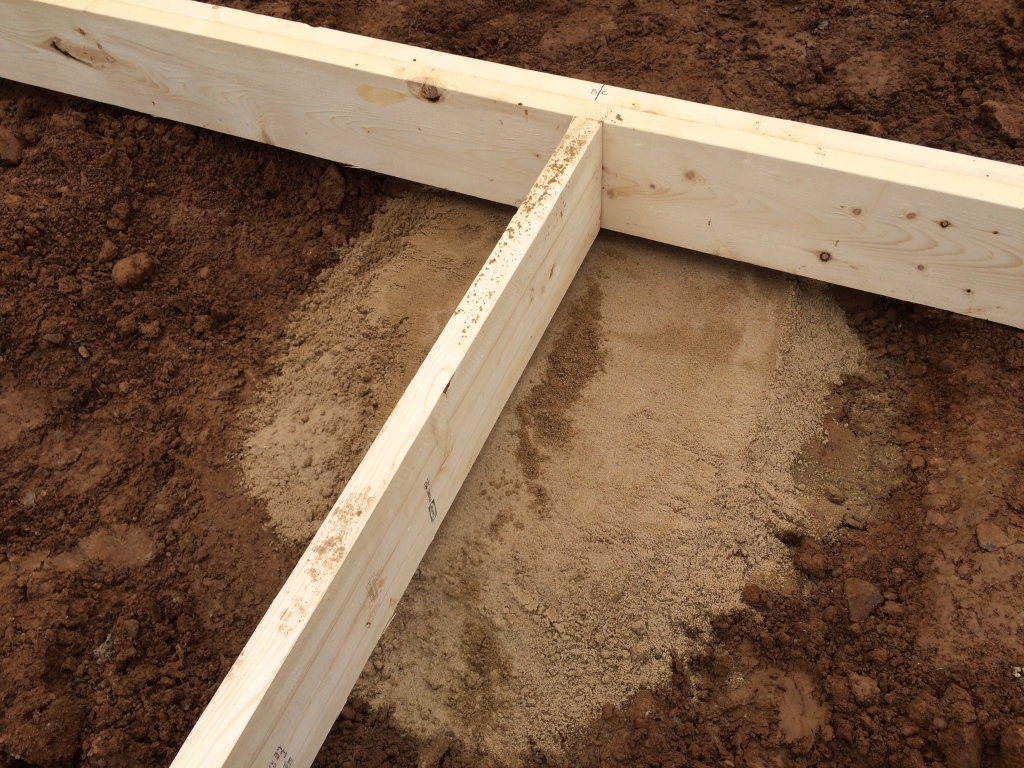
We leveled out the 12 locations, on undisturbed soil, where we’ll be placing the above ground footings. We did this using 2 bags of Quikrete All-Purpose-Sand for each of the locations where we’ll be placing the 8 24″ X 24″ patio slab paver pads and 3 precast 4-way concrete post footings for the 3 deck posts.
Leveling the ground with All-Purpose-Sand (AKA Crusher Dust)
Getting the ground perfectly level is critical in ensuring the remainder of the structure is level, won’t shift, and allows for every beam, board and joist to line up perfectly.
Below my wife is leveling out the ground. It’s great when the whole family comes out to lend a hand.
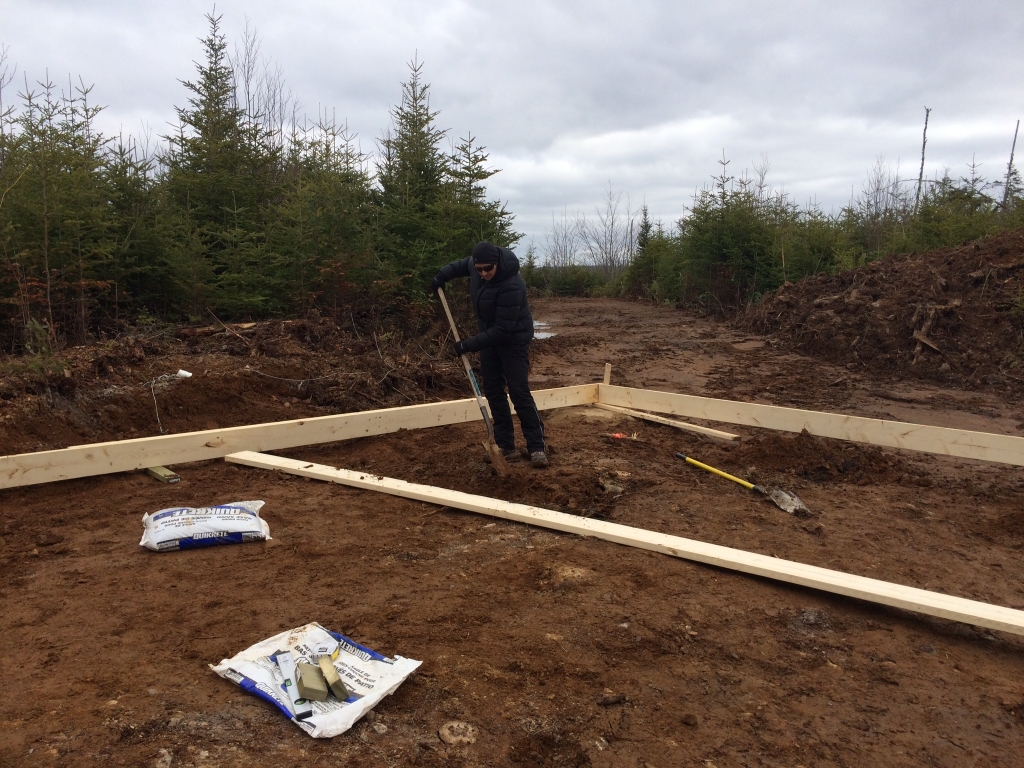
Laying out some lumber scabs to ensure the pads are all the same height.
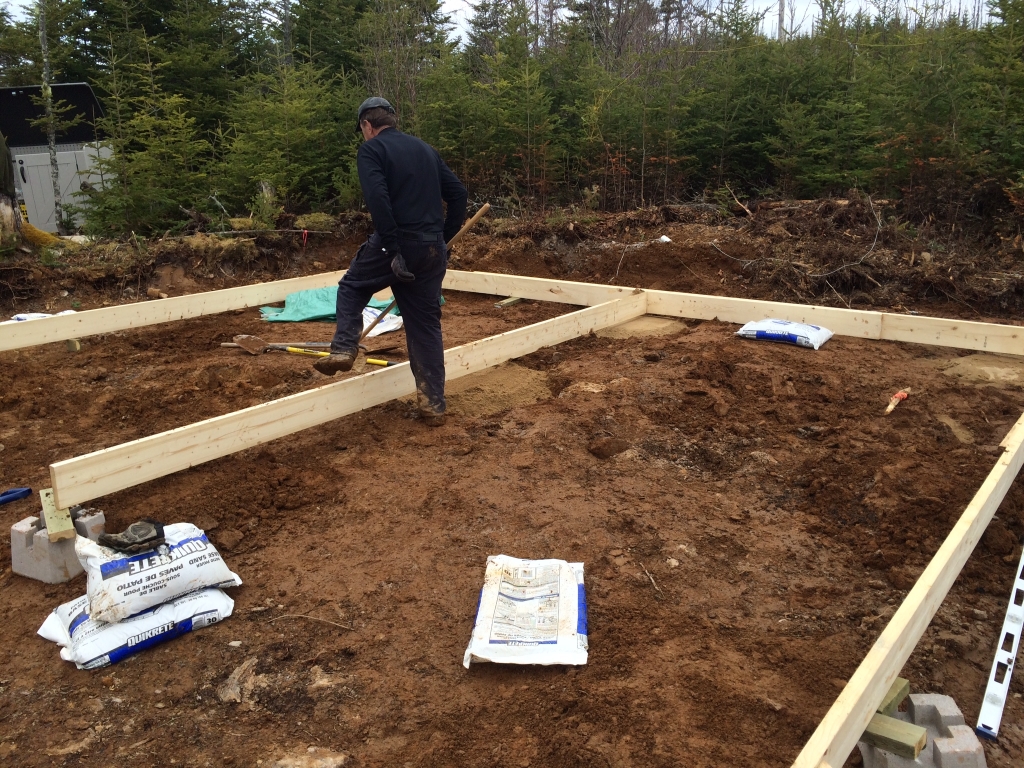
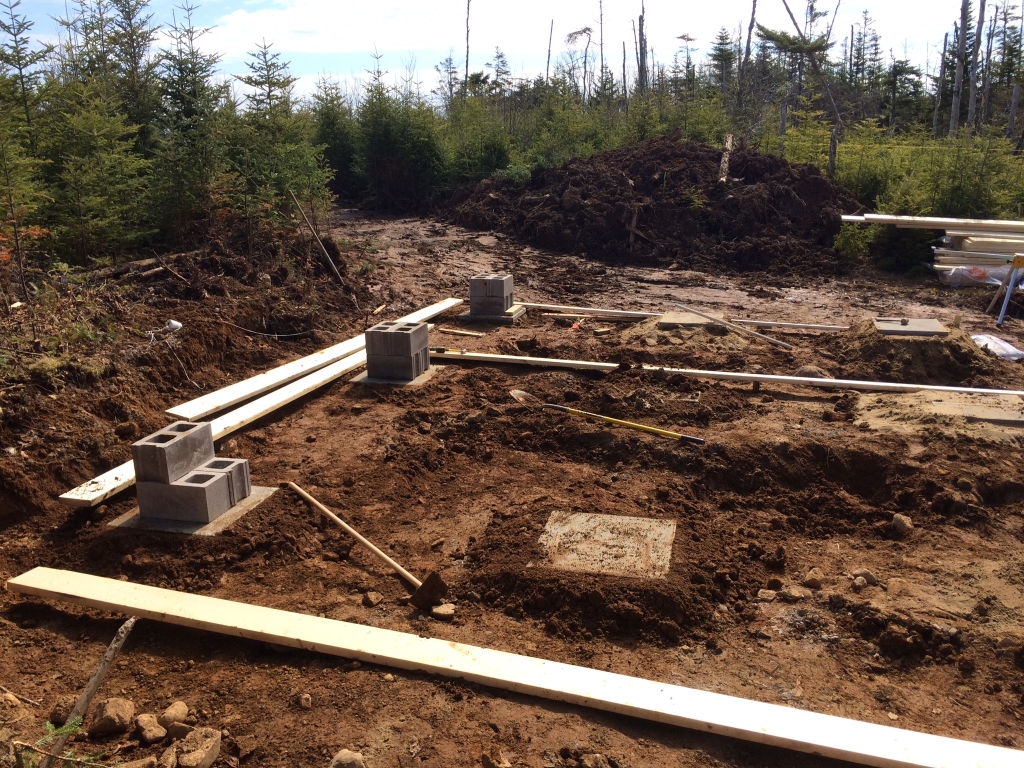
Below we initially used 4 cinder blocks on each pad (2 on top of 2) but we found that was a little too high to our liking.
TIP: You can fill the cinder block with expanding foam to help keep water/snow from filling them up and freezing in the winter.
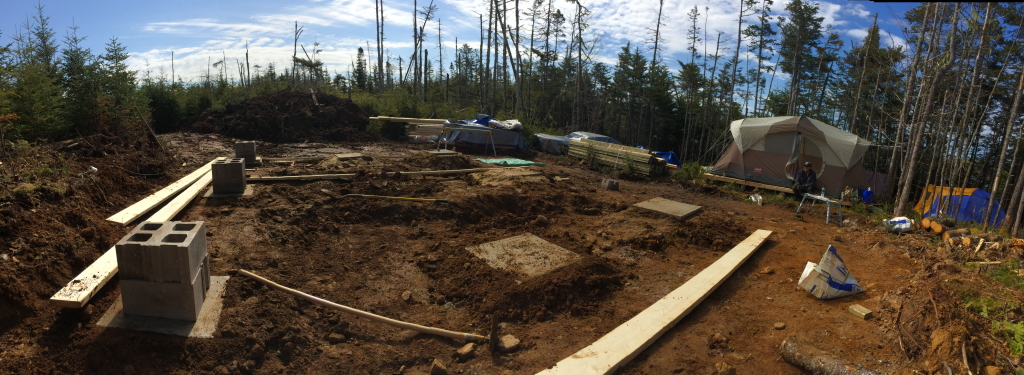
Here’s a panoramic view of our build site.
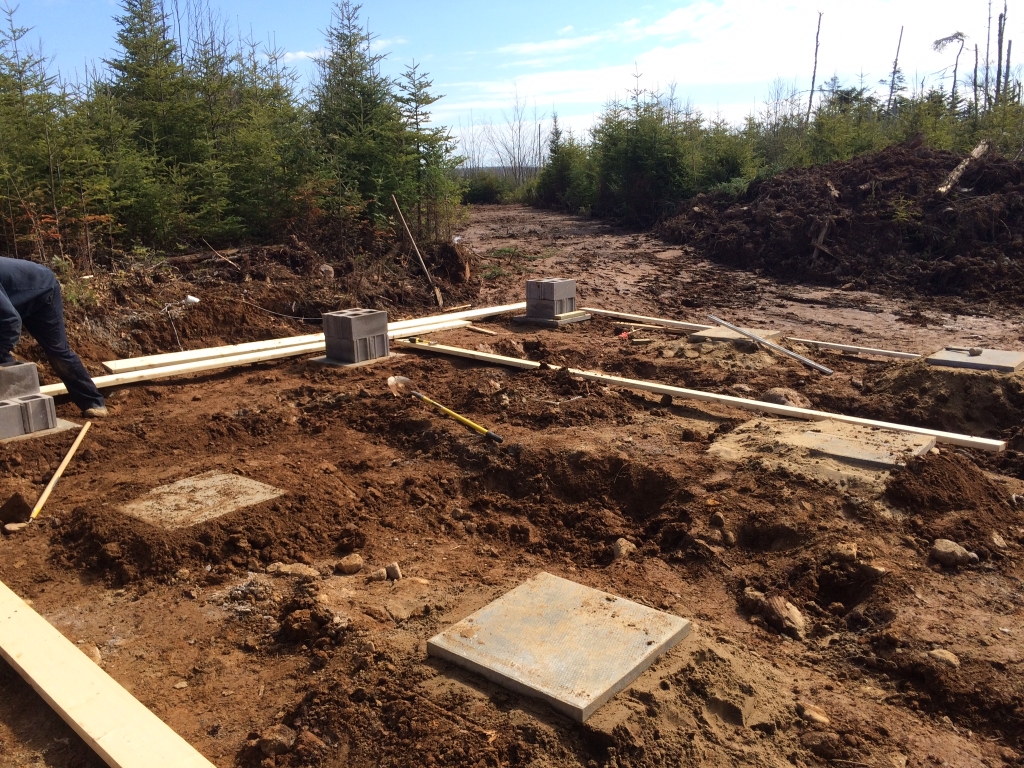
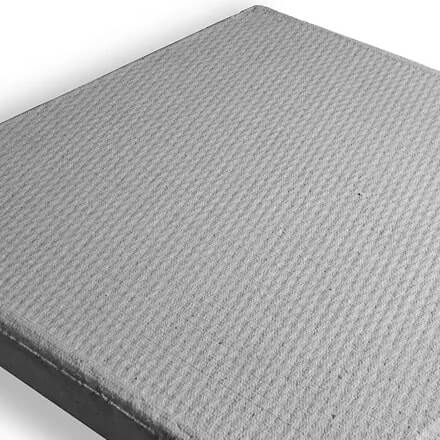
These are the Shaw Brick 24″ x 24″ patio slab pavers we used.
The Main Support Beams
We used 16ft long 2×8’s to make up the three main beams that will support the floor joist.
To fashion the 20′ beams we over staggered and overlapped the 2×8’s making sure to use construction adhesive and nails the full length of the beam.
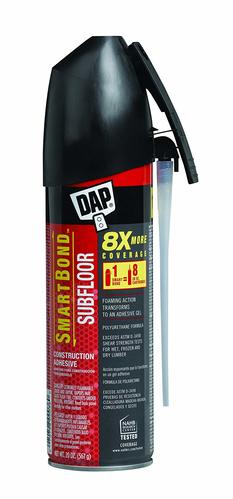
TIP: We used DAP Subfloor Construction Adhesive whenever we needed to build our beams or put down subfloor.One can of this expanding foam is equal to 8 tubes of regular construction adhesive!
These are the 9 footings that will support the three main support beams.
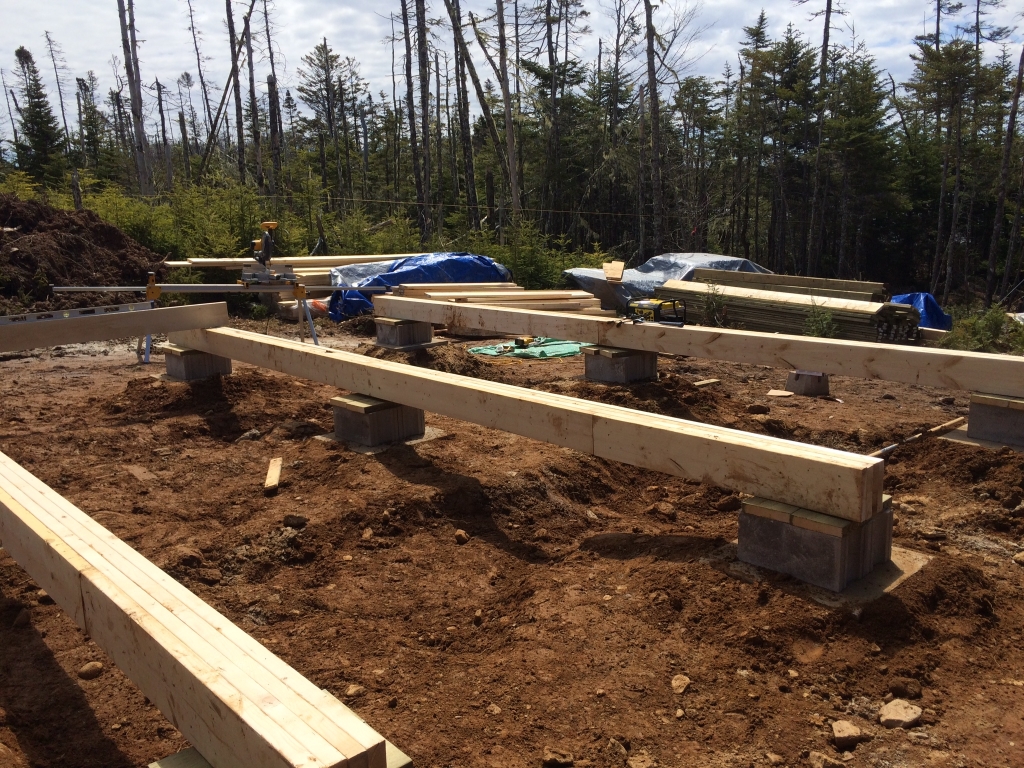
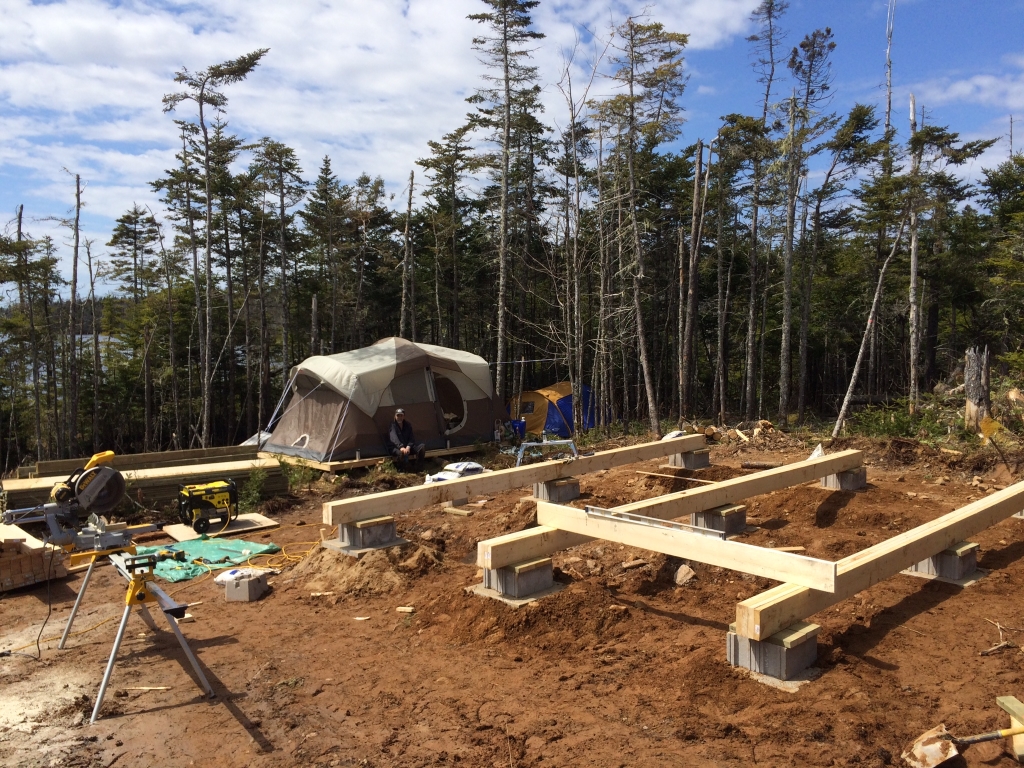
TIP: Never allow lumber that is not pressure treated to come into contact with concrete or cement blocks/pads. The moisture from the concrete can be drawn up into the wood, and after a period of time the wood will rot. You can maintain separation using pressure-treated spacers like we did or use an appropriate gasket made from plastic or foam.
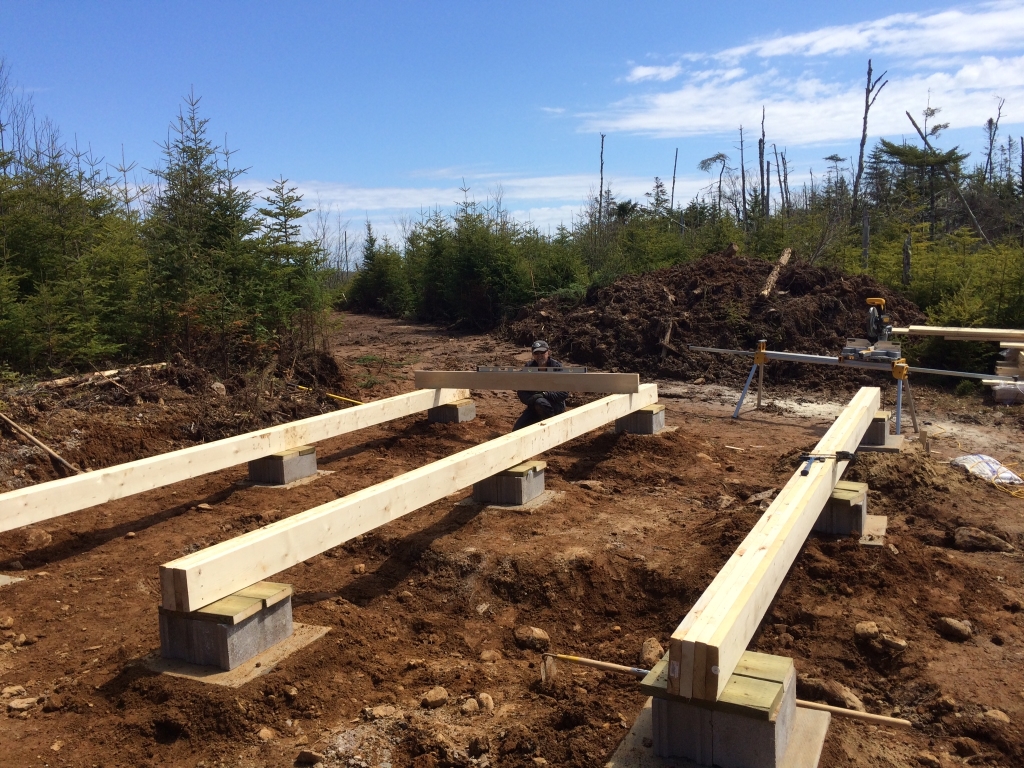
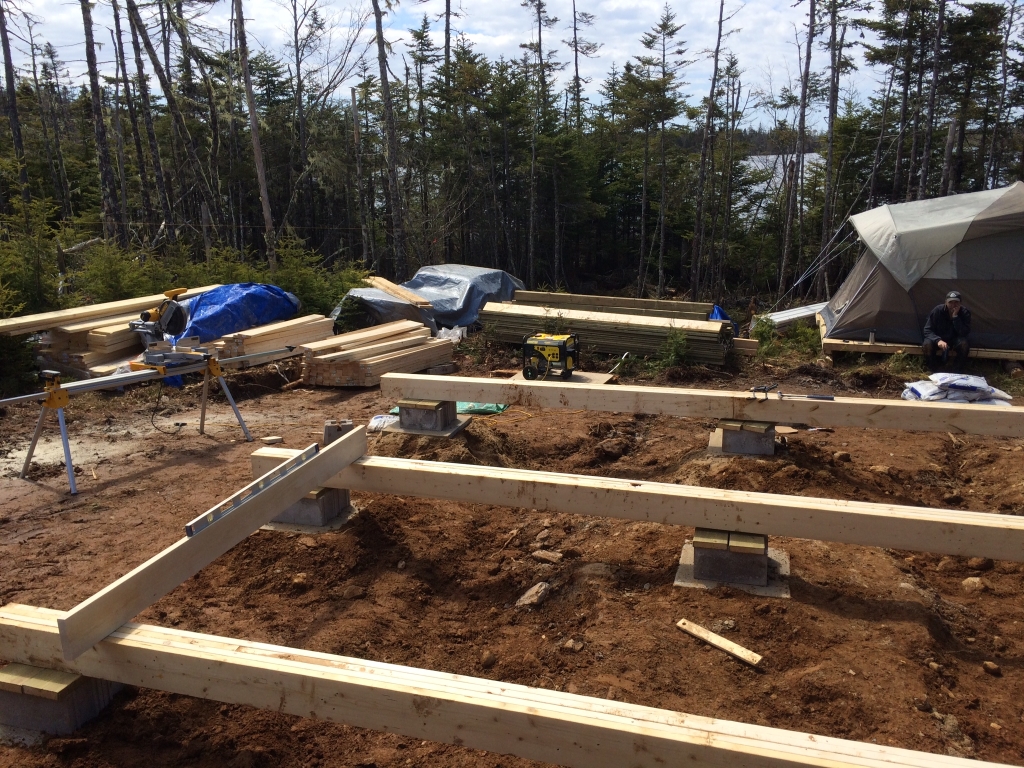
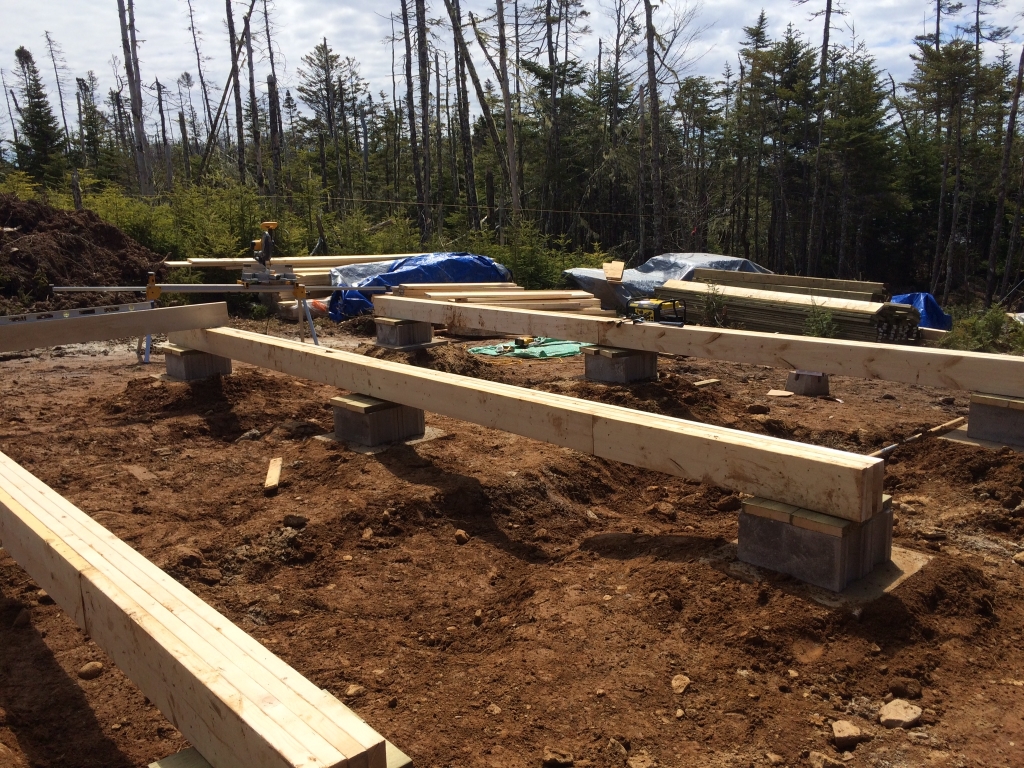
Each of the three main support beams are free floating on their respective cement block without anchoring them down.
This allows for the footing to shift (with the change in seasonal temps) “if” that happens at all.
If the beam was anchored to the footing and one footing was to shift, it could cause a shearing force through the cabin and possibly crack a window, put the cabin out of plumb or split the finished drywall.
By allowing the beam to ride on-top of the cement footing the entire building can slightly shift on the foundation which helps prevent any unwanted forces on the cabin.
Now to be 100% clear when I say “shift” or “slide” I’m talking millimeters here.
Please do not misread that and think your home will be sliding around like skates on ice!
Without a doubt the best single purchase we had before tackling this build was this Dewalt Cordless Framing Nailer.
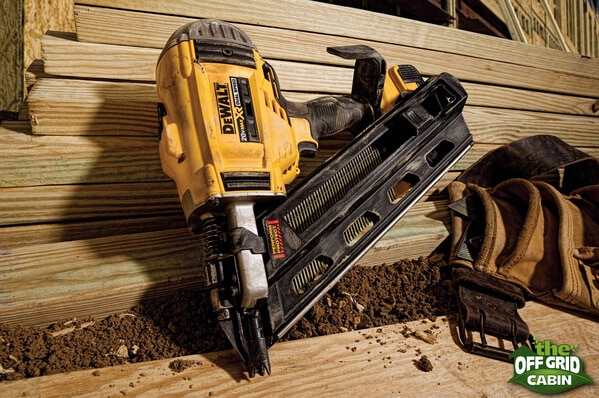
You’ll hear me go on and on about this one tool throughout the build but I honestly cannot give it enough praise. You may wonder why we would spend the money on something like this when we could have just swung a good old hammer around?
It was a massive time saver! This one tool easily shaving days off the overall build, allowed us to nail in places where we just could not swing a hammer and best of all it’s cordless (no air hose). I highly recommend getting one for your build and you can always sell it afterwards if you’ll not need it again. That was my initial plan but I’ve found I’m always building something at the cabin and this has made those projects so much easier and faster.
The Three Front Deck Footings
We used 3 Shaw Brick 6″ x 6″ Deck Blocks from Home Depot to support the 3 – 6″ x 6″ PT Posts for the front deck.
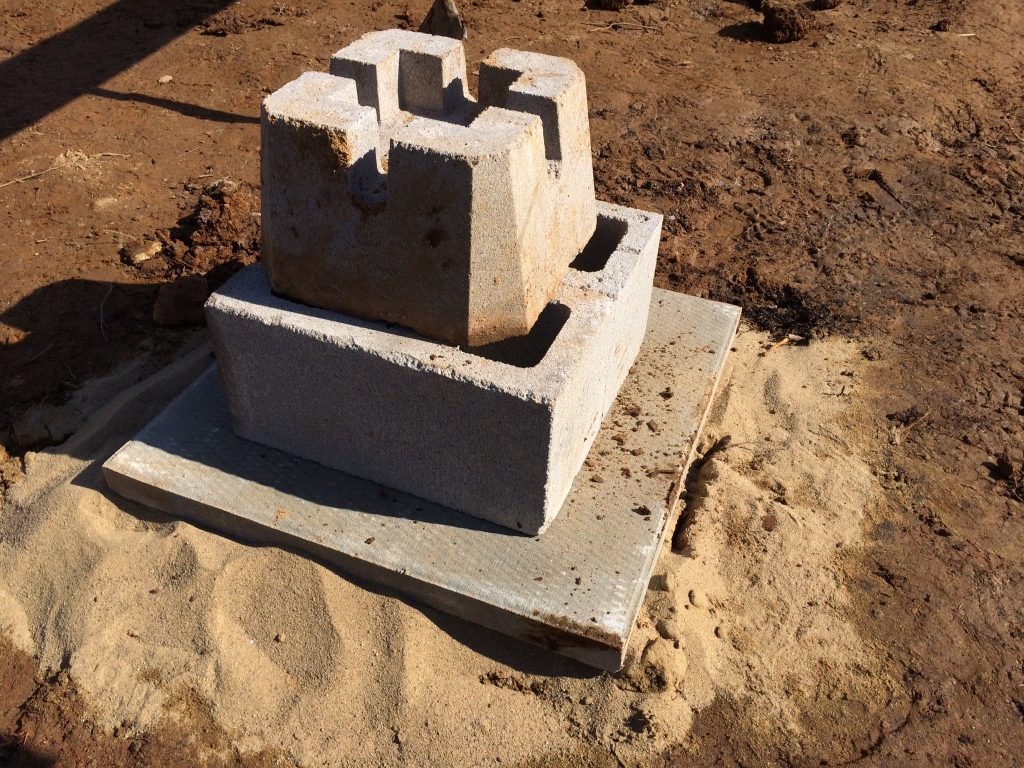
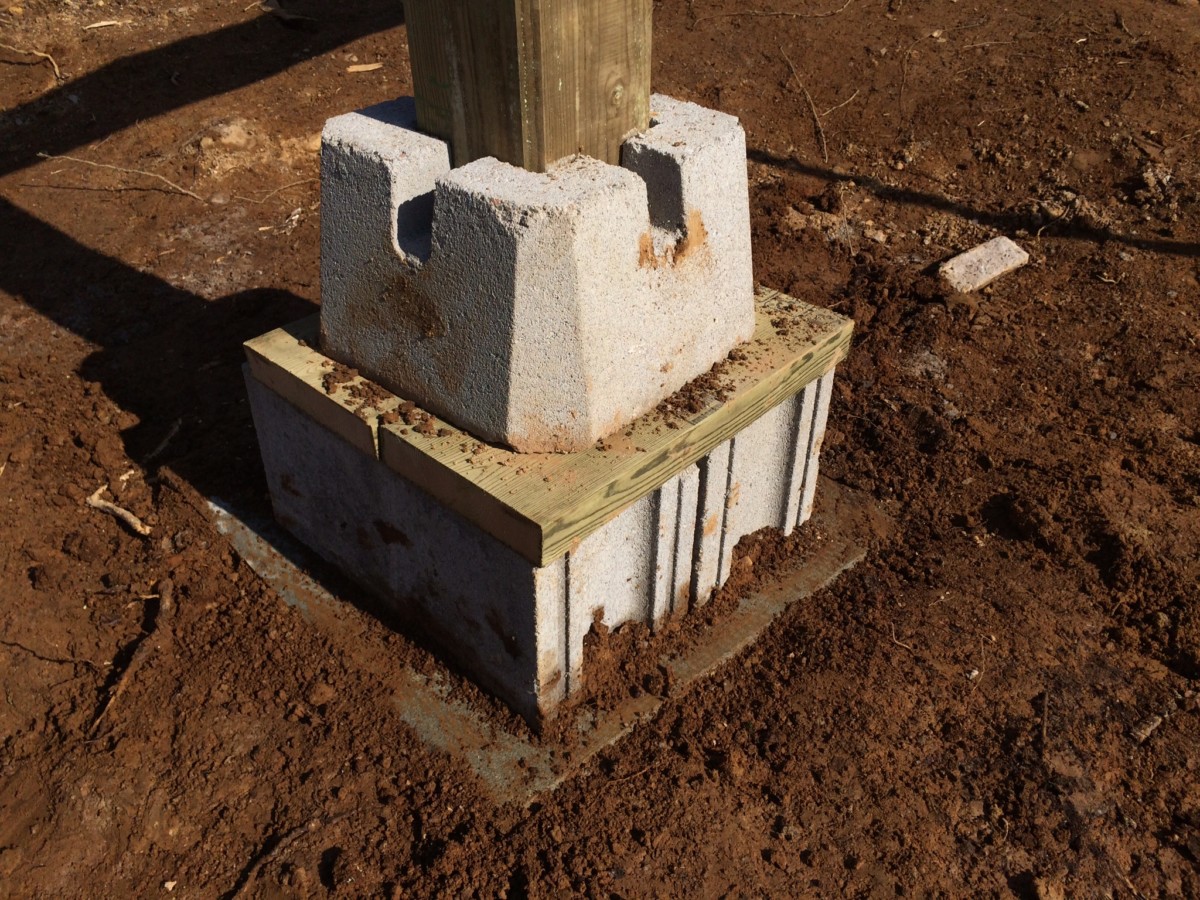
The Main Floor Joist
We used 2×8’s placed at 16″ on center for the floor joist and plan on topping the floor joists with 3/4″ OSB.
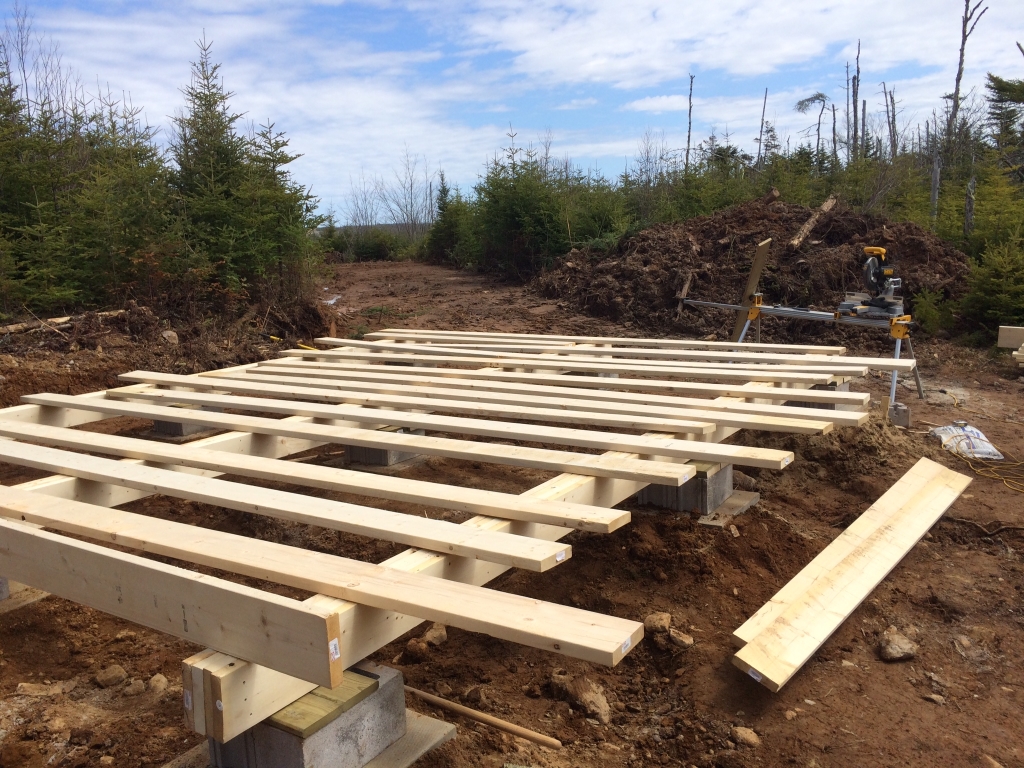
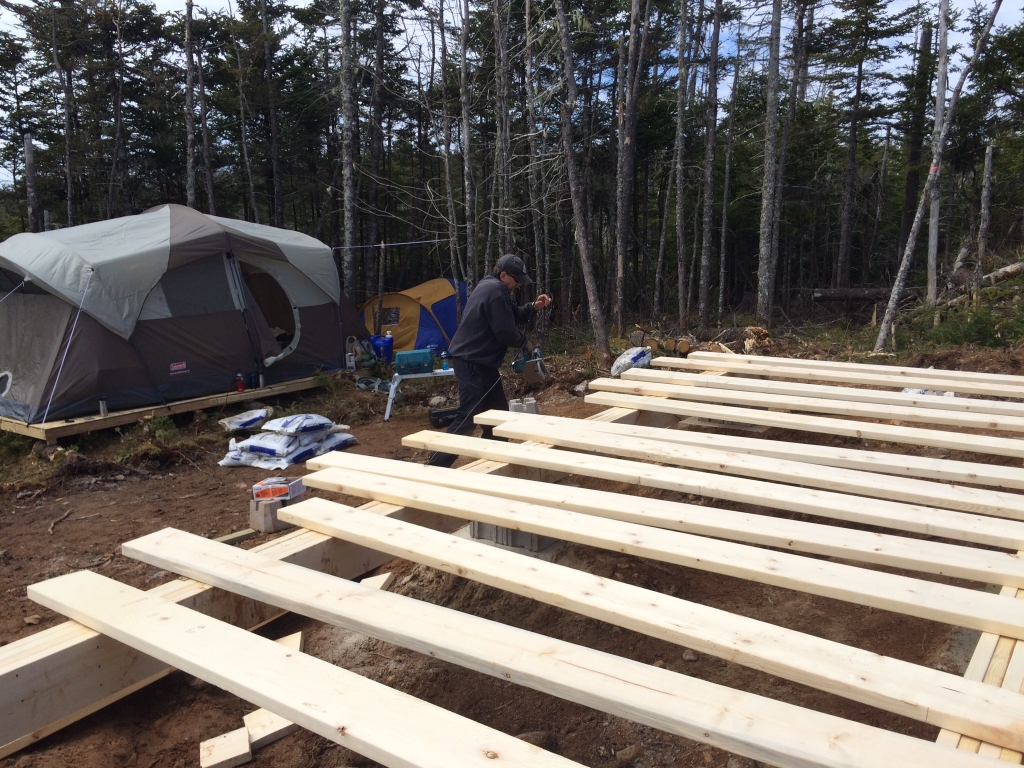
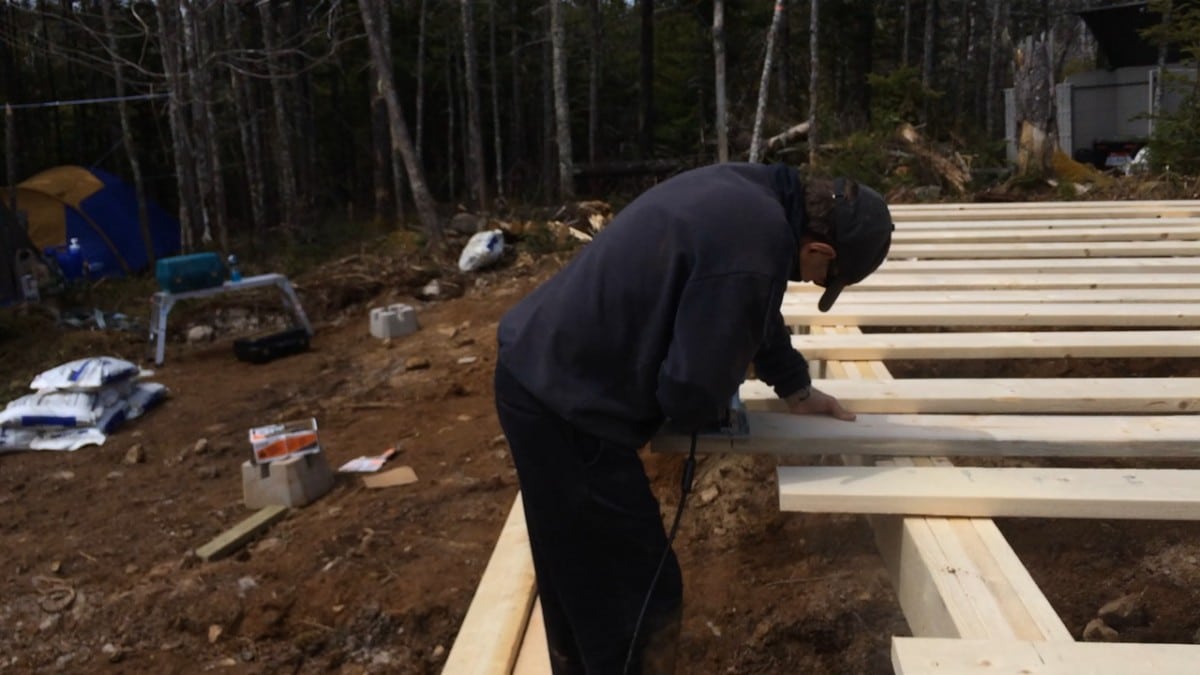
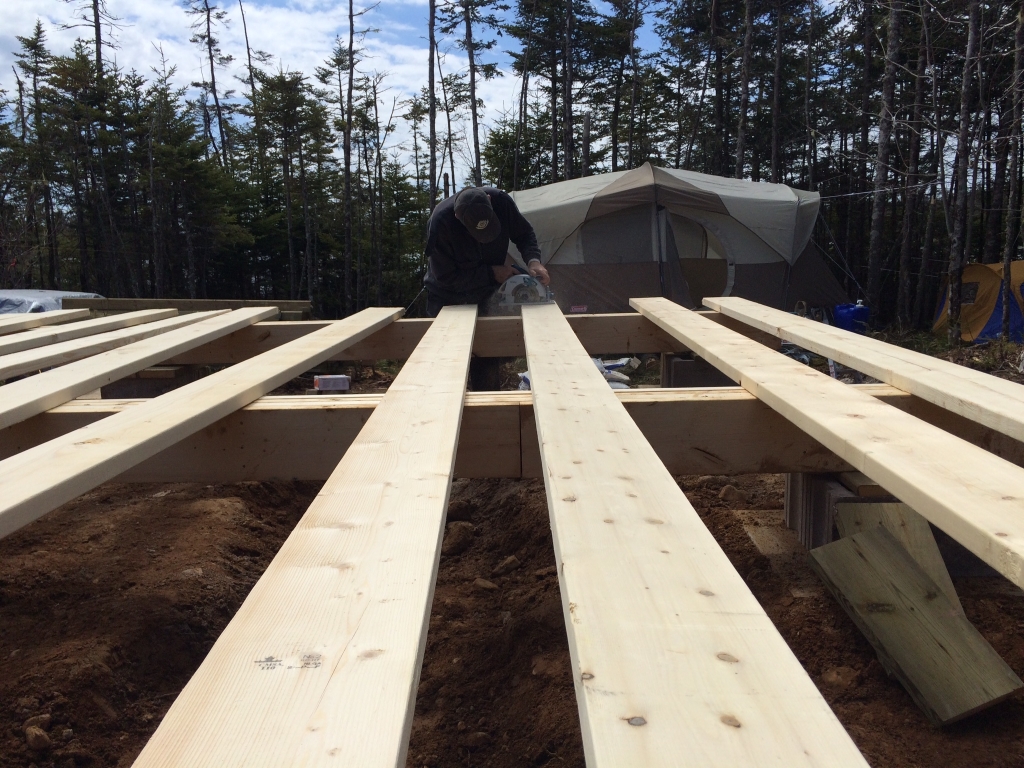
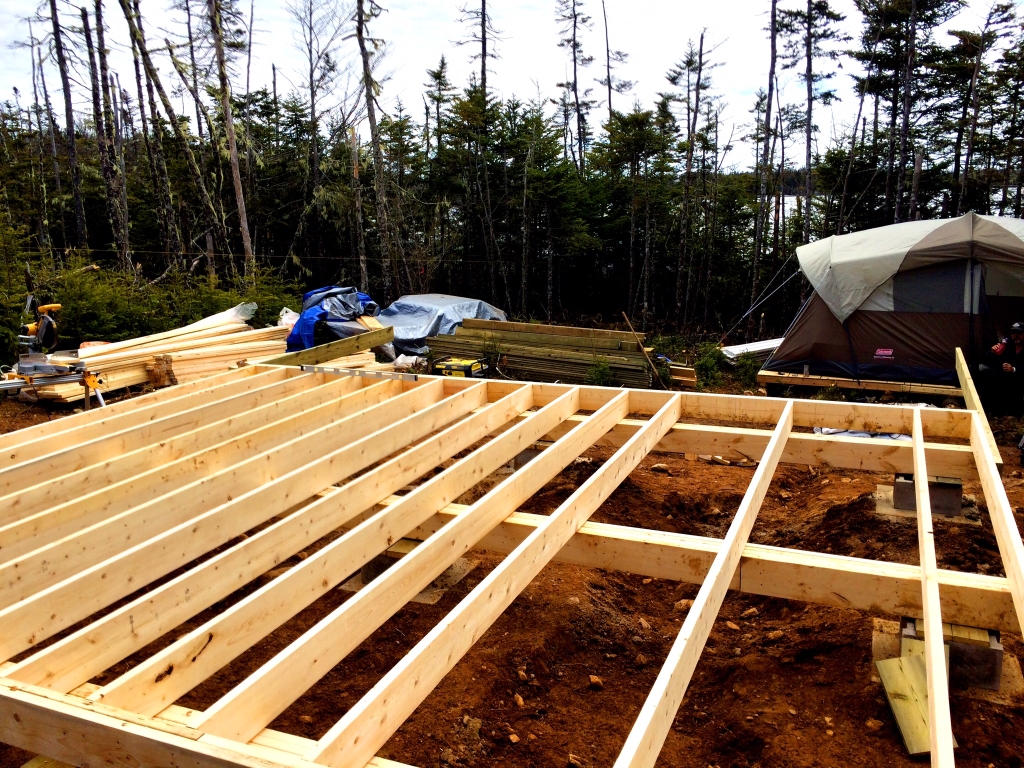
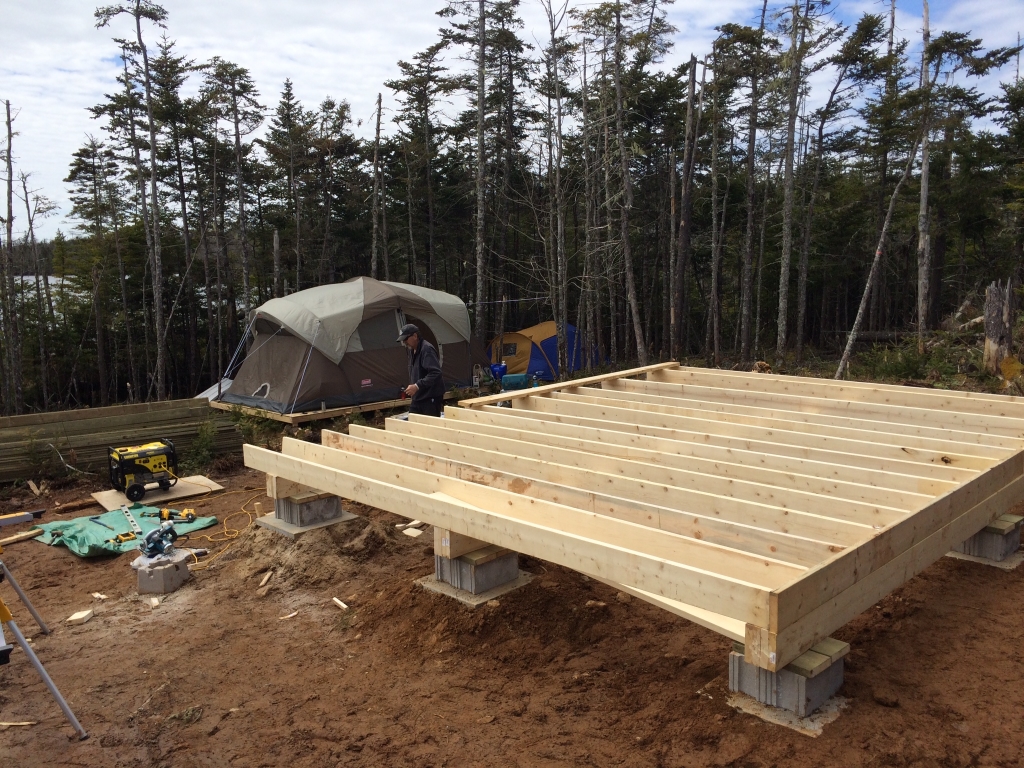
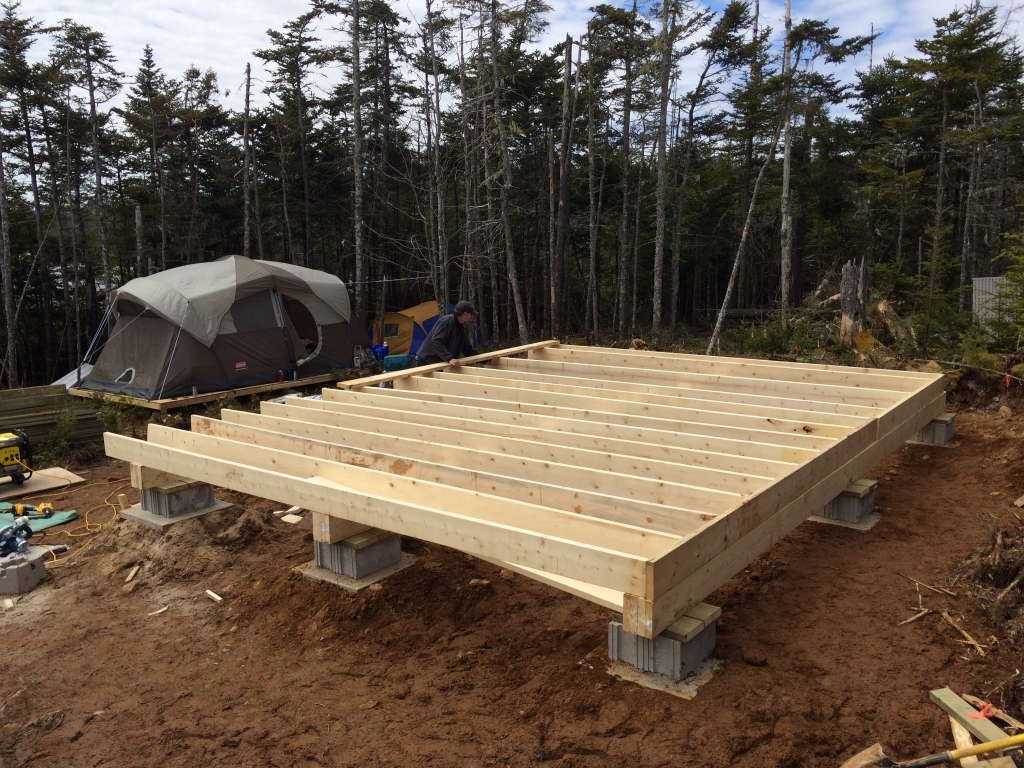
The completed floor joist.
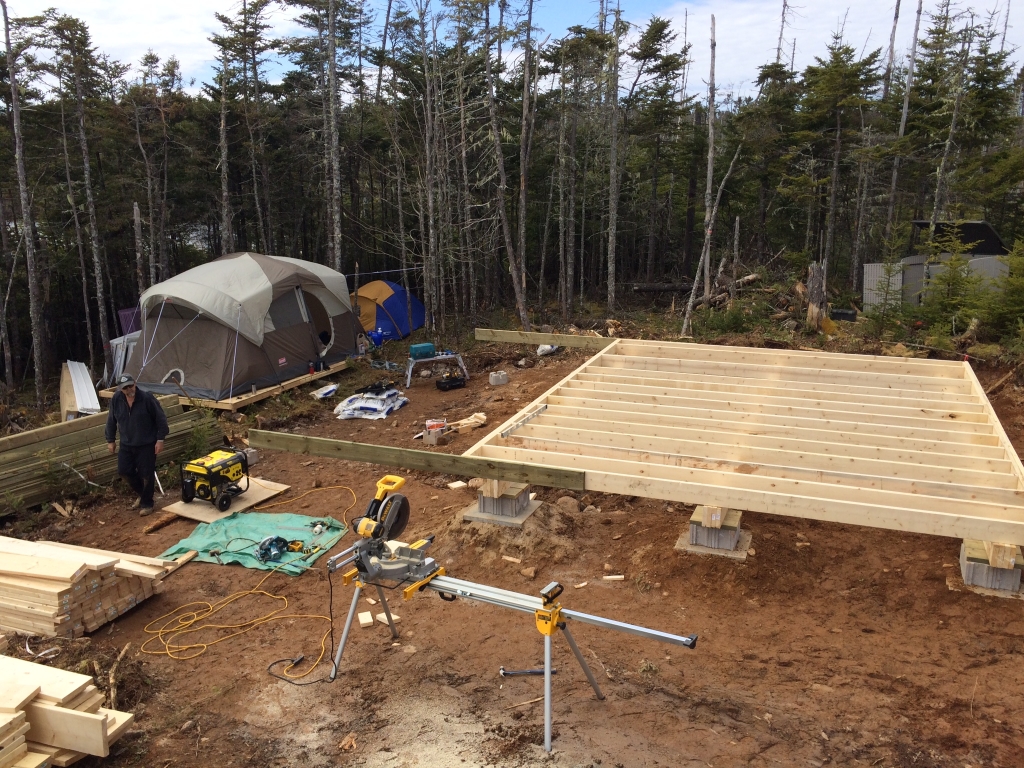
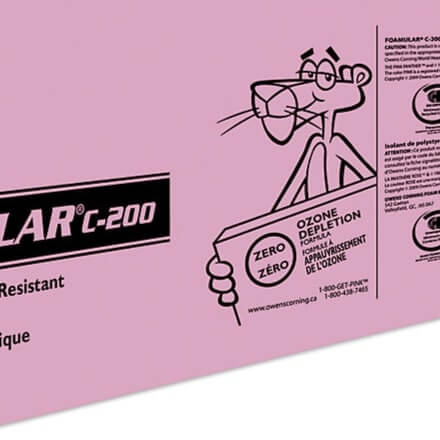
NOTE: We will be laying down 3/4″ OSB subfloor and then a layer of 1″ thick rigid pink foam (FOAMULAR C-200 Extruded Polystyrene Rigid Insulation – 24-inch x 96-inch x 1/2-inch butt edge) from Home Depot to act as a thermal break between the inside and outside of the cabin floor.
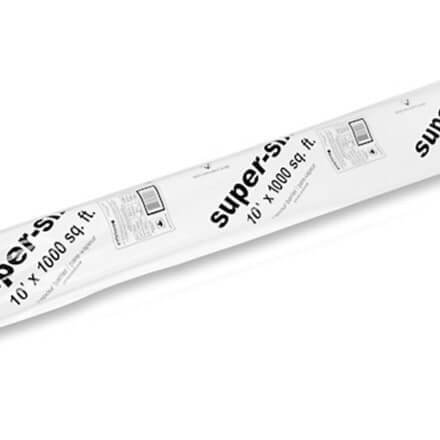
The pink foam will have another layer of 3/4″ OSB subfloor on top and then a 6mm poly (Everbilt 10 ft. x 100 ft. CGSB Approved Wall & Ceiling Vapour Barrier)
Lastly we’ll be putting in a water resistant laminate flooring that has a pre-attached foam backer for additional insulation and noise reducing properties.
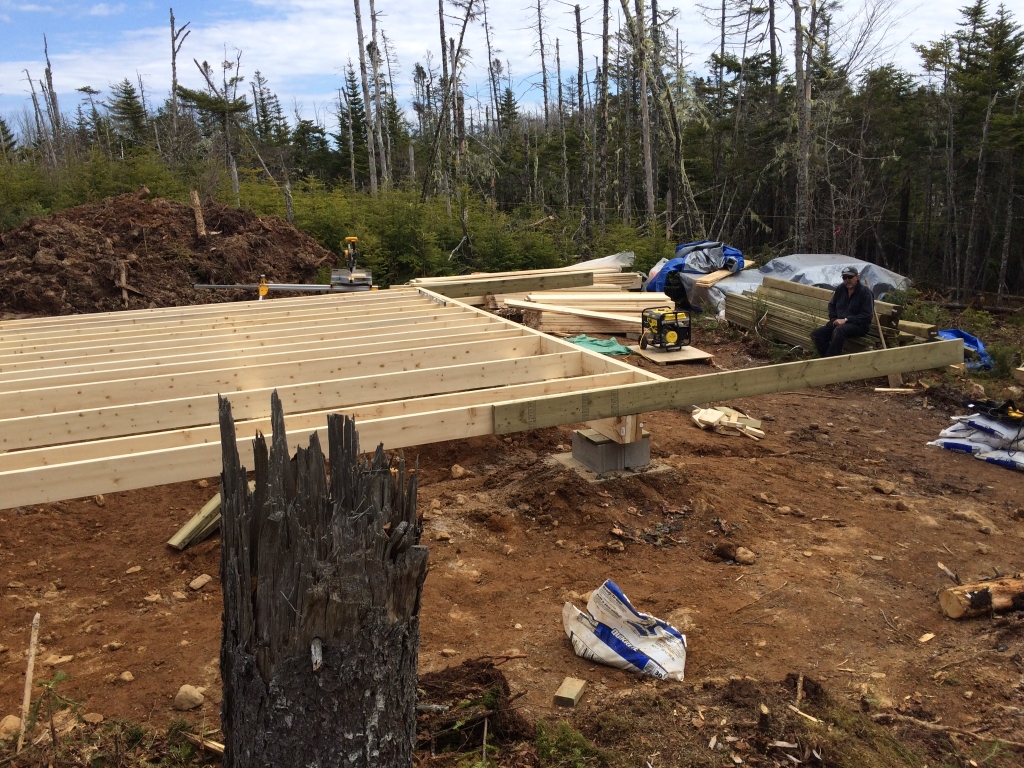
The pressure treated beams gives us a sneak peek at the rough size of the front deck.
The front deck dimensions are 20′ x 8′
We’ll be using three 6″ x 6″ posts to support the front edge of the covered deck’s steel roof.
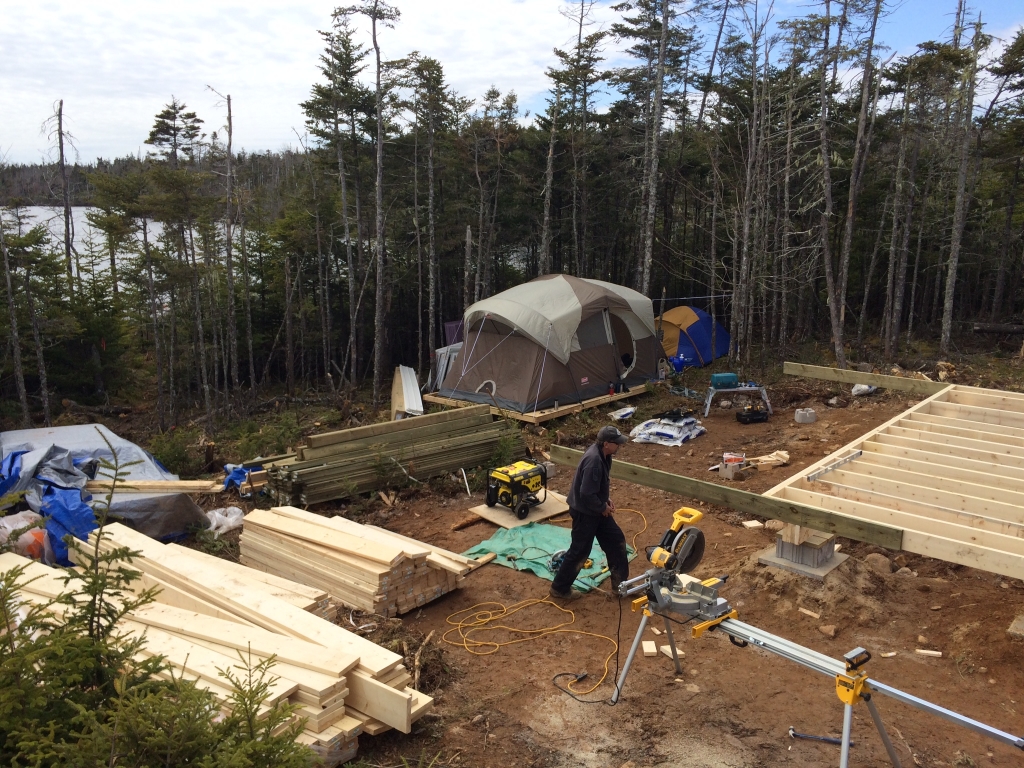
Completing The Foundation
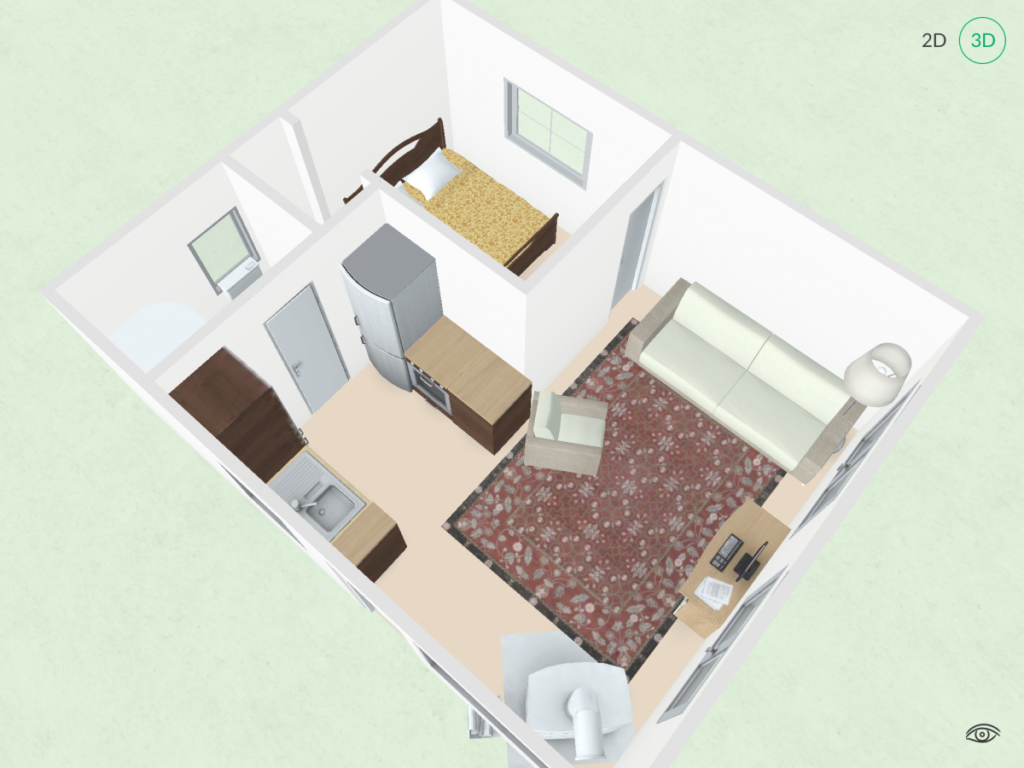
Today we finished up the footings, the three main support beams, and began to frame the floor joist. We now have a good idea of the interior floor space the main living areas, kitchen, bathroom and master bedroom dimensions.
In our opinion, this is by far the best method for building a small cabin foundation with our soil type, climate and proximity to the lake.
Every off grid build has unique foundation requirements.
Remember to consider the following when choosing the type of foundation you’ll be constructing…
- Ground type (gravel, soil, rocky, slab, tree roots)
- Ease of clearing the land
- Overall footprint
- Settling
- Slope
- Time
- Cost
Next time we’ll finish up the floor joist, put in those three 6″ x 6″ pressure treated front deck posts, and make sure the entire foundation is level, plumb and square before we put down the sub-floor.
FAQs
1. How long does it take to build an off-grid cabin foundation?
- Building times vary but generally range from a few weeks to a couple of months, depending on factors like weather and complexity.
2. Do I need professional help to build my off-grid cabin foundation?
- While some tasks can be DIY, consulting with professionals, especially for complex structures, is advisable for safety and compliance.
3. Can I build an off-grid cabin foundation on sloped terrain?
- Yes, but additional considerations and engineering may be required to ensure stability on sloped ground.
4. What is the cost range for building an off-grid cabin foundation?
- Costs vary based on factors like foundation type, materials, and location. It’s advisable to create a detailed budget beforehand.
5. Are there government incentives for sustainable off-grid construction?
- In some regions, there are incentives or tax benefits for using sustainable materials and practices. Check with local authorities for applicable programs.
Conclusion
Building an off-grid cabin is a great way to enjoy the beauty and freedom of nature, without compromising on comfort and convenience. But before you can enjoy your cabin, you need to build a foundation for it. A foundation is the base of your cabin, and it affects the safety, efficiency, and durability of your off-grid living. Therefore, you need to choose and build a foundation that is suitable for your cabin, your site, and your budget. In this blog post, we’ve shown you the four main types of foundations for off-grid cabins: concrete, pier and beam, skid, and screw pile. We’ve also given you some tips and tricks on how to make your foundation more eco-friendly and sustainable, by using recycled or natural materials, adding insulation, and applying sealant. We hope this blog post has helped you learn how to build an eco-friendly off-grid foundation for your cabin. If you have any questions or comments, please feel free to leave them below. We’d love to hear from you. Thank you for reading, and happy building!
Ready To Check Out The Next Step Of The Build?
How To Build The Perfect Front Deck!
Your Turn!


What is the frost depth in your area?? You mite of used sono-tubes with rebar. Did you check cross angle of the box frame?? Suggest you use foil-buble-wrap over the 3/4 OSB sub flooring, the pink insulation attracts ants and other critters. If the flooring will be exposed to the weather for a wile, use driveway sealer to roll on top of the OSB, so it don’t swell up from rain. Use strapping to anchor the walls to the outer box sill, and brackets on the top plate of the walls to the roof rafters. Good Luck.
Hey there Mike! Thanks for taking the time to comment and share your expertise.
So, the reason we went with our above ground footing design, and not digging 4-6 ft holes with sono-tubes filled with concrete, is…
1. Time: We had only a 2 week period to build the cabin from start to finish and went with the fastest method that was still safe, effective and proven. Digging holes, mixing concrete and waiting for it to set would take days we did not have. We had all the building material dropped off the same day the build site was stripped by excavator and the 14 day clock to get the entire cabin framed, closed in and weather proof was started.
2. Location: We had the excavator for one day only in order to clear the land then it was gone (partly because of the load restrictions on the roads here in winter, partly because it was needed elsewhere, partly for cost reasons). The rocks underground where we are located are massive granite boulders (and without that excavator, it would not be possible to move them by hand along or by using post-hole diggers. An 8 cubic foot boulder (2ft x 2ft x 2ft) weighs 1200lbs. A boulder 27 cubic foot weighs 4320lbs! Unfortunately that’s exactly what we have right here.
3. Cost: We were able to save the cost of the tubes, footings, heavy equipment, and concrete putting those expenses into other parts of the build.
4. Ease: Honestly, it took a morning to get everything squared away and level and we were building. My father used to build houses in Pangnirtung Nunavut and this is how they did it then. Those homes are still there 50 year later.
5. Maintenance: I ensure the cabin is level every few months all the way around AND plumb. If for any reason it isn’t (that hasn’t happened yet) then it’s very easy to slip a car jack under that position and fix it (sand, pressure treated wood, cement block…etc)
The pink foam is sandwiched between two layers of plywood and end capped all the way around.
I think you’ll see the use of the top plate brackets in the following posts on rafters. We also used hurricane ties up top even though that’s total over kill where we are.
The next cabin we build there will be far less time constraints, now that I’m retired, and I would consider using sono-tubes and concrete to compare the process.
Thanks again for chiming in Mike!!
Steve
Thanks for posting. I am not judging you, just making comparisons to what I have researched thus far for my future build. I too was wondering why you didn’t use tubes with rebar. It looks like you have plenty of water near by to mix your pour. I am curious though…what is anchoring the cabin to the ground?
Andrew,
Hey, I actually just replied to Mike’s comment re the same sort of thing here.
I hope that explains exactly why we built our foundation the way we did and if you have any more questions at all please fire away.
Thanks for asking your questions Andrew and we’re thrilled you are doing research BEFORE moving ahead. I’ve gotten too many emails and comments from people saying they started… and “Now what?” Good on you!
Cheers!
Steve
The pink 1 inch foam board is sandwiched between 3/4 inch osb subfloor and then end caped all the way around, you wrote. I still am not clear on this. Are the walls sitting on this sandwiched floors? Or, did you put down the first 3/4 down, build the walls on top of that and then put the pink foam board and next 3/4 osb later inside the wall bottom plates? Please help.
The walls are built on top of the bottom 3/4 inch subfloor.
Then the 1″ thick pink rigid foam is laid down.
Next is a top layer of OSB.
Finally the 6 mil poly vapour barrier is put down before the laminate flooring.
I am planning on building an off grid cabin rhat will be 16 by 24. In manitoba. Harsh winters. Can I use this method of foundation for such a cabin
Hey there Levi!
Great to hear you’re building an off grid cabin as well.
Yes you can definitely use this method in harsh winter environments. In fact, our cabin is located less than 1Km from the Atlantic Ocean coastline and we get some bitter cold winds hitting us quite frequently. Provided you have good insulation and heat source, we find the wood-foam-wood thermal break works very well.
We also laid down a hardwood floor (from Costco) that probably doesn’t contribute to the insulation factor much but helps retain the heat once the cabin is at a good temperature.
The “ONLY” issue we’ve experienced (our fault) was when we left a memory foam mattress directly on the floor while we were gone (and the heat off). When we came back and heated up the cabin, we forgot to lift the mattress off the floor and the temperature change created humidity between the mattress and the floor. Nothing major but a point to remember. Now we’re installing a Murphy bed to prevent such an issue in the future and to save space.
I lived in Portage La Prairie 2004 when I first began my military flying career and again from 2009-2010 while attending helicopter flight training. I can definitely vouch for those frigid winters on the prairies!
Best of luck with the cabin and do keep us in the loop as you progress!
Cheers!
Steve
Hi there, we build our 16×24 cabin the same way, except for the foam layer, we just put osb floor like you. We put a floating fool and a thin foam layer after, and we dont have any issue. I will keep reading, mine is in north coast of Quebec. we close the kit in 3 days
I’m doing a 10×15 got some good info here thanks guys
What kind brand footings did you use? I am finding it hard to fins any footings that will take a 6×6. Thanks!
Hey they CJ, we used 4-inch x 4-inch Deck-Block made by Shaw Brick that we picked up at HomeDepot for $6.98 a piece. they do make a 6-inch x 6-inch Deck Block for $11.80 a piece. Here’s the link for details on that block… https://www.homedepot.ca/en/home/p.6-inch-x-6-inch-deck-block.1000127420.html
i need to know if i need to dig footer trenches if i m planing on a second floor everything ive seen so far says yes i think just concrete post would be easier for me cause i have no help. but i think i need trenches what do u think please need to know asap
Hey there Malissa! Great question :)
The choice of using a footer trench depends primarily on the ground type, how level it is (0…10… 20… 30 degree slope), availability and cost of related materials, and whether you intend to hire a professional building service contractor or to do it the work yourself.
If you hire a professional building service contractor, your choice of foundation options are fairly wide.
If you do everything yourself (like me), here are some typical basic options for constructing your small cabin foundation:
-Prefabricated concrete blocks (precast piers)
-Poured Concrete
-Stone
-Pressure Treated Timber
-Posts (locked in concrete or sono tubes)
-Concrete pads with cinder-block on sand/crusher (this is our design)
You’ll find out MORE about our specific foundation type here..
http://theoffgridcabin.com/hidden-secrets-for-how-to-build-the-perfect-level-foundation/
Also… here’s some small cabin guidelines I have shared with people in the past… (yes this does include 2-story cabins)
-If the ground is rocky OR there are a lot of tree roots underground, digging holes (for posts) may be a problem.
-If the ground has a small slope, you may be able to compensate with different-sized, or additional blocks, or raise the ground level on one side by laying gravel.
-If the ground has a fairly steep slope, you will need to use posts or raise a wall from concrete blocks on low-level side.
-It is not recommended to place concrete blocks directly on the ground, unless it is bare solid rock. Blocks should be placed on a flat rock/slab and/or gravel, and be well leveled. (this is what we did as we are on very compacted grey clay)
-Make sure any gravel is well compressed. Otherwise it will settle later and skew your cabin structure.
-One of the advantages of using concrete blocks is that over time, some blocks may settle more than others. This can be fixed by slightly lifting one side of the cabin with a car jack and shimming the blocks with flat stone, ceramic tile, etc.
-If using posts, they normally should be dug into the ground deep enough to firmly hold their load and below the freezing level. The freezing level depends on your geographical zone. Generally, you should dig the post at least 4 ft deep.
-If pillars or posts are not dug deep enough (i.e., above the frost line), this may cause warping or movement within the structure over time as moisture in the ground freezes and thaws. Cabin structure warping can lead to cracked windows, skewed doors, etc.
-If a post cannot be dug into the ground, another option is to place it into a concrete footing or a concrete (deck) block. However – very important – this can only be done on some (1 or 2) support points. Posts that are not secured deeply will not withstand horizontal forces. Other supports points (posts/blocks) that can withstand these forces must be firmly mounted.
-When placing posts into the ground, it is recommended to use concrete footing, at least in the top half. Sono tubes are supposed to be even better options, but they require more concrete, are more labor-intensive and cost more money as a result.
-Poured concrete is an applicable option only on a well-leveled ground. However, it is also a more expensive and more labor-intensive option.
-For posts you can use prefabricated pressure-treated 4″x4″ or 6″x6″ posts, or wooden posts formed using tree trunks. (You can paint them with oil paint first for better protection).
Sometimes the best option is to place the entire structure on a set of two double support beams (sometimes called girders). This is especially useful on unlevel ground, when used in conjunction with posts. Use two (or more) double-sets of 2″x10″ or 2″x12″ beams. (Keep in mind that beams add height to the cabin floor – your small cabin will look and feel “raised”).
Hope this helps you a bit in your planning. Feel free to ask any more questions along the way!
Cheers!
Steve
oh also forgot to say the ground is slightly uneven so thats why i felt like i needed to build footers plus second floor
Gents, great info for an amateur building a small cabin in the Maine Woods! Starting at the beginning of this series of notes, I was wondering how the 2×6 floor joists are secured to the 3 quad beams that form the base of the foundation…is it by weight/gravity, or are there straps that are used to keep the joist frame securely in place over the 3 quad beams?
Hey Mike, just wanted to get back with you regarding the floor joist set-up in case you didn’t catch in future posts. The entire system is a floating design. Because we didn’t go with a traditional solid foundation (concrete pier) or a concrete slab/crawlspace/basement the footings will shift “minimally” with changes in seasonal temps. With the joists “floating” on the beams this allows us to shim the individual sections that “may” require it as the building settles over time. I’m going to write up a post showing how I check for lever each spring/fall and how I level each pad if required. It’s incredibly simple, quick and effective.
Hate to repeat a question that might be answered later but here goes. I understand the 3 quad 2×8 beams are sitting on the piers without any attachments and I understand why. What I am not clear on are the floor joists. Are you saying the joists are not attached to the beams in any way? That is the way I read your reply to a previous question. The beams are free floating and the entire floor joist assembly is also free floating? Please help.
Hey Todd you are 100% correct in that the floor joists are fully floating on top of the three main support beams. This not only prevents the cabin from buckling in the event of the pads shifting with frost heave but makes aligning the tongue and groove subfloor sheets with the center of the joist extremely easy. You can see in the photos in this post that the sheets line up perfectly with the floor joist.
Hi there. I find this info very useful and thank you for sharing. I am curious to know what are these pads that your setting your blocks on top of called? Are they standard pavers or something special?
These are the specific Patio Slab Paver that we used.
Where’s the rest of the cabin build at?
Hey David. Simply click the top of your browser where it says BLOG. I’ve made a dedicated drop down menu that allows you to select “Building The Cabin
” and you can see every phase of the cabin build we’ve completed so far :)Cheers!
Hello Steve, can you please confirm a few things regarding the floor. In some photos it seems the floor overhangs the main beams at front and rear of cabin but in others they seem flush to the edge of the floor. If the floor does over hang the beams, by how much. If you didn’t do this than I assume the cinder blocks at front and rear will be in the way when skirting the cabin and I will have to work around them ? I do notice the cinder blocks are inset on left and right sides which means no going around them when installing the skirt. In short, the easiest way to put this is are the main beams 16 feet apart, outer edge to outer edge ?
Hey Paul,
The floor joists are flush on both sides and the rear. The only side that isn’t flush (yet) is the front. In the next post you’ll see that’s because we’re building an 8′ x 20′ covered front deck and we’ll be using 3 6″x6″ chamfered pressure treated posts to support the front of the cabin deck instead of the footing style we used for the main cabin section. We won’t be skirting around the cabin for a few reasons.
1. To allow air to better circulate underneath the cabin. This helps keep the ground dry as we’re on a slight slope and rain “may” run underneath.
2. It allows us to easily shim the cabin footings in the future if we find any one (or more) footings have lowered due to settling. And access the propane/water lines.
3. We also want to store our kayaks/paddle boats and firewood under the front deck and not have to try and squeeze them (or us) through a 3 foot tall door way.
If your build calls for skirting around the bottom then you could simply move the footings in one floor joist, shorten the 3 main support beams a little, and that would work.
Cheers!
Hi Steve.
I have been day dreaming for years about building my off grid cabin myself. i found your site and it’s been a great resource (for the day dreaming still) .
Thanks for all the good info. i got couple of questions regarding the foundation
1. How did you joind the 4 2×8″ beams? Nails, Screws only or should I use glue as well?
2. I did not see the beams bolted to the concrete, is it onr isn’t it needed? I am planing on building a 20’x20′ cabin
TIA
Hey Karben!
For fastening the beams together we did use a subfloor adhesive foam called Dap SmartBond Subfloor Construction Adhesive Here’s a link to the DAP page which shows the exact product so you know which particular adhesive I’m referring to. We also used our DeWalt cordless nail gun to fasten the beams together, layer by layer. (I will edit the blog post to include this info)
Each of the three main support beams are free floating on their respective cement block without anchoring them down. This allows for the footing to shift (with the change in seasonal temps) “if” that happens at all. If the beam was anchored to the footing, and one footing was to shift, the cabin could experience a shearing force and may cause a weak point in the footing and/or structure. By allowing the beam to ride on-top of the cement footing the entire building can slide on the foundation to prevent unwanted forced from occurring.
Now to be 100% clear when I say “shift” or “slide” I’m talking millimeters here. Please do not misread that and think your home will be sliding around like skates on ice! Our cabin foundation for example, which was built in April 2015 (it’s currently Oct 2018), has not moved what so ever over the past three years. That’s going from +30 in the summer to -30 in the winter and being built on a gravel/soil foundation.
Hope that helps answer those questions Karben.
Cheers!!
Steve
Thanks a lot Steve, very helpfull indeed
So glad to hear you found it helpful Karben!
Steve, I am curious, did you purchase pre-made pads or make forms and pour your 24×24″ concrete pads beneath the cinder blocks? It appears to be a pre-made piece, but thought I would ask. Soon I will be starting my own cabin adventure in the southeastern US and want all the info I can get!
Hey there Patrick!
We actually picked up the pads from Home Depot. They call them a Patio Slab Paver and are less than $10 a piece. Here’s the link for them at Home Depot so you can see exactly what I’m talking about.
Definitely share your cabin build process with us when you get started Patrick!
Cheers!!
Steve
Wow! Your style of sharing your build with us is capturing as in the first page of a book determining whether you go to page two. Your “book” makes one want to go at a slow absorbing pace..a question that I would be interested in the process of the sand and crusher dust and exactly how you leveled all the points of the foundation….thanks!
Hey there Wayne!
Well, once we dug down to “undisturbed soil” we simply tamped down the ground lightly with the end of a 4×4 post and then dumped out approximately two bags of crushed dust (sand) for each pad. Using a 16 inch long 2×4 as a screed we leveled the sand and then double check it with our 4 foot level. We also lightly tamped the sand down but not too much.
The great thing about this sand is that it will not spread out flat like regular sand. It stays pretty much where you put it based on the fact that each grain of sand is course and “locks” together unlike regular sand that has formed from rock naturally wearing away. This sand is crushed. Hence the name “crusher dust”.
Finally, we topped the level sand with our concrete pad and made certain all the pads were the same height. If any pad was too high we simply tamped it down further. If it was too low, we just lifted the pad and added a few more handfuls of sand.
Hope that helps Wayne and thank you for the kind comments.
Cheers!!
Steve
Is this style of foundation safe for areas where earthquakes are a serious risk?I really like this style of foundation, but since it floats on the concrete pads could the whole building potentially fall off in a large quake? Thanks!
Hey there Ben. I had this question come up a while back and someone who knows more than I do about earthquakes (we don’t have any here in Nova Scotia) sent me this link to help address a possible solution. While no “off-grid cabin” can be 100% quake-proof, I’d like to think you could improve upon what we’ve used in our construction by including additional structural supports like these here.
Yes, I love your build I am in the process of building a 10×16 chicken coop and was looking for ideas for the foundation because where I am putting it there are a lot of tree roots and didn’t want to take the time and money to dig down 4ft and put in piers. I didn’t understand your build is a 20 x24 or 24x 20 and you are using 2x6x16 for your floor joists. Am I missing something? How are you spanning 20′ with a 16 foot floor joist? I have to be missing something. just wondering. thank You for your ideas your site has been very helpful.
Hey David,
When facing the cabin from the front the inside floor space is 20ft wide and 16ft deep. The covered deck is also 20ft wide and it’s 6ft deep. So all in all our cabin has a total floor space of 20ft wide and 24ft deep.
We used 16ft long 2×8’s quadruped up (nailed and glued) to make up the three main beams that support the floor joist. The pads are spaced 8ft apart and so we aren’t spanning the entire 20ft unsupported. These main beams run left to right and the floor joist built on top of these beams run front to back.
To fashion the beams we overlapped the 2×8’s making sure to use construction adhesive and nails the full length of the beam. When we had two layers built we simply overlapped another row of 2×8’s and repeated the process until we had four layers.
Hope that and the photos in the post make it clear exactly how we built it.
Steve